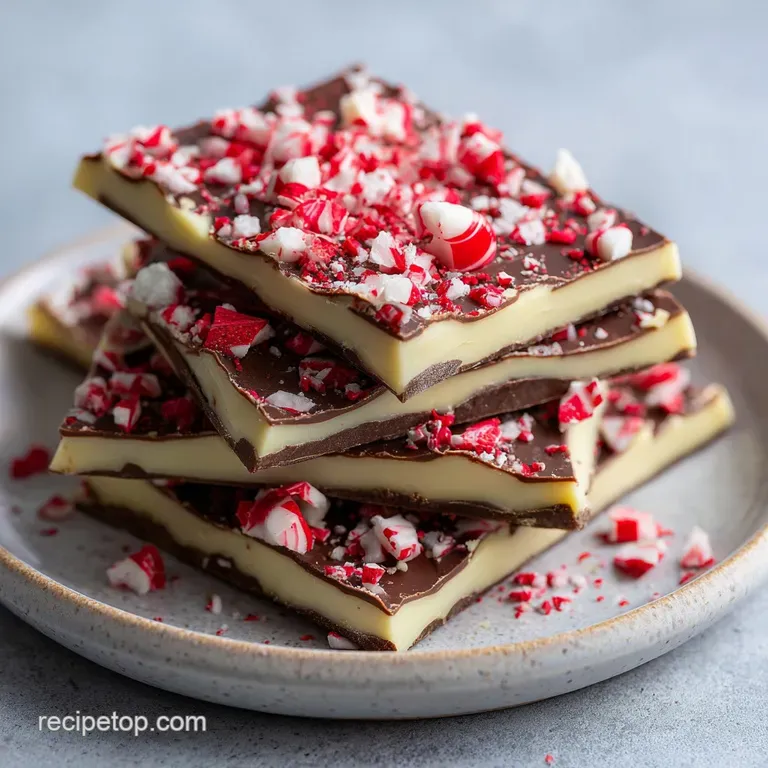
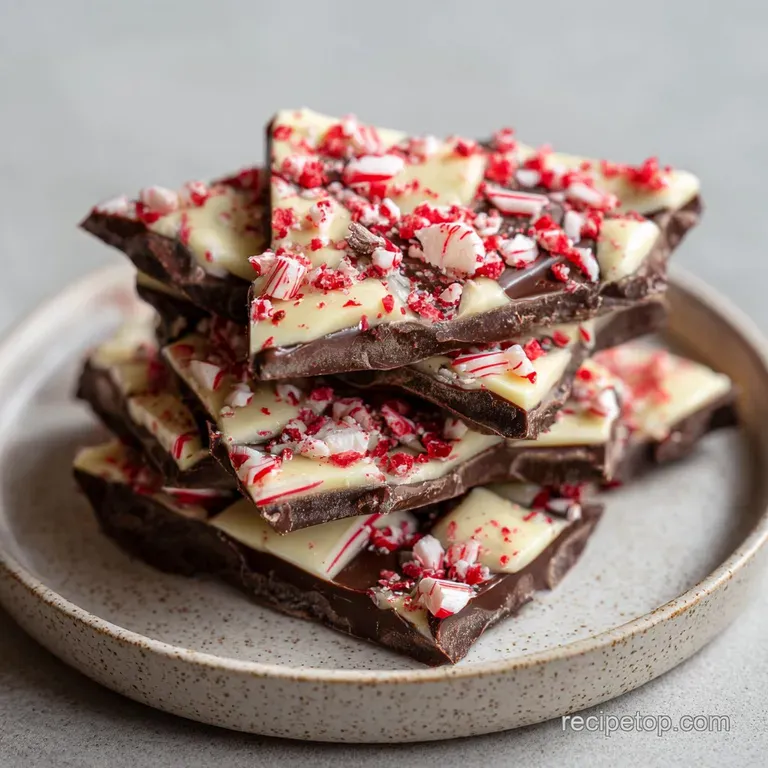
Chocolate Peppermint Bark Recipe: Shatter Crisp Snap
- Time:15 minutes active + 2 hours chilling = Total 2 hours 20 mins
- Flavor/Texture Hook: Shatter crisp snap with velvety chocolate layers
- Perfect for: Holiday gifting, party platters, or a quick sweet fix
- The Logic Behind Layers
- Comparing Your Cooking Methods
- Breaking Down the Components
- Choosing Your Sweet Ingredients
- Essential Tools for Success
- Step-by-Step Bark Instructions
- Solving Your Chocolate Problems
- Fresh Twists and Variations
- Storage and Zero Waste
- Sweet Treats to Pair
- Recipe FAQs
- 📝 Recipe Card
The Logic Behind Layers
The magic of this treat is the contrast. We aren't just mixing flavors; we're stacking textures and intensities.
Fat Stability: Cocoa butter in the chips keeps the bark firm at room temperature, ensuring it doesn't just melt the second you touch it.
Flavor Balance: The bitterness of the dark chocolate acts as an anchor, preventing the white chocolate and peppermint from becoming cloying.
Temperature Gradient: By layering cold set dark chocolate under warm white chocolate, we create a distinct line of separation that looks sharp when broken.
Crystal Structure: Rapid chilling in the fridge locks the fats in place, giving us that signature shatter when you bite into a piece.
Comparing Your Cooking Methods
Before you start, decide how you want to melt your chocolate. Both work, but they give you different vibes in the kitchen.
| Method | Time | Texture | Best For |
|---|---|---|---|
| Microwave | 5 minutes | Smooth, fast | Quick weeknight treats |
| Double Boiler | 15 minutes | Ultra glossy | Large, precise batches |
Right then, most of us will go the microwave route because it's faster. Just remember to stir constantly. If you leave it for 60 seconds without stirring, you're risking those grainy lumps that ruin the mouthfeel.
Breaking Down the Components
Not all chocolate is created equal. Using the right fats and solids changes how the bark behaves once it hits the fridge.
| Ingredient | Science Role | Pro Secret |
|---|---|---|
| Dark Chocolate Chips | Structure & Bitterness | Use 60% cocoa or higher for a better snap |
| White Chocolate Chips | Creamy Contrast | Add a pinch of salt to cut the sugar |
| Peppermint Extract | Aromatic Punch | Stir in after melting to preserve potency |
| Candy Canes | Textural Crunch | Crush them into uneven shards for better looks |
Choosing Your Sweet Ingredients
Stick to high-quality chips. I've tried the super cheap store brands, and they often contain too much vegetable oil, which makes the bark soft instead of snappy.
- 12 oz (340g) dark chocolate chips Why this? Provides the deep, bitter base that balances the sugar
- 1 tsp (5ml) peppermint extract Why this? Concentrated mint flavor that cuts through the fat
- 12 oz (340g) white chocolate chips Why this? Adds a creamy, buttery layer for visual contrast
- 0.5 tsp (2.5ml) peppermint extract Why this? Less is more here so the white chocolate doesn't taste like toothpaste
- 1 cup (100g) crushed candy canes Why this? Adds a necessary shatter and a hit of raw sugar
Fresh vs Shortcut Comparison
| Element | Fresh/Premium | Shortcut | Flavor Impact |
|---|---|---|---|
| Mint | Fresh Peppermint Leaves | Peppermint Extract | Extract is more intense and classic |
| Chocolate | Couverture Bars | Baking Chips | Bars are glossier; chips are easier to melt |
If you're looking for more global inspiration for your sweets, I highly recommend browsing some of the best third culture cookbooks to see how different cultures handle mint and chocolate pairings.
Essential Tools for Success
You don't need a professional kitchen, but a few specific tools make this way easier. Don't even bother with foil - it doesn't release the chocolate cleanly.
- 9x13 inch baking sheet: The standard size for a thick but manageable layer.
- Parchment paper: Essential for a clean release.
- Microwave safe glass bowls: Glass distributes heat more evenly than plastic.
- Rubber spatula: For scraping every last bit of chocolate from the bowl.
Chef's Note: Freeze your parchment lined baking sheet for 5 minutes before pouring the dark chocolate. This starts the setting process immediately and prevents the chocolate from pooling too deeply in the center.
Step-by-step Bark Instructions
Let's crack on. Follow these steps exactly to avoid the "soup" scenario.
- Line a 9x13 inch baking sheet with parchment paper, leaving an overhang on the sides. Note: The overhang acts as a handle to lift the whole sheet out later.
- Melt the dark chocolate in a microwave safe glass bowl in 30 second intervals, stirring between sessions until smooth and glossy.
- Stir in 1 tsp peppermint extract and spread evenly onto the parchment paper.
- Melt the white chocolate in a microwave safe bowl using 30 second intervals until completely liquid.
- Stir in 0.5 tsp peppermint extract.
- Carefully pour the white chocolate over the dark chocolate layer and spread to the edges.
- Immediately sprinkle the crushed candy canes evenly across the top, pressing them lightly into the white chocolate.
- Transfer the pan to the refrigerator and chill for at least 2 hours until the bark is firm to the touch.
Solving Your Chocolate Problems
Even with a plan, chocolate can be moody. Here is how to handle the common hiccups.
Grainy or Separated Chocolate
This usually happens when the chocolate gets too hot and the cocoa butter separates from the solids. If this happens, you can sometimes save it by stirring in a tiny teaspoon of coconut oil or heavy cream, but it's better to avoid it by sticking to those 30 second bursts.
Layer Blending
If your white chocolate swirls into the dark, your base layer wasn't set enough. Next time, pop the dark layer in the fridge for 10 minutes before adding the white.
| Problem | Root Cause | Solution |
|---|---|---|
| Dull Finish | Temp too high | Stir in a tiny bit of room temp butter |
| Candy Canes Melting | Added too early | Let white chocolate cool for 2 mins first |
| Bark is Too Soft | Under chilled | Give it another 30 minutes in the fridge |
Common Mistakes Checklist
- ✓ Stir every 30 seconds without fail.
- ✓ Use parchment paper, never aluminum foil.
- ✓ Ensure the peppermint extract is at room temperature.
- ✓ Don't overcrowd the baking sheet; keep layers even.
- ✓ Press candy canes lightly, don't mash them in.
Fresh Twists and Variations
Once you've nailed the base, you can play around with the flavor profiles. If you love this kind of treat, you might also enjoy my Dark Chocolate Tart for a more decadent experience.
Decision Shortcut:
- If you want a deeper, adult flavor, use 70% cocoa dark chocolate.
- If you want more crunch, double the amount of candy canes.
- If you want a softer snap, replace dark chocolate with milk chocolate.
For a Milk Chocolate Twist
Substitute the dark chocolate chips with 12 oz of milk chocolate. Note: Milk chocolate is softer, so you might need an extra 30 minutes of chilling time to get a clean break.
For an Extra Crunch
Add a layer of toasted slivered almonds or crushed pretzels between the dark and white layers. This adds a salty element that makes the mint pop.
| Original Ingredient | Substitute | Why It Works |
|---|---|---|
| Dark Chocolate | Milk Chocolate | Creamier taste. Note: Less snap than dark |
| Candy Canes | Fresh Mint Leaves | Herbal note. Note: Lacks the crunch of sugar |
| Peppermint Extract | Peppermint Oil | Stronger aroma. Note: Use only 2 drops |
Storage and Zero Waste
Chocolate is sensitive to smells, so storage is key.
Storage: Keep the bark in an airtight container. In the fridge, it stays fresh for 1 week. In the freezer, it'll last up to 3 months. If freezing, wrap it in parchment first, then a freezer bag to prevent "freezer burn" tastes.
Zero Waste: Don't throw away the "dust" at the bottom of the candy cane bag or the shattered bits of bark. Toss the chocolate crumbs into a smoothie or use them as a topping for vanilla ice cream. If you have leftover peppermint extract, it's great in a batch of homemade frosting.
Sweet Treats to Pair
This bark is quite rich, so it pairs best with something that has a different texture. A soft, chewy cookie is the perfect foil for the shatter of the bark. I always serve this alongside my Brown Butter Chocolate Chip Cookies for a full on dessert spread.
If you're serving this at a party, pair it with a tart fruit, like fresh raspberries or sliced Granny Smith apples. The acidity of the fruit cuts through the velvety fat of the white chocolate, keeping your palate refreshed so you can eat more bark. Just keep it all chilled until the moment you serve it!
Recipe FAQs
What chocolate should I use for peppermint bark?
Use high-quality dark and white chocolate chips. These provide a consistent melt, similar to the components found in our holiday cookie bars.
How to make chocolate for diabetics?
Substitute the standard chips for sugar-free chocolate alternatives. Ensure the chosen brand melts smoothly to maintain the structure and snap of the bark.
Is peppermint bark made with milk or dark chocolate?
This recipe uses dark and white chocolate. The bitterness of the dark chocolate balances the sweetness of the white layer and peppermint extract.
What kind of chocolate is best for bark?
Semi sweet or dark chocolate chips are ideal. They offer a firm set and a rich flavor profile that complements the crushed candy canes.
How to melt the chocolate without scorching it?
Heat in 30-second intervals. Stir the chocolate between each session to ensure even heat distribution and a smooth, glossy finish.
Is it true I must use a double boiler for the chocolate?
No, this is a common misconception. A microwave safe glass bowl is faster and works perfectly if you stir frequently between short heating bursts.
How long can I store peppermint bark?
Store it for one week in the fridge. For longer preservation, wrap the bark in parchment and place it in a freezer bag for up to three months.
Chocolate Peppermint Bark

