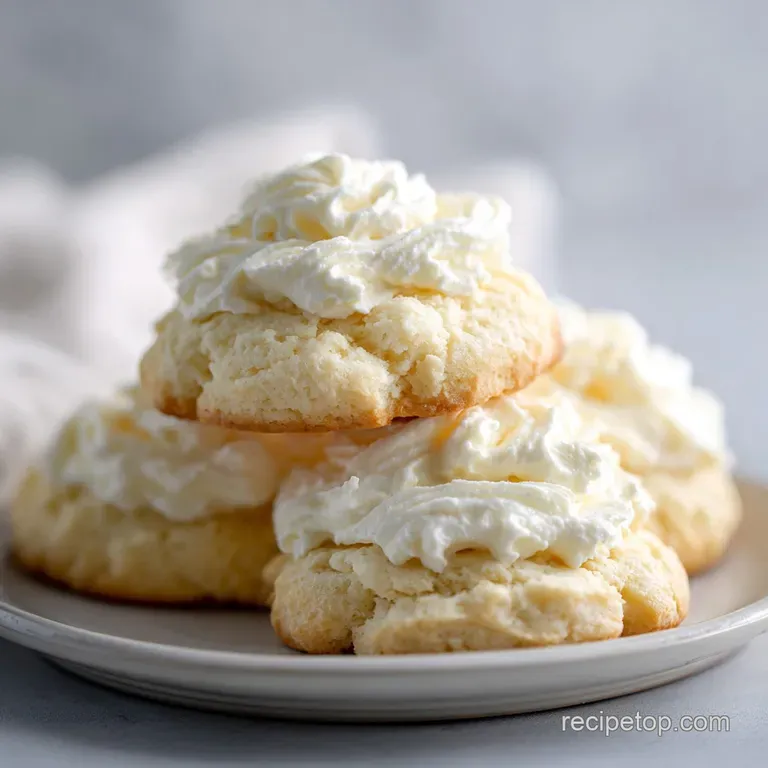
Whipped Shortbread Cookies: Light and Buttery
- Time: Active 15 minutes, Passive 12 minutes, Total 27 minutes
- Flavor/Texture Hook: Velvety, melt in-your mouth, and buttery
- Perfect for: Holiday gifting, afternoon tea, or beginner bakers
- Whipped Shortbread Cookie Recipe for Light and Buttery Treats
- Air Integration Changes Everything
- Essential Cookie Specifications
- High-Quality Ingredients and Substitutes
- Necessary Tools for Success
- Master the Whipping Technique
- Solving Common Baking Issues
- Creative Flavor Profile Variations
- Storing and Preserving Freshness
- Elegant Serving and Pairing
- Recipe FAQs
- 📝 Recipe Card
Whipped Shortbread Cookie Recipe for Light and Buttery Treats
Imagine a cookie that doesn't just crunch, it dissolves. That is exactly what you get here. I remember the first time I saw my aunt whipping butter for what felt like an eternity. I thought she’d lost her mind, but then I tasted the result. It was a complete revelation.
Discover our ultimate whipped shortbread cookie recipe for perfectly light and buttery treats.
You are going to love how the sweet, bright candied cherry contrasts with the rich, salty undertone of the grass fed butter. It is a simple joy that feels incredibly sophisticated. The best part is that you don't need any fancy skills, just a little bit of patience while your mixer does the heavy lifting.
We are aiming for a texture that is light as air but tastes like a decadent indulgence.
Right then, let's talk about the payoff. Most cookies require hours of chilling or complicated rolling, but these are ready in under half an hour. We're skipping the heavy, dense dough of traditional shortbread and going for something much more ethereal.
It is the kind of treat that makes you want to hide the container so you don't have to share. Trust me, you'll want to make a double batch immediately.
Air Integration Changes Everything
The secret to that signature shatter crisp texture isn't a magic ingredient, it is actually physics. We are using mechanical aeration to build a lattice of tiny air bubbles within the fat.
When the heat hits those bubbles, they expand slightly before the flour sets, creating a honeycomb like interior that feels weightless.
- Mechanical Aeration: Whipping the butter for a full 8 to 10 minutes forces air into the fat, creating a stable foam that mimics the lift usually provided by baking powder.
- Starch Interference: The high ratio of cornstarch gets in the way of gluten strands, ensuring the cookie stays tender rather than chewy or tough.
- Cold Stabilization: Flash chilling the dough before it hits the oven solidifies the butter fats, which prevents the cookies from melting into a flat puddle during the first few minutes of baking.
- Sugar Suspension: Sifted powdered sugar dissolves instantly into the moisture of the butter, preventing the gritty texture often found in cookies made with granulated sugar.
| Batch Size | Butter Amount | Cook Time | Pan Spacing |
|---|---|---|---|
| 24 Cookies | 1 Cup | 12 minutes | 2 inches apart |
| 48 Cookies | 2 Cups | 14 minutes | 2 inches apart (Rotate pans) |
| 12 Cookies | 1/2 Cup | 11 minutes | 2 inches apart |
Using the right amount of space on your baking sheet is vital because even though we chill these, they need room for the air inside to expand. If you crowd them, the edges won't get that beautiful, pale gold finish we're looking for.
Essential Cookie Specifications
When we look at what goes into this whipped shortbread cookie recipe for light and buttery treats, every component has a specific job. It isn't just about flavor, it is about how the ingredients interact to create that velvety finish.
I always reach for the best butter I can find because, with so few ingredients, there is nowhere for low quality fat to hide.
| Ingredient | Science Role | Pro Secret |
|---|---|---|
| Grass fed Butter | Primary Fat Source | Use it slightly cool (60°F) to hold air better than warm butter. |
| Cornstarch | Gluten Inhibitor | Always sift this with the flour to ensure no clumps disrupt the "shatter" effect. |
| Powdered Sugar | Sweetness & Texture | Sifting is mandatory here to prevent tiny pockets of undissolved sugar. |
| Vanilla Bean Paste | Flavor Depth | The tiny flecks add a visual "gourmet" cue that extract lacks. |
For the butter, I really recommend something with a high fat content. Cheap butter often has more water, which can cause the cookies to steam rather than bake, leading to a tougher crumb. If you have the choice, the extra dollar for the "fancy" gold wrapped butter is worth every penny here.
high-quality Ingredients and Substitutes
Building your dough starts with gathering the right elements. Since we are going for a "melt in-your mouth" vibe, the quality of your flour and starch matters. Don't be tempted to swap the cornstarch for more flour, or you will lose that signature dissolve on-the tongue sensation.
- Unsalted Grass fed Butter (1 cup): Provides the rich, creamy foundation. Why this? High fat content ensures a tender, silky crumb.
- Substitute: European style butter (like Kerrygold) works perfectly.
- Powdered Sugar (1/2 cup): Keeps the texture smooth and adds subtle sweetness. Why this? Contains a bit of cornstarch, helping with the structure.
- Substitute: Granulated sugar blitzed in a blender until it's a fine dust. Note: Result may be slightly crunchier.
- All Purpose Flour (1 1/2 cups): Gives the cookie enough body to hold its shape. Why this? Provides just enough protein for structure without being heavy.
- Substitute: A 1:1 gluten-free flour blend (ensure it contains xanthan gum).
- Cornstarch (1/2 cup): The secret to the "whipped" texture. Why this? Softens the flour's proteins for a delicate snap.
- Substitute: Arrowroot powder works as a direct swap.
- Candied Cherries (24 halves): Adds a festive, chewy contrast. Why this? They don't bleed moisture into the dough like fresh fruit.
- Substitute: A single pecan half or a silver dragee.
Before you start, make sure you sift your dry ingredients. I know it feels like an annoying extra step, but sifting the flour, cornstarch, and salt twice is how we maximize aeration. It makes the final dough much easier to pipe or scoop, and you won't find any dry flour pockets when you take a bite.
Necessary Tools for Success

You don't need a professional kitchen, but a few specific tools make this process much easier. A stand mixer is truly your best friend here because whipping butter for 10 minutes by hand is basically a gym workout you didn't sign up for.
- Stand Mixer: Using a paddle attachment is best for incorporating air without over beating the proteins once the flour is added.
- Sifter or Fine Mesh Strainer: Essential for the sugar and flour. Clumps are the enemy of a light shortbread.
- Piping Bag & Star Tip: If you want those classic ridges that catch the light, a large star tip (like a 1M) is the way to go.
- Parchment Paper: These cookies are delicate. Silpat mats work too, but parchment makes it easier to slide the whole sheet onto a cooling rack.
If you are a fan of cookies that use unique prep methods, you might notice the whipping technique is similar to how we prep the base for Brown Butter Chocolate Chip Cookies. The goal is always to build a stable emulsion of fat and air before adding the bulk of your dry ingredients.
Master the Whipping Technique
Let's get into the actual process. The timing here is very specific, so don't try to rush the mixer. If the butter looks yellow, it isn't ready. You are looking for a transformation into a "porcelain white" color that looks almost like marshmallow fluff.
- Place 1 cup of cool butter and 1/2 cup sifted powdered sugar in your mixer bowl.
- Start on low to avoid a sugar cloud, then crank it to medium high.
- Beat for 8 to 10 minutes. Note: Set a timer! Most people stop at 3 minutes, which is why their cookies are dense.
- While that whips, sift your 1 1/2 cups flour, 1/2 cup cornstarch, and 1/4 tsp salt together twice.
- Turn the mixer to the lowest setting possible.
- Gradually add the dry ingredients and 1 tsp vanilla. Stop as soon as the white streaks vanish.
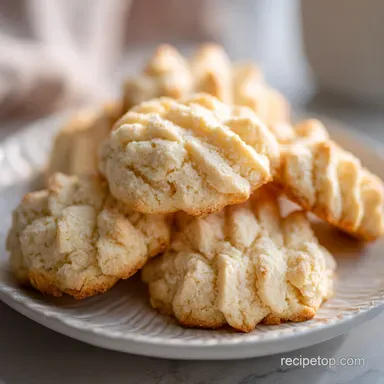
- Pipe or scoop 24 portions onto your parchment lined trays.
- Press one candied cherry half into the center of each.
- Put the whole tray in the fridge for 15 minutes. Do not skip this.
- Bake at 350°F (180°C) for 12 minutes until the bottoms are barely golden.
The cookies should still look quite pale on top when you take them out. If they start turning brown on the edges, they are likely overbaked and will lose that "melt away" quality. They will be very soft right out of the oven, so let them sit on the tray for at least 5 minutes to firm up before moving them.
Solving Common Baking Issues
Even the best bakers run into trouble sometimes. The most common issue with this recipe is the cookies spreading into flat pancakes. This usually happens because the butter was too warm when it started or the chilling step was rushed. Shortbread relies on the fat staying semi solid until the flour "sets" in the heat.
Why Your Cookies Spread Too Much
If your cookies look like flat discs rather than fluffy mounds, the temperature is the culprit. Either the oven wasn't fully preheated, or the dough was too warm. If you find the dough is too soft to hold its shape while piping, pop the whole piping bag in the fridge for 5 minutes to firm up.
| Problem | Root Cause | Solution |
|---|---|---|
| Gritty Texture | Sugar didn't dissolve | Always sift powdered sugar and whip for the full 10 minutes. |
| Tough Cookies | Over mixed flour | Only mix dry ingredients on low speed until just combined. |
| Burnt Bottoms | Dark baking sheet | Use light colored pans or double stack your baking sheets. |
Wait, what if they are too crumbly and fall apart? This usually means they were moved too soon. Let them cool completely. Shortbread is fragile by nature, and it actually tastes better the next day once the flavors have had time to settle and the fats have fully re solidified.
Common Mistakes Checklist
- ✓ Using "spreadable" butter from a tub (it has too much oil/water).
- ✓ Skipping the sifting step (leads to lumps and uneven baking).
- ✓ Not chilling the trays before baking (causes excessive spreading).
- ✓ Over baking until the tops are brown (makes them dry and bitter).
- ✓ Measuring flour by the cup instead of by weight (leads to dry dough).
Creative Flavor Profile Variations
While the classic cherry topped version is a holiday staple, this base dough is a blank canvas. You can easily tweak it to fit any season or craving. Just remember that if you add liquids, you need to be very careful not to break the emulsion we worked so hard to build.
- Citrus Zest: Fold in the zest of one lemon or orange at the very end for a bright, floral note that cuts through the richness.
- Chocolate Dipped: Skip the cherry, bake as usual, and once cool, dip half of the cookie into melted dark chocolate. Sprinkle with sea salt.
- Spice Kick: Add 1/2 tsp of cinnamon or a pinch of cardamom to the dry ingredients for a cozy, warm flavor profile.
- Almond Twist: Swap the vanilla for 1/2 tsp of almond extract. This pairs beautifully with the candied cherry.
If you enjoy the buttery, layered sweetness of these variations, you might also love my Easy Caramel Cookie Bars. They offer a similar buttery base but with a much chewier, salted caramel finish that provides a great contrast to this light shortbread.
| Feature | Oven Baked (Standard) | Stovetop Skillet (Alternative) |
|---|---|---|
| Texture | Even, light, and airy | Dense with a crispy "fried" bottom |
| Color | Uniformly pale gold | Darker on the bottom, pale top |
| Effort | Set it and forget it | Requires constant monitoring |
Storing and Preserving Freshness
Shortbread is one of the best "make-ahead" treats because it actually has a fairly long shelf life. Because there are no eggs and very little moisture, these cookies don't spoil quickly. The high fat content acts as a natural preservative, keeping them fresh for weeks if handled correctly.
Storage: Keep your cookies in an airtight container at room temperature for up to 2 weeks. If you live in a very humid climate, add a small piece of bread to the container to absorb excess moisture, though usually, these stay crisp on their own.
Freezing: These freeze beautifully! You can freeze the baked cookies for up to 3 months. Just make sure they are completely cool before packing them into a freezer bag. You can also freeze the unbaked dough balls.
When you're ready to bake, just add 2 minutes to the oven time no need to thaw!
Zero Waste Tip: If you end up with broken cookies at the bottom of the tin, don't toss them. Pulse the crumbs in a blender and use them as a "sand" topping for vanilla ice cream or as a buttery base for a cheesecake crust. It is a fantastic way to ensure every bit of that grass fed butter is enjoyed.
Elegant Serving and Pairing
Presentation is half the fun with these little treats. Because they are so pale and delicate, they look stunning on a dark platter or a vintage tiered stand. I love serving them during the holidays with a side of hot cocoa or a strong Earl Grey tea.
The tannins in the tea help cleanse the palate between those rich, buttery bites.
If you are feeling extra fancy, you can serve these alongside a small bowl of lemon curd or raspberry jam for dipping. The tartness of the fruit is a perfect match for the sweet shortbread.
They also make wonderful "sandwich" cookies if you pipe a bit of buttercream or ganache between two of them just be gentle, as they are prone to shattering!
Finally,, consider the "If you want X, do Y" approach for your next batch: If you want a crispier edge, bake them for 14 minutes instead of 12. If you want a more "savory" shortbread, increase the sea salt to 1/2 tsp.
If you want them to be extra sturdy for shipping, replace 1/4 cup of the cornstarch with more all purpose flour.
These cookies are a testament to the fact that simple ingredients, when treated with a bit of respect and a lot of air, can become something truly extraordinary. Whether you're gifting them or keeping the whole tray for yourself, I hope they bring a bit of buttery joy to your kitchen!

Recipe FAQs
How to achieve the perfect light and airy texture?
Beat the butter and powdered sugar for 8 10 minutes. You are looking for the mixture to transition from a pale yellow to a porcelain white shade, reaching the consistency of thick whipped cream before adding your dry ingredients.
Is it true I can use tub margarine instead of grass fed butter?
No, this is a common misconception. Tub margarines contain too much water and oil, which will ruin the structure of the shortbread and cause the cookies to lose their shape completely during the 12-minute bake time.
How to prevent the cookies from spreading in the oven?
Flash chill your portioned dough on the baking sheet for 15 minutes in the refrigerator before putting them into the oven. If you enjoyed learning how to control texture through temperature here, you can see how we apply similar principles to our Sweet Potato Maple Blondies.
How to ensure the cookies do not turn out dry or crumbly?
Measure your flour by weight using 190g rather than using a measuring cup. Over packing flour is the most common reason for dry, dense cookies, as it upsets the delicate fat-to-flour ratio required for that melt-in-the-mouth crumb.
Is it necessary to sift the dry ingredients twice?
Yes, sifting twice is essential for the best aeration. Because this recipe lacks leavening agents, the sifting process is the primary way you create the lift needed for a light, delicate cookie structure.
How to tell when these cookies are finished baking?
Watch for barely golden bottoms and fully set structures. Do not wait for the tops to brown, as this will lead to a dry, bitter flavor and a loss of that signature buttery finish.
How to store the finished cookies for maximum freshness?
Keep them in an airtight container at room temperature. They will stay fresh for up to two weeks due to the high fat content, which acts as a natural preservative for the dough.
Whipped Shortbread Cookie Recipe
Ingredients:
Instructions:
Nutrition Facts:
| Calories | 131 kcal |
|---|---|
| Protein | 0.9 g |
| Fat | 7.8 g |
| Carbs | 14.6 g |
| Fiber | 0.3 g |
| Sugar | 6.3 g |
| Sodium | 25 mg |
