Walking Taco Casserole: Crispy and Layered
- Time: 10 min active + 30 min cook = Total 40 mins
- Flavor/Texture Hook: Shatter crisp chips meeting velvety melted cheese
- Perfect for: Busy weeknight dinners or a crowd-pleasing game day feed
- Why This Build Works
- Component Analysis
- Gathering Your Essentials
- Tools for a Quick Bake
- Step-by-Step Assembly Guide
- Fixing Common Casserole Issues
- Troubleshooting Common Issues
- Easy Dietary Swaps
- Adjusting the Portion Size
- Taco Night Truths
- Storage and Leftover Tips
- Best Sides for This Meal
- Critical Sodium Level
- Recipe FAQs
- 📝 Recipe Card
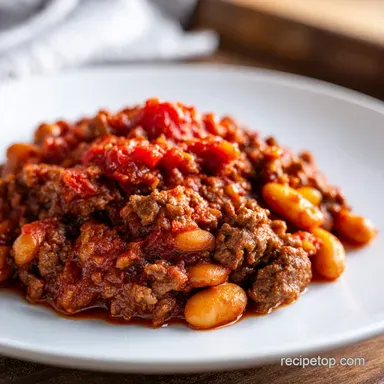
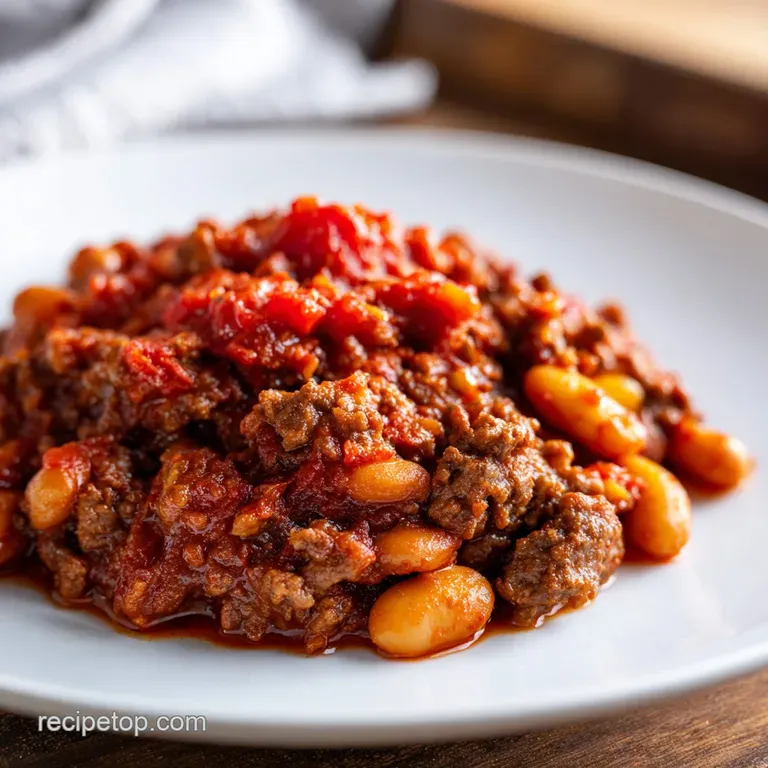
The sizzle of ground beef hitting a hot pan is usually where the magic starts, but for a long time, my taco nights ended in a soggy disaster. I once tried a version of this for a family reunion where I just dumped everything together.
By the time it hit the table, the chips had absorbed every drop of moisture, and we were basically eating taco flavored porridge. It was an absolute letdown.
But I found the fix. The secret is all about the order of operations and a thick layer of cream cheese that acts like a waterproof seal. Now, you get that distinct contrast between the crunch of the chips and the richness of the beef.
This Walking Taco Casserole is the ultimate shortcut for when you want the vibe of a taco bar without the effort of prepping ten different bowls. It's simple, one pan, and actually works.
Why This Build Works
The biggest struggle with any chip based bake is the "soggy bottom." If the meat juice hits the chips directly, the structure collapses. By layering a thick, velvety cream cheese mixture on top of the beef, we create a moisture barrier.
This keeps the top layer of chips from soaking up the liquids, ensuring they still shatter when you bite into them.
If you're into these kinds of easy bakes, you might also like my Stuffed Pepper Casserole for another hearty beef dinner.
- Fat Barrier
- The high fat content in cream cheese repels water based juices from the beef.
- Starch Support
- Using a thin base of chips provides a sturdy foundation that toasts in the oven.
- Moisture Control
- Simmering the beef until the sauce is thick prevents excess liquid from leaking into the crust.
- Cheese Insulation
- The shredded cheddar locks in heat and prevents the top chips from burning.
| Method | Time | Texture | Best For |
|---|---|---|---|
| Fast Bake | 40 mins | Crispy/Creamy | Weeknights |
| Classic Taco Bar | 60 mins | Fresh/Custom | Parties |
| Slow Cooker | 4 hours | Soft/Integrated | Meal Prep |
Component Analysis
Right then, let's look at why we use these specific bits. Not everything in the pantry works here, especially if you want to avoid that mushy texture.
| Ingredient | Science Role | Pro Secret |
|---|---|---|
| Lean Ground Beef | Protein Base | Brown it hard for better flavor |
| Cream Cheese | Moisture Barrier | Use room temp for no lumps |
| Fritos/Doritos | Structural Crunch | Crush slightly, don't pulverize |
| Sharp Cheddar | Binder/Flavor | Grate your own for better melt |
According to the techniques over at Serious Eats, browning meat properly is all about not crowding the pan, which lets the beef sear rather than steam.
Gathering Your Essentials
Don't go for the lowest fat options here. I've tried it, and honestly, don't even bother with low-fat cheese or light sour cream. You lose the structural integrity of the barrier and the flavor goes flat.
- 1 lb lean ground beef Why this? Less grease prevents a soggy crust
- 1 tbsp olive oil
- 3 tbsp taco seasoning
- 1 cup chunky salsa Why this? Adds texture and acidity
- 1/2 cup water
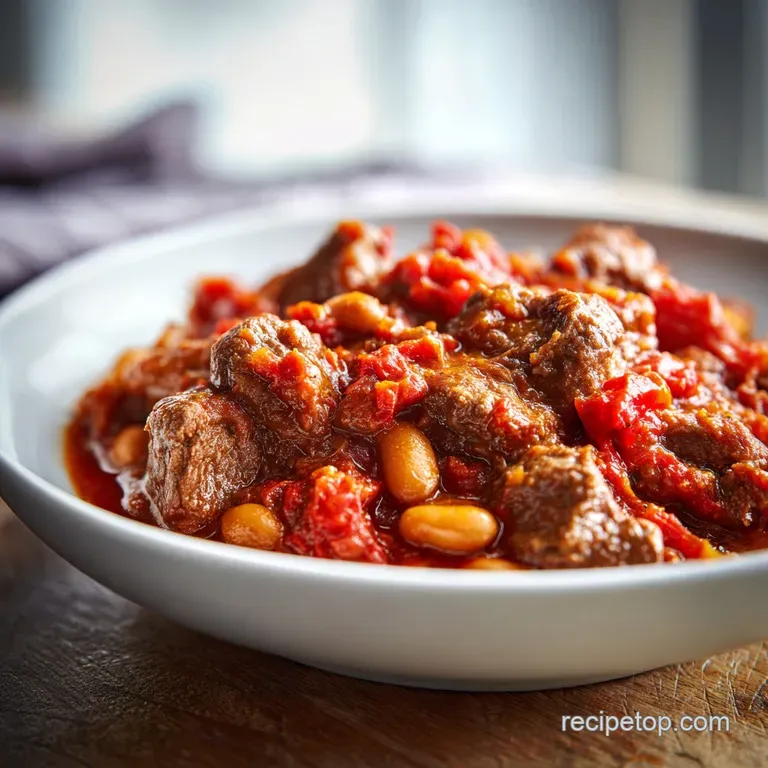
- 1 can (425g) pinto beans, drained and rinsed
- 8 oz cream cheese, softened Why this? Creates the essential moisture seal
- 1/2 cup sour cream
- 2 cups shredded sharp cheddar cheese
- 1 tsp garlic powder
- 4 cups Fritos or Doritos, crushed slightly Why this? Classic walking taco flavor
- 2 scallions, sliced
| Original Ingredient | Substitute | Why It Works |
|---|---|---|
| Ground Beef | Ground Turkey | Leaner protein. Note: Needs more seasoning as it's blander |
| Pinto Beans | Black Beans | Similar texture. Note: Adds an earthier, darker look |
| Fritos/Doritos | Tortilla Chips | Classic crunch. Note: Less punchy flavor than corn chips |
| Sour Cream | Greek Yogurt | Similar tang. Note: Higher protein but slightly thinner |
Tools for a Quick Bake
You don't need a fancy kitchen for this. Just a few basics and you're gold.
- 9x13 inch baking dish
- Large skillet
- Medium mixing bowl
- Spatula or whisk
Step-by-step Assembly Guide
Let's crack on. The key here is the simmering phase. If you rush the beef and it's too watery, the whole Walking Taco Casserole will suffer.
Phase 1: Searing and Simmering
- Heat olive oil in a skillet over medium high heat. Add the lean ground beef and cook, breaking it apart with a spatula, until browned and no longer pink. Drain any excess fat.
- Stir in the taco seasoning, water, salsa, and pinto beans. Simmer for 8-10 minutes until the liquid reduces and the meat is coated in a thick, glossy sauce.
- Preheat the oven to 350°F (175°C).
Phase 2: Building the Layers
- In a medium bowl, whisk together the softened cream cheese, sour cream, and garlic powder until completely smooth.
- Spread a thin layer of crushed chips at the bottom of a 9x13 inch baking dish. Note: This acts as a heat shield for the bottom.
- Pour the seasoned beef mixture over the chips.
- Spread the cream cheese mixture evenly over the beef, then sprinkle 1 cup of shredded cheddar on top.
Phase 3: The Golden Finish
- Top the cheese with the remaining crushed chips and the final 1 cup of shredded cheddar.
- Bake for 15-20 minutes until the cheese is melted and bubbling.
- Optionally, broil for the last 2 minutes until the top chips are toasted.
- Remove from oven and garnish with sliced scallions and fresh cilantro.
Chef's Note: For a massive flavor boost, stir a teaspoon of espresso powder or a splash of soy sauce into the beef while simmering. It doesn't taste like coffee or soy, it just makes the beef taste "beefier."
Fixing Common Casserole Issues
Even with a plan, things happen. Usually, it's a matter of moisture or temperature.
Troubleshooting Common Issues
| Issue | Solution |
|---|---|
| Why Your Chips Went Soggy | This usually happens if the beef wasn't simmered long enough. If the sauce is too watery, it seeps through the cream cheese. Always ensure the beef looks thick and jammy before it hits the pan. |
| Why the Cheese Separated | If you see oil pooling on top, you might have used pre shredded cheese with too many anti clumping agents. Grating your own block of sharp cheddar prevents this and gives you a velvety melt. |
| Why the Center is Cold | Large casseroles can have cold spots. Make sure your cream cheese is truly softened before mixing, otherwise, it stays in cold clumps that the oven can't penetrate in 20 minutes. |
Common Mistakes Checklist
- ✓ Did you drain the beef fat? (Prevents greasy layers)
- ✓ Is the cream cheese softened? (Avoids lumps)
- ✓ Did you simmer the sauce until thick? (Prevents sogginess)
- ✓ Are the chips only slightly crushed? (Maintains crunch)
Easy Dietary Swaps
You can tweak this without ruining the vibe. Just keep the fat to water ratio in mind.
For a Vegetarian Twist Swap the beef for 1.5 lbs of crumbled extra firm tofu or a plant based meat substitute. Use a bit more taco seasoning since tofu doesn't have the natural savoriness of beef.
For a Lower Carb Option Skip the chips entirely. Instead, use a layer of sautéed cauliflower rice at the bottom and top with a sprinkle of pork rinds for that salty crunch.
For Extra Heat Fold diced jalapenos into the beef mixture or use "Flamin' Hot" Doritos for the topping. If you want it truly spicy, add a dash of cayenne to the cream cheese layer.
Adjusting the Portion Size
If you're not feeding a crowd, you'll need to adjust your gear and timing.
Scaling Down (Half Batch) Use an 8x8 inch pan. Since the layer is thinner, reduce the bake time by about 20% (roughly 12-15 minutes). Beat one egg if you're adding any binders, but for this recipe, just halve the cream cheese and sour cream.
Scaling Up (Double Batch) Don't just double everything in one pan or it will take forever to cook through. Use two 9x13 pans. Keep the spices at 1.5x instead of 2x to avoid over salting, and reduce total liquid by 10% to keep the consistency thick.
For baking, lower the oven to 325°F (160°C) and extend the time by 10 minutes to ensure the center sets.
| Batch Size | Pan Size | Temp | Estimated Time |
|---|---|---|---|
| Half | 8x8 inch | 350°F | 12-15 mins |
| Standard | 9x13 inch | 350°F | 15-20 mins |
| Double | 2x 9x13 inch | 325°F | 25-30 mins |
Taco Night Truths
Myth: Browning beef seals in the juices. It doesn't. Browning is about creating flavor through a crust. The moisture loss happens regardless, but the taste you get from a deep brown sear is worth the trade.
Myth: low-fat cheese melts just as well. Wrong. low-fat cheese often contains fillers that make it "clump" or release water. For a velvety Walking Taco Casserole, full fat sharp cheddar is non negotiable.
Storage and Leftover Tips
This dish holds up surprisingly well, but the chips will eventually soften.
Fridge Storage Keep leftovers in an airtight container for up to 3 days. The chips will lose their shatter, but the flavor only gets better as the spices meld.
Freezer Instructions You can freeze the beef mixture separately for 3 months. I don't recommend freezing the assembled casserole because the chips turn into mush during the thaw. Freeze the meat, then assemble fresh with chips and cheese.
Reheating for Crunch Avoid the microwave if you can. Put leftovers in a toaster oven or air fryer at 350°F (175°C) for 5-8 minutes. This helps crisp up the chips and bubble the cheese again.
Zero Waste Tips Don't throw away the stems of your scallions. Chop them finely and sauté them with the beef at the start for extra depth. If you have leftover sour cream, mix it with a bit of lime juice and hot sauce to make a quick dipping sauce for extra chips.
Best Sides for This Meal
Since this is a heavy, cheesy meal, you need something bright to cut through the richness. A simple slaw with lime and cilantro is a great shout. If you're really hungry, this pairs surprisingly well with a side of Crockpot Mac and Cheese for a total comfort food overload.
You can also set up a "Fresh Topping Station" with diced avocado, pickled red onions, and extra salsa. Let everyone scoop their own fresh bits on top of the hot bake. Trust me, the cold avocado against the bubbling cheese is the best part.
Right then, you're all set. This Walking Taco Casserole is a total win for anyone who wants maximum flavor with minimum cleanup. Just remember the cream cheese barrier, and you'll never deal with taco porridge again. Enjoy!
Critical Sodium Level
1240 mg 1,240 mg of sodium per serving (54% 54% of daily value)
The American Heart Association recommends a daily sodium limit of 2,300 mg to maintain heart health.
Tips to Reduce Sodium
-
Swap Taco Seasoning-30%
Replace store-bought taco seasoning with a homemade blend of chili powder, cumin, and paprika to eliminate hidden salt.
-
Switch the Chips-30%
Replace Fritos or Doritos with unsalted corn tortilla chips or toasted cornmeal to significantly cut salt.
-
Low-Sodium Salsa-20%
Choose a low-sodium chunky salsa or make a fresh Pico de Gallo using fresh tomatoes and lime juice.
-
Better Bean Choice-20%
Use no-salt added pinto beans or soak dry beans to remove the majority of the sodium.
-
Moderate the Cheese-15%
Use a lower sodium cheese alternative or reduce the amount of sharp cheddar by half.
-
Boost Fresh Herbs
Increase the amount of fresh cilantro and scallions to add bright, bold flavor without adding any sodium.
Recipe FAQs
What is the difference between a walking taco and a walking taco casserole?
The delivery method. A walking taco is served inside a portable chip bag, whereas this casserole is layered in a baking dish and oven baked for a melted, cohesive meal.
What all goes in a walking taco casserole?
Ground beef, pinto beans, and corn chips. It also features a creamy layer made of cream cheese, sour cream, and garlic powder, topped with sharp cheddar, salsa, and taco seasoning.
Is it true that corn chips always get soggy in a casserole?
No, this is a common misconception. Soggy chips usually occur if the beef isn't simmered enough; ensuring the sauce is thick and jammy prevents moisture from seeping through the layers.
How to bake the walking taco casserole?
Bake at 350°F (175°C) for 15 20 minutes. Remove the dish from the oven once the cheese is melted and bubbling.
Why is my cheese separating and releasing oil?
Pre-shredded cheese often contains anti clumping agents. Grating your own block of sharp cheddar prevents oil pooling and results in a more velvety melt.
Can I freeze the assembled walking taco casserole?
No, it is not recommended. The chips turn into mush during the thawing process; instead, freeze the beef mixture separately for up to 3 months and assemble fresh with chips and cheese.
Can I use other proteins instead of ground beef?
Yes, ground turkey or chicken work well. If you enjoy layering hearty meats and vegetables in a dish, you might also like our Potato Casserole for 6 recipe.
Walking Taco Casserole