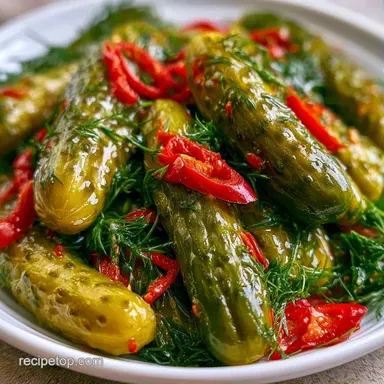
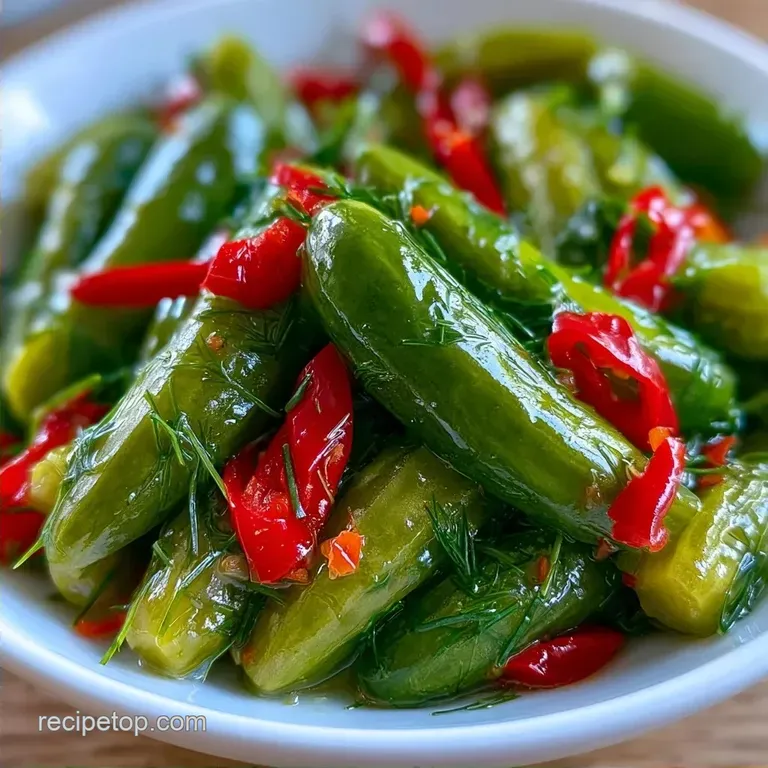
Spicy Garlic Dill Pickles with Thai Chilies
- Time: 30 min active + 24 hours chilling
- Flavor/Texture Hook: Sharp garlic heat with a loud, fresh snap
- Perfect for: Summer barbecues or healthy mid day snacking
- Spicy Garlic Dill Pickles Recipe Specs
- Why These Stay Crunchy
- Ingredient Deep Dive
- Gathering Your Essentials
- Essential Gear Needed
- Bringing It Together
- Common Mistakes and Fixes
- Mix It Up
- Storage and Shelf Life
- Serving and Enjoying
- Why You'll Love This
- Critical Sodium Level
- Recipe FAQs
- 📝 Recipe Card
The smell of fresh dill and sliced Thai chilies always reminds me of my aunt's summer porch parties. She had these jars lined up in the fridge, and they were the only thing people fought over. Most store-bought versions taste like salt and vinegar, but these have a real, biting heat that hits the back of your throat.
I used to think you needed a huge canning setup to get a good pickle. I was wrong. All you really need is the right cucumber and a bit of patience while they sit in the fridge.
These Spicy Garlic Dill Pickles bring together a punchy garlic profile and a clean, spicy finish. They aren't just a condiment; they're a way to add a nutrient dense, probiotic style kick to your lunch.
Spicy Garlic Dill Pickles Recipe Specs
This version focuses on a balanced brine that isn't overly sugary. By using raw honey instead of refined sugar, we keep the glycemic load low while still rounding out the acidity of the vinegar. It's a great way to get a salty, spicy fix without the artificial additives found in commercial brands.
Right then, let's look at the specifics. This recipe yields 5 pint jars, making it ideal for sharing or stocking your fridge for a few weeks. Since we're using a refrigerator method, you get a fresher taste than long term canned goods.
Why These Stay Crunchy
Blossom End Removal: Trimming the blossom end removes enzymes that soften the cucumber, keeping the snap intact. Hot Brine Flash: Pouring hot brine over cold cucumbers sets the flavor quickly without cooking the vegetable through.
Since we're using a stovetop method to heat the brine, we can control the infusion. Some people prefer a cold soak method, but that takes much longer to penetrate the garlic and chilies.
| Brine Method | Prep Time | Texture | Best For |
|---|---|---|---|
| Hot Brine (Stovetop) | 10 minutes | Firm & Zesty | Quick flavor infusion |
| Cold Soak | 0 minutes | Extra Crisp | long term slow cure |
Ingredient Deep Dive
Understanding what goes into the jar helps you tweak the heat or salt levels based on your nutrition needs.
| Ingredient | What It Does | Best Swap |
|---|---|---|
| Kirby Cucumber | Provides the structural snap | Persian Cucumber (smaller) |
| White Vinegar | Lowers pH for preservation | Apple Cider Vinegar (mellower) |
| Coarse Sea Salt | Draws out moisture and seasons | Kosher Salt (no iodine) |
| Thai Bird's Eye Chilies | Adds a sharp, clean heat | Jalapeños (milder heat) |
Gathering Your Essentials
For the produce, stick to Kirby cucumbers. They have thicker skins and less water than slicing cucumbers, which prevents them from turning into mush.
The Produce
- 3 lbs Kirby or Persian cucumbers, sliced into spearsWhy this? Thicker walls mean better crunch
- 5 bunches fresh dill, stems includedWhy this? Stems hold the most aromatic oils
- 15 cloves garlic, smashedWhy this? Smashed cloves release more allicin
- 30g Thai bird's eye chilies, slit lengthwiseWhy this? Slitting releases the seeds for heat
The Low Sugar Brine
- 2 cups white distilled vinegarWhy this? Clean acidity that doesn't mask dill
- 2 cups filtered waterWhy this? Avoids chlorine tastes
- 3 tbsp coarse sea saltWhy this? Essential for osmotic pressure
- 1 tbsp raw honeyWhy this? Natural sweetness with enzymes
The Spice Blend
- 1 tbsp yellow mustard seeds
- 1 tbsp black peppercorns
- 1 tsp red pepper flakes
- 1 tsp coriander seeds
Essential Gear Needed
You don't need a professional kitchen for this. Five sterilized pint jars are the core of the operation. If you don't have a fancy sterilizer, just run them through a hot dishwasher cycle.
A medium saucepan is needed for the brine. I prefer stainless steel because vinegar can react with some uncoated pans over time. A sharp chef's knife is also a must to get those clean, uniform spears.
Bringing It Together

Let's crack on with the process. Trust me on the trimming part; it makes a huge difference in the final texture.
- Wash the cucumbers thoroughly and slice them into spears, trimming the blossom end to preserve crunch.
- Pack sliced cucumbers tightly into five sterilized pint jars, layering them with smashed garlic cloves, fresh dill fronds, and slit chilies.
- In a medium saucepan, combine filtered water, white vinegar, sea salt, and honey.
- Bring the brine to a rolling boil over medium high heat, stirring until salt and honey are fully dissolved.
- Stir in the mustard seeds, peppercorns, red pepper flakes, and coriander seeds, then remove from heat immediately.
- Carefully pour the hot brine over the packed cucumbers, leaving 1/2 inch of headspace at the top of each jar. Note: This gap prevents overflow and allows a proper seal
- Tap jars gently to release air bubbles and seal lids tightly.
- Allow jars to cool to room temperature, then refrigerate for a minimum of 24 hours to allow flavor infusion.
Common Mistakes and Fixes
The most frequent issue I see is "soft" pickles. This usually happens when people skip trimming the blossom end or use English cucumbers, which are too watery. If your pickles lack a snap, it's often a produce choice issue, not a brine issue.
Another problem is the vinegar being too aggressive. If the taste is too sharp, you can balance it by adding a tiny bit more honey to the next batch, though the 24 hour chill usually mellows the acidity.
Why Your Pickles Are Soft
If the texture is more like a cooked vegetable than a raw one, check your cucumber variety. Slicing cucumbers are meant for salads, not pickling.
| Problem | Root Cause | Solution |
|---|---|---|
| Mushy Texture | Used slicing cucumbers | Switch to Kirby or Persian |
| Bitter Taste | Left blossom ends on | Trim 1/8 inch off the end |
| Weak Heat | Chilies weren't slit | Slice chilies lengthwise |
Mix It Up
If you want a different heat level, you can easily adjust the chilies. For a "nuclear" version, double the red pepper flakes and leave the Thai chilies whole but punctured. If you prefer a more mellow, Double Garlic Pickles approach, increase the garlic to 20 cloves and drop the chilies to 10g.
For a sweet and spicy twist, swap the raw honey for maple syrup. It adds a woody depth that pairs well with the coriander seeds.
Adjustment Shortcut:
- Want more crunch? Keep cucumbers in an ice bath for 1 hour before jarring.
- Want more salt? Add 1 tsp of sea salt per jar.
- Want more aroma? Add a strip of lemon zest to each jar.
Adjusting for Volume
Scaling this recipe is straightforward, but be careful with the salt. If you're doubling the batch to 10 jars, only increase the salt and spices to 1.5x. Over salting can make the pickles taste medicinal rather than savory.
For smaller batches (like 2 jars), you can halve the ingredients. Just remember to reduce the boiling time for the brine by about 20% since a smaller volume of liquid heats up faster.
Storage and Shelf Life
Since these are refrigerator pickles, they don't have the indefinite shelf life of canned goods. Store them in the coldest part of your fridge, not the door. They stay fresh and crisp for about 4 to 6 weeks.
For those interested in long term storage, you can follow safe canning practices by using a water bath canner. However, the refrigerator method preserves more of the raw garlic's punch. For more food safety tips when preserving foods at home, you can also check the Human Foods Program.
Zero Waste Tip: Don't toss the brine! Once the cucumbers are gone, use the leftover liquid as a marinade for grilled chicken or a base for a spicy potato salad dressing. If you have leftover dill stems, blend them into a pesto.
You can also find more inspiration with Garlic Dill Pickles recipe if you want a version without the heat.
Serving and Enjoying
These are a powerhouse as a side for grilled meats. I love them with a lean turkey burger or a piece of grilled salmon to cut through the richness. The acidity helps balance the fats in the meal, making the whole plate feel lighter.
For a gourmet snack platter, pair them with sharp cheddar cheese, sliced apples, and some raw almonds. The contrast between the spicy pickle and the sweet apple is brilliant.
Why You'll Love This
Honestly, the best part is knowing exactly what's in your jar. You get the health benefits of garlic and the anti inflammatory properties of raw honey, all in a low calorie package. It's a balanced way to satisfy a craving for something salty.
Debunking Pickle Myths Some believe you must boil the cucumbers themselves to make them safe. This is a myth; boiling the veg actually destroys the crunch. The hot brine handles the preservation.
Another myth is that you need a "pickling salt" to avoid cloudy brine. While sea salt is preferred, any non iodized salt works fine. The cloudiness is usually just the garlic and spices suspended in the liquid, not a sign of spoilage.
Critical Sodium Level
2100 mg 2,100 mg of sodium per serving (91% 91% of daily value)
The American Heart Association recommends a daily limit of no more than 2,300 mg of sodium, with an ideal limit of 1,500 mg for most adults to lower blood pressure.
Tips to Reduce Sodium
-
Reduce Sea Salt-30%
Cut the coarse sea salt by 30-50%. Since this is the primary sodium source, reducing this ingredient has the most significant impact.
-
Use Salt Substitutes-20%
Replace a portion of the sea salt with a potassium based salt substitute to maintain the brining effect with less sodium.
-
Increase Acidity-10%
Add a splash of lemon juice or slightly increase the white distilled vinegar to provide a sharp tang that compensates for reduced salt.
-
Boost Aromatics
Add extra fresh dill, garlic, or black peppercorns to enhance the flavor profile and sensory appeal without adding any sodium.
Recipe FAQs
How to make spicy pickles at home?
Pack sliced cucumbers, garlic, dill, and Thai chilies into jars. Pour over a boiling brine of vinegar, water, salt, and honey, then refrigerate for at least 24 hours to infuse flavor.
What can I add to dill pickles to make them spicy?
Use slit Thai bird's eye chilies and red pepper flakes. These ingredients provide a sharp, lingering heat that complements the savory garlic and fresh dill.
Is it true that English cucumbers are best for this recipe?
No, this is a common misconception. English cucumbers are often too watery; use Kirby or Persian cucumbers to ensure a superior snap.
Why are my pickles soft instead of crunchy?
You likely skipped trimming the blossom end. Removing this end prevents enzymes from softening the cucumber, which is essential for maintaining a crisp texture.
How long do these refrigerator pickles last?
About 4 to 6 weeks. Because these are not canned, they must be kept refrigerated to maintain freshness and safety.
Where should I store these jars in the fridge?
Store them in the coldest part of the refrigerator. Avoid the door, as temperature fluctuations can compromise the texture and shelf life of the pickles.
How to balance the brine if the vinegar tastes too sharp?
Stir in a small amount of additional raw honey. If you enjoyed balancing these bold flavors, see how we use a similar acid sweet approach in our bang bang chicken bowl.
Spicy Garlic Dill Pickles