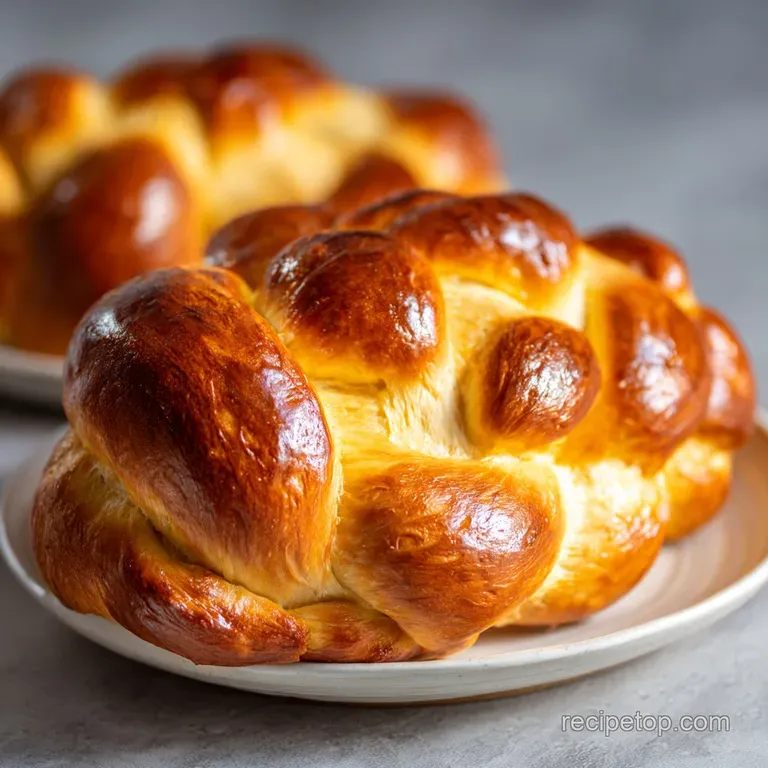
Delight in Homemade Challah Bread Recipe
- Time: Active 45 minutes, Passive 3 hours 15 mins, Total 4 hours
- Flavor/Texture Hook: Velvety, honey kissed crumb with a silken, mahogany crust
- Perfect for: Weekend mornings, budget-friendly gifting, or the ultimate French toast
- Delight in Homemade Challah Bread Recipe
- Reasons This Loaf Is Better
- Crucial Specs for Your Bake
- Selecting the Best Budget Ingredients
- Basic Tools for Every Kitchen
- Creating Your Golden Braided Loaf
- Fixing Flat or Heavy Bread
- Fun Flavor Swaps to Try
- Storing and Reviving Your Loaf
- Tasty Ways to Serve Challah
- Recipe FAQs
- 📝 Recipe Card
Delight in Homemade Challah Bread Recipe
The first time I tried braiding bread, it looked less like a majestic loaf and more like an octopus having a bad hair day. I remember the kitchen was covered in a fine dust of flour, and my hands were sticky with honey, but the aroma drifting from the oven was enough to make me keep going.
There is something truly primal and grounding about pushing your palms into a soft, elastic dough and watching it transform from a shaggy mess into a silken ball of potential.
That smell of yeast blooming in warm water mixed with a hint of floral honey is a sensory trigger that instantly relaxes me. It’s the scent of a home that’s alive and a kitchen that’s working.
I’ve made every mistake in the book from using water that was too hot and "cooking" the yeast to rushing the rise and ending up with a brick but those fails taught me exactly what a successful loaf needs.
You don't need a fancy stand mixer or expensive French butter to find delight in homemade challah bread recipe success. In fact, this recipe is designed to be approachable and budget friendly, proving that with a little patience and a few eggs, you can create something that looks like it belongs in a professional window display.
We are going for that deep mahogany crust that yields to a crumb so soft you can practically use it as a pillow.
Reasons This Loaf Is Better
Success in bread baking isn't just about following a list; it is about understanding how ingredients interact. This recipe relies on a few key principles to ensure a light, airy result every single time.
- Hygroscopic Sweetening: Honey doesn't just add sweetness; it attracts moisture from the air, which keeps the bread from drying out even days after baking.
- Lipid Enrichment: Using vegetable oil instead of butter provides a more flexible fat that coats flour proteins, resulting in a softer "pull" and a longer shelf life.
- Strategic Hydration: A 1.5 cup water ratio to 7.5 cups of flour creates a dough that is manageable for braiding but wet enough to allow for a dramatic oven spring.
- The Glaze Double Down: Applying the egg wash twice creates a thick, lacquered finish that protects the interior moisture while providing a satisfying textural contrast.
| Feature | Homemade Fresh | store-bought Shortcut |
|---|---|---|
| Texture | Velvety and pull apart | Often dry or crumbly |
| Cost | Under $3.00 per loaf | $7.00 - $10.00 per loaf |
| Preservatives | None (natural honey) | High (calcium propionate) |
Crucial Specs for Your Bake
Before we get our hands messy, let's look at the numbers that make this bread work. Precision is your friend when it comes to yeast and temperature.
The Physics of the Rise Yeast fermentation produces carbon dioxide gas which is trapped by the gluten network. As the temperature increases in the oven, this gas expands rapidly (the "oven spring") before the heat sets the protein structure.
| Ingredient | Science Role | Pro Secret |
|---|---|---|
| Active Dry Yeast | Leavening agent | Bloom in 110°F water to ensure it's alive. |
| Honey (0.5 cup) | Food for yeast | Use a spray of oil in your measuring cup first so it slides out. |
| Large Eggs (3) | Structure & color | Room temperature eggs incorporate faster without chilling the dough. |
| All Purpose Flour | Gluten source | Sift it if your flour is clumpy to prevent dry pockets. |
If you're in the mood for something a bit quicker but still want that comforting doughy texture, my Garlic and Butter recipe is a fantastic 20 minute alternative for busy weeknights.
Selecting the Best Budget Ingredients
You don't need to raid a specialty store for this. Most of these are likely sitting in your pantry right now.
- 1.5 cups warm water: Aim for 110°F/43°C. Why this? It's the "Goldilocks" temp for yeast activation.
- 1 tablespoon active dry yeast: One standard packet. Why this? Provides the reliable lift needed for heavy dough.
- 0.5 cup plus 1 teaspoon honey: Any clover or wildflower honey works. Why this? Tenderizes the crumb better than granulated sugar.
- 7.5 cups all purpose flour: Store brand is perfectly fine. Why this? Lower protein than bread flour keeps it soft.
- 0.5 cup vegetable oil: Canola or sunflower oil works well. Why this? Keeps the recipe dairy-free and very affordable.
- 4 large eggs: Split into 3 for dough and 1 for the wash. Why this? Provides the rich, yellow hue and structure.
- 1 large egg yolk: Added to the wash. Why this? Increases protein for a darker, shinier crust.
- 1 tablespoon fine sea salt: Enhances all the other flavors. Why this? Controls yeast growth so it doesn't over proof.
- 1 tablespoon water: To thin the egg wash.
- 1 teaspoon poppy or sesame seeds: Optional decoration.
| Original Ingredient | Substitute | Why It Works |
|---|---|---|
| Honey | Maple Syrup | Similar liquid sugar content; adds a woody, autumnal flavor. |
| Vegetable Oil | Melted Coconut Oil | Provides fat for the crumb. Note: Adds a slight tropical scent. |
| Fine Sea Salt | Table Salt | Use slightly less (2 tsp) as table salt is denser. |
Basic Tools for Every Kitchen
You don't need a stand mixer, though it helps. I often prefer doing this by hand to really feel the dough's progress.
- Large Mixing Bowl: The bigger, the better to allow for the first rise.
- Measuring Cups & Spoons: Accuracy is vital for the water to flour ratio.
- Baking Sheet: A standard rimmed cookie sheet is perfect.
- Parchment Paper: Prevents the honey rich bottom from sticking or burning.
- Pastry Brush: For that all important double egg wash.
- Bench Scraper: (Optional) Great for dividing the dough into equal strands.
For a sweet treat to enjoy while your dough rises, these Soft and Chewy recipe cookies are a great way to use up any extra eggs you might have in the carton.
Creating Your Golden Braided Loaf
- Bloom the yeast. Combine 1.5 cups warm water, 1 teaspoon honey, and 1 tablespoon yeast in a small bowl. Wait 10 minutes until a thick, foamy head appears. Note: If it doesn't foam, your yeast is dead; start over.
- Mix the wet base. In your large bowl, whisk 3 eggs, 0.5 cup honey, 0.5 cup oil, and the salt. Whisk until the honey is fully incorporated.
- Incorporate the flour. Add the yeast mixture to the egg mixture, then gradually stir in 7 cups of flour. Stir until a shaggy, sticky ball forms.
- Knead the dough. Turn onto a floured surface. Add the remaining 0.5 cup flour as needed while kneading for 10 minutes until the dough is silken and bounces back when poked.
- The first rise. Place in an oiled bowl, cover with a damp cloth, and let sit in a warm spot for 2 hours until the dough has doubled in size.
- Divide and strand. Punch the dough down to release air. Divide into 6 equal pieces (for two 3 strand loaves) and roll into 12 inch long ropes.
- Braid the loaves. Pinch three ropes together at the top, then braid like hair. Tuck the ends under until the loaf looks snug and uniform.
- The second rise. Place loaves on parchment lined sheets. Cover and let rise for 45 minutes until they look puffy and light.
- The double wash. Whisk 1 egg, 1 yolk, and 1 tablespoon water. Brush the loaves once, wait 5 minutes, and brush again until every crevice is glistening. Sprinkle with seeds if using.
- Bake to perfection. Bake at 350°F (180°C) for 30 minutes until the crust is deep mahogany and the bottom sounds hollow when tapped.
Chef's Tip: Use a digital thermometer to check doneness. You are looking for an internal temperature of exactly 190°F (88°C) for a loaf that is fully cooked but still moist.
Fixing Flat or Heavy Bread
Even seasoned bakers hit a snag now and then. Don't panic; most bread issues are easily corrected for the next batch.
Why Bread Stays Dense and Heavy
If your loaf feels like a paperweight, the culprit is usually under proofing or "dead" yeast. If the water was too hot, it killed the yeast. If the room was too cold, the yeast simply stayed asleep. Always check that foam in step one; it is your insurance policy.
Why the Braid Tears or Blows Out
This usually happens when the dough hasn't risen enough during the second proof. The "oven spring" is so violent that the gas forces its way out of the weakest points the seams of the braid. Make sure the loaves look noticeably "bloated" before they go into the heat.
| Problem | Root Cause | Solution |
|---|---|---|
| Crust is too dark/burnt | High honey content | Tent with foil after 20 mins to stop browning. |
| Dough is too sticky to braid | Not enough flour/kneading | Add flour 1 tbsp at a time until it cleans the counter. |
| Bread is dry and crumbly | Overbaked | Check temp at 25 mins; 190°F is the sweet spot. |
Common Mistakes Checklist
- ✓ Never skip the yeast blooming step; it confirms your ingredients are active.
- ✓ Use a "light hand" when braiding; if you pull too tight, the dough can't expand.
- ✓ Always do the second egg wash; the first one gets absorbed, the second one shines.
- ✓ Let the bread cool for at least 30 minutes before slicing to set the internal structure.
Fun Flavor Swaps to Try
Once you've mastered the basic loaf, the possibilities are endless. Challah is a fantastic canvas for both sweet and savory additions.
- Everything Bagel Style: Instead of just poppy seeds, use a mix of dried garlic, onion, salt, and sesame seeds on the egg wash.
- Cinnamon Raisin: Knead 1 cup of soaked raisins and 1 tablespoon of cinnamon into the dough during step 4.
- The Savory Herb: Fold in fresh rosemary and cracked black pepper for a loaf that pairs beautifully with hearty soups or shakshuka.
Decision Shortcut If you want a softer crust, brush the loaf with melted butter immediately after it comes out of the oven. If you want a deeper flavor, let the dough rise in the refrigerator overnight for the first rise.
If you want perfect toast, slice the loaf thick and let it sit out for an hour to slightly dry before griddling.
Storing and Reviving Your Loaf
Fresh bread has a short lifespan because it lacks the chemical preservatives found in store-bought bags.
Storage Guidelines Keep your Challah in an airtight bag at room temperature for up to 3 days. Avoid the refrigerator, as the cold temperature actually recrystallizes the starches and makes the bread go stale faster.
Freezing Challah freezes beautifully. Wrap the cooled loaf tightly in plastic wrap, then a layer of foil. It will stay fresh for up to 3 months. Thaw at room temperature for several hours before serving.
Zero Waste Tips If the bread does go stale, don't throw it out! Stale Challah is the gold standard for French toast or bread pudding. The dry crumb acts like a sponge, soaking up custard without falling apart.
You can also pulse dried chunks in a food blender to make the best buttery breadcrumbs you've ever tasted.
Tasty Ways to Serve Challah
While a warm slice with a thick smear of salted butter is heaven, there are so many ways to find delight in homemade challah bread recipe results throughout the week.
The Ultimate French Toast Slice the bread 1.5 inches thick. Dip in a mixture of eggs, heavy cream, vanilla, and nutmeg. Fry in plenty of butter until the outside is caramelized and the inside is like bread pudding.
Shakshuka Sidekick There is no better vessel for scooping up spicy tomato sauce and runny egg yolks than a chunk of Challah. Its airy texture holds onto the sauce while the crust provides a necessary chew.
Modern Sandwiches Try using Challah for a grilled cheese sandwich. The hint of honey in the dough creates a spectacular sweet and savory contrast with sharp cheddar or creamy brie.
The Morning Toast Simply toasted with a bit of jam or honey, it turns a basic breakfast into something that feels intentional and special. It's the ultimate budget luxury.
Myths About Yeast One common misconception is that salt kills yeast on contact. While salt does regulate yeast growth, it won't kill it unless you pour a pile of salt directly onto a pile of yeast.
In this recipe, the flour and other liquids act as a buffer, making it perfectly safe to mix them. Another myth is that you must use bread flour for a good rise. While bread flour has more protein, all purpose flour actually gives Challah its signature tender, cake like bite that people love.

Recipe FAQs
What temperature water should I use to activate the yeast?
Aim for 110°F (43°C). This is the optimal temperature range for yeast to bloom rapidly; water much hotter will kill the live cultures, resulting in a flat loaf.
Can I substitute honey with granulated white sugar in this recipe?
Yes, but the texture will change slightly. Sugar doesn't tenderize the crumb as effectively as honey, which also retains moisture longer. If you want to see how acid balances sweetness in a different context, review the technique in our Banana Bread Brownies recipe.
How do I achieve the signature dark, shiny crust on my challah?
Apply a double egg wash, brushing once, waiting five minutes, and brushing again. For the deepest mahogany color, whisk one extra egg yolk into the wash mixture.
How long must the dough rise during the first proofing stage?
Allow the dough to rise for 2 hours in a warm spot until it has doubled completely in volume. Proper fermentation is key to flavor and structure; if you master this slow gas production here, you’ll find the same principles useful when learning the Creamy Vegetable Casserole recipe to develop deep, savory notes.
Is it true that salt kills the yeast if mixed in too soon?
No, this is a common misconception. Salt regulates yeast growth and controls the rise speed, but it will not kill the yeast if it is mixed with the other ingredients as directed.
How do I know when my challah is fully baked internally?
Check the internal temperature; it must register 190°F (88°C). If you rely only on color, the inside might still be gummy, so using a thermometer is the most reliable way to ensure doneness.
What is the best way to store leftover challah to keep it fresh longer?
Store it tightly wrapped at room temperature for up to 3 days. Avoid refrigeration, as it accelerates staling; for long term storage, slice and freeze immediately.
Homemade Challah Bread Recipe
Ingredients:
Instructions:
Nutrition Facts:
| Calories | 223 kcal |
|---|---|
| Protein | 5.3 g |
| Fat | 5.9 g |
| Carbs | 36.3 g |
| Fiber | 1.2 g |
| Sugar | 7.4 g |
| Sodium | 244 mg |
