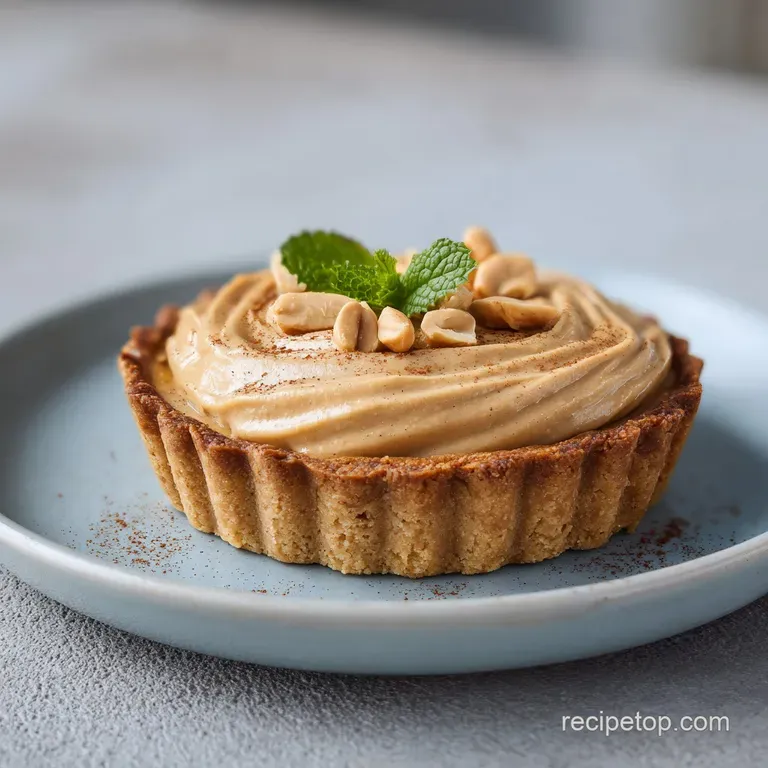
Peanut Butter Pie: Creamy and Stable

- Time: Active 15 minutes, Passive 240 minutes, Total 255 minutes
- Flavor/Texture Hook: Velvety peanut butter filling against a dark chocolate cookie shatter
- Perfect for: High impact dinner parties or low effort weekend treats
- Velvety Chocolate Peanut Butter Pie Magic
- Essential Recipe Specs
- Sourcing the Best Ingredients
- Tools for Success
- Step-by-Step Filling Construction
- Fixing Common Baking Blunders
- Flavor Swaps and Alternatives
- Keeping Your Pie Fresh
- Sweet Treats to Serve
- Culinary Myths Debunked
- Recipe FAQs
- 📝 Recipe Card
Velvety Chocolate Peanut Butter Pie Magic
Forget everything you’ve been told about needing gelatin or piles of cornstarch to make a no bake dessert stand tall. There’s a common myth floating around that if you don't use a stove, you’re basically just making a bowl of pudding in a crust. That’s totally wrong.
This Peanut Butter Pie is all about the physics of fat and air, creating a slice that feels like silk but stands like a brick and mortar cake.
We’ve all seen those sad, slumped over pies at potlucks that look like they’re melting into the plate. It usually happens because the cook used a "light" whipped topping or didn't give the fats enough time to bond.
When you take that first bite of this version, you aren't getting a mouthful of sugar; you’re getting the deep, roasted saltiness of the peanuts and the snap of a dark chocolate crust. It’s a contrast that makes your taste buds wake up immediately.
It’s honestly one of those treats that makes people think you spent hours over a double boiler. In reality, we’re just using a few clever tricks with temperature and folding techniques to get that professional finish.
It’s straightforward, it’s rich, and it’s about to become the most requested dessert in your rotation. Let's get into how we actually build these layers of flavor.
Essential Recipe Specs
Fat Stabilization: The high fat content in the brick cream cheese and the peanut butter creates a structural matrix that traps air bubbles. When chilled, these fats solidify, providing the "backbone" of the pie without requiring heat or thickeners.
Aeration Balance: By whipping the heavy cream to stiff peaks before folding it into the dense peanut butter mixture, we introduce millions of tiny air pockets. This lightens the density, turning what would be a heavy fudge into a velvety mousse.
Moisture Migration Control: Freezing the chocolate cookie crust before adding the filling creates a cold barrier. This prevents the moisture from the cream cheese from soaking into the crumbs, ensuring the base remains a crisp shatter rather than a soggy mess.
Emulsion Stability: Using cold heavy cream (minimum 36% fat) is non negotiable. The cold temperature keeps the fat globules stable while they are being beaten, allowing them to trap the maximum amount of air for a fluffy, stable filling.
| Thickness | Set Time | Minimum Chill | Visual Cue |
|---|---|---|---|
| 2 inch filling | 10 minutes (crust) | 4 hours (total) | Center barely jiggles when nudged |
| 1 inch filling | 7 minutes (crust) | 2 hours (total) | Edges look matte and firm |
| 3 inch (Deep dish) | 15 minutes (crust) | 6 hours (total) | Knife comes out clean after a test cut |
I've found that people often rush the chilling process, but the full 4 hours is where the magic happens. The fats need that specific window of time to fully crystallize.
If you try to cut it after only two hours, you’ll get a tasty mess, but you won’t get those sharp, clean edges that make a Peanut Butter Pie look like it came from a high end bakery.
| Component | Fast Method | Classic Method | Texture Result |
|---|---|---|---|
| Crust | store-bought graham | Homemade chocolate sandwich cookie | Classic is much crunchier and darker |
| Filling | Whipped topping tub | Fresh heavy whipping cream | Classic is far more velvety and less oily |
| Topping | Bottled syrup | Homemade peanut butter ganache | Classic adds a rich, fudgy snap |
Sourcing the Best Ingredients
| Ingredient | Science Role | Pro Secret |
|---|---|---|
| Cream Cheese | Primary Stabilizer | Use full fat brick style only; tub versions contain too much water and will fail to set. |
| Heavy Cream | Aeration Agent | Keep it in the back of the fridge until the very second you are ready to whip it. |
| Peanut Butter | Flavor & Fat | Commercial "no stir" brands work best here because the oils are already stabilized. |
| Confectioners' Sugar | Structural Sweetener | Sifting is mandatory; it prevents tiny sugar lumps from ruining the silky mouthfeel. |
When you're picking out your peanut butter for this recipe, resist the urge to go for the "natural" kind where the oil sits on top. While I love those for toast, the oil separation in this specific dessert can cause the filling to weep or separate in the fridge.
We want that smooth, emulsified commercial stuff to keep everything cohesive.
For the chocolate sandwich cookies, 300g is usually about 24 cookies. Don't worry about removing the cream filling in the middle; it actually acts as a secondary binder for the crust.
When you pulse them into a fine sand, that cream gets distributed and helps the butter hold everything together so the crust doesn't fall apart when you lift a slice.
- 300g chocolate sandwich cookies: Use the classic dark ones for the best color contrast.
- 85g unsalted butter, melted: This binds the crumbs into a solid base.
- 2g sea salt: Essential to cut through the richness of the filling.
- 225g full fat brick cream cheese: Must be softened to room temperature to avoid lumps.
- 250g creamy commercial peanut butter: Provides the primary flavor and structure.
- 120g confectioners' sugar, sifted: Lightens the texture and adds necessary sweetness.
- 240ml cold heavy whipping cream: Look for 36% fat or higher for the best peaks.
- 5ml pure vanilla extract: Rounds out the nutty notes of the peanut butter.
- 100g semisweet chocolate chips: For the ganache layer.
- 80ml heavy cream: To melt with the chocolate for the topping.
- 15g creamy peanut butter: For the decorative swirl on top.
Tools for Success
You don't need a professional kitchen, but a few specific tools make this "Peanut Butter Pie" much easier to handle. A food processor is the best way to get those cookies down to a fine, even sand consistency.
If you don't have one, a heavy rolling pin and a sturdy zip top bag will work, but you'll have to be aggressive to make sure there aren't any large chunks left behind.
A stand mixer with a whisk attachment is a lifesaver for the filling. Beating the cream cheese and peanut butter until they are truly glossy takes some power. If you’re using a hand mixer, just be patient and keep moving it around the bowl.
An offset spatula is my secret weapon for the top of the pie it allows you to get that perfectly flat, professional surface before you pour on the ganache.
Chef's Tip: Before you start whipping your cream, put your mixing bowl and the whisk attachment in the freezer for about 10 minutes. A cold bowl prevents the fat in the cream from warming up, which helps you achieve those stiff peaks much faster.
step-by-step Filling Construction
- Pulse the cookies. Place 300g of chocolate sandwich cookies in the food processor and pulse until they are a fine sand. Note: This ensures the crust is dense and won't crumble.
- Bind the crust. Stream in 85g of melted butter and 2g of sea salt, mixing until it resembles wet soil.
- Set the base. Press the mixture into a 9 inch plate and freeze for 10 minutes until firm to the touch.
- Cream the base. Beat 225g softened cream cheese and 250g peanut butter until completely smooth and pale.
- Sweeten the mix. Gradually add 120g sifted confectioners' sugar on low, then whip on medium until glossy.
- Whip the cream. In a cold bowl, whip 240ml heavy cream and 5ml vanilla until stiff peaks form.
- Fold carefully. Gently fold one third of the cream into the peanut butter until no white streaks remain. Note: This lightens the base so the rest of the cream doesn't deflate.
- Fill the crust. Pour the filling into the chilled crust and smooth the top until perfectly flat.
- Make the ganache. Melt 100g chocolate chips with 80ml heavy cream and 15g peanut butter until silky and pourable.
- Final Chill. Pour the ganache over the pie and refrigerate for 4 hours until the filling is set and stable.
Fixing Common Baking Blunders
Why Your Filling is Grainy
If your filling feels gritty on the tongue, it’s almost always because the cream cheese was too cold when you started mixing. When cold cream cheese meets sugar, it forms tiny, stubborn beads that are impossible to smooth out later. Another culprit is skipping the sifting of the confectioners' sugar.
Avoiding the "Soup" Effect
If the pie doesn't hold its shape when sliced, the heavy cream likely wasn't whipped long enough, or it was folded too aggressively. You need those stiff peaks to provide the internal structure. If you just stir the cream in like milk, the "Peanut Butter Pie" will never set up properly in the fridge.
Fixing a Crumbly Crust
A crust that falls apart usually lacks enough "glue." This happens if the cookies weren't ground finely enough or if the butter wasn't distributed evenly. If you notice the crumbs aren't holding together when you press them into the side of the dish, add an extra tablespoon of melted butter to the mix.
| Problem | Root Cause | Solution |
|---|---|---|
| Filling is too soft | Cream wasn't whipped to stiff peaks | Chill for an extra 2 hours or freeze for 30 mins before slicing |
| Ganache is dull/cracked | Overheated chocolate or lack of fat | Add a teaspoon of room temp butter and whisk until shiny |
| Crust sticks to the pan | Butter solidified too hard | Wrap the bottom of the pan in a warm towel for 30 seconds |
Common Mistakes Checklist
- ✓ Ensure cream cheese is truly room temperature (about 2 hours on the counter).
- ✓ Never use "natural" oily peanut butter for the filling.
- ✓ Sift the confectioners' sugar even if it looks fine in the bag.
- ✓ Use a metal or glass bowl for whipping cream, never plastic (which can hold onto grease).
- ✓ Don't skip the 10 minute freezer set for the crust.
- ✓ Clean your knife with warm water between every single slice for perfect edges.
Flavor Swaps and Alternatives
If you want to change the vibe of this recipe, it’s actually quite flexible. For a "crunchy" version, you can swap the smooth peanut butter for a commercial crunchy variety, but be aware that it will make the folding process slightly more difficult. The little bits of nut can deflate the air bubbles if you aren't careful. For another decadent treat with a similar rich profile, you might enjoy a Dark Chocolate Tart, which uses a similar ganache technique.
If you are looking for something a bit lighter or perhaps a bit more "grab and-go," these Peanut Butter Yogurt Bites are a great way to use up any leftover peanut butter you might have in the pantry. They offer that same nutty hit without the heavy cream cheese base.
| Original Ingredient | Substitute | Why It Works |
|---|---|---|
| Chocolate Cookies | Graham Crackers | Provides a honeyed, lighter base. Note: Lacks the bitter chocolate contrast. |
| Semi sweet Chips | Milk Chocolate | Creates a much sweeter, kid friendly topping. Note: May stay softer at room temp. |
| Heavy Cream (filling) | Coconut Cream (chilled) | Similar fat content. Note: Adds a distinct tropical flavor to the nuts. |
Keeping Your Pie Fresh
This dessert handles the fridge remarkably well because of the high fat content. You can store the "Peanut Butter Pie" in the refrigerator for up to 5 days. Just make sure it’s tightly covered with plastic wrap or stored in a dedicated pie carrier.
If left uncovered, the cream based filling can absorb "fridge smells" (like that half cut onion in the crisper drawer), which is definitely not the flavor profile we’re going for.
For long term storage, this pie is actually a fantastic candidate for the freezer. Wrap the entire dish in a double layer of plastic wrap and then a layer of aluminum foil. It will stay fresh for up to 2 months.
You can even eat it straight from the freezer for a texture that’s very similar to a premium ice cream cake. If you prefer it velvety, let it thaw in the fridge for about 2 hours before serving.
Don't throw away the leftover cookie crumbs if you have some that didn't make it into the crust. I love to store them in a small jar and sprinkle them over vanilla ice cream later in the week. If you have extra ganache, it can be reheated gently and drizzled over pancakes or used as a dip for strawberries.
Sweet Treats to Serve
When it comes to serving, a little bit of salt goes a long way. I always finish each slice with a tiny pinch of flaky sea salt right on top of the ganache. It makes the chocolate taste "more like chocolate" and keeps the sweetness from being overwhelming.
You could also pile on some extra crushed peanuts for a texture contrast that mimics a famous candy bar.
If you’re hosting a party, this pie pairs beautifully with a very dark, bitter coffee. The acidity of the coffee cuts right through the richness of the cream cheese and peanut butter, cleansing your palate between bites.
For a cold option, a tall glass of ice cold milk is the classic choice for a reason it’s the ultimate partner for anything involving peanut butter and chocolate.
The Salty Garnish
Try adding a few pretzels to the top of the ganache before it sets. The crunch and the extra salt create a "take-5" style flavor profile that everyone loves. Just make sure to add them right before serving if you want them to stay maximum level crispy.
The Beverage Pairing
A glass of cold brew coffee is my personal favorite. The smooth, low acid nature of cold brew matches the velvety texture of the pie perfectly without competing for attention. If you're feeling fancy, a small glass of tawny port also complements the nutty, toasted notes of the filling.
Culinary Myths Debunked
One of the biggest myths is that you have to bake the crust to make it stay together. You don't. While baking a graham cracker crust can add a toasted flavor, a chocolate sandwich cookie crust has enough sugar and cream in the cookies themselves to bind perfectly with just melted butter and a quick chill.
The freezer does the work that the oven usually does, saving you time and keeping your kitchen cool.
Another misconception is that "low-fat" cream cheese can be substituted 1:1. It cannot. low-fat or "Neufchâtel" cheese has a significantly higher water to fat ratio. In a no bake recipe like this, that extra water will prevent the filling from emulsifying properly, leaving you with a grainy, soft mess that won't hold its shape when you try to slice it.
Stick to the full fat brick.
Finally, some people think you need a stand mixer to get the filling right. While it certainly helps with the heavy lifting, you can absolutely do this with a sturdy whisk and some elbow grease. The key isn't the machine; it's the temperature of the ingredients.
As long as your cream cheese is soft and your heavy cream is ice cold, you’ll get the result you’re looking for.

Recipe FAQs
What is the recipe for Dolly Parton's peanut butter pie?
This pie features a chocolate cookie crust and a light, creamy peanut butter mousse filling. You combine 300g of crushed chocolate sandwich cookies with 85g of melted butter, then fill with a whipped mixture of 225g cream cheese, 250g creamy peanut butter, 120g confectioners' sugar, and 240ml whipped
heavy cream, finishing with a chocolate ganache.
What is Dolly Parton pie?
It is a decadent, no-bake peanut butter pie known for its rich, airy texture. The recipe relies on the emulsion of heavy cream and softened cream cheese to achieve a stable, sliceable consistency without needing to bake the filling.
Is peanut butter pie a thing?
Yes, it is a popular Southern dessert staple. Many bakers enjoy the contrast of salty peanut butter with sweet chocolate, similar to how we balance bold, sweet flavors in our buttery cookie bars.
What is Dolly Parton's favorite pie?
Dolly Parton has often cited peanut butter pie as one of her preferred comfort desserts. Its popularity stems from the accessible, pantry friendly ingredients and the balance between the intense cocoa crust and the whipped peanut butter center.
How to ensure the filling stays fluffy?
Fold the whipped cream into the peanut butter base in two batches. Start by mixing one-third of the cream to lighten the dense peanut butter, then gently fold in the remaining cream until no white streaks remain to maintain aeration.
How to get clean slices every time?
Dip your knife into warm water and wipe it clean between every single slice. This prevents the chocolate ganache and peanut butter filling from dragging or smearing across the top of the pie.
Is it true I must use natural peanut butter for the filling?
No, this is a common misconception. You must use creamy commercial peanut butter for the filling; natural peanut butter contains too much oil and will break the emulsion, preventing the pie from setting properly.
Creamy Peanut Butter Pie
Ingredients:
Instructions:
Nutrition Facts:
| Calories | 638 kcal |
|---|---|
| Protein | 10.9 g |
| Fat | 47.5 g |
| Carbs | 46.8 g |
| Fiber | 2.2 g |
| Sugar | 32.1 g |
| Sodium | 421 mg |
