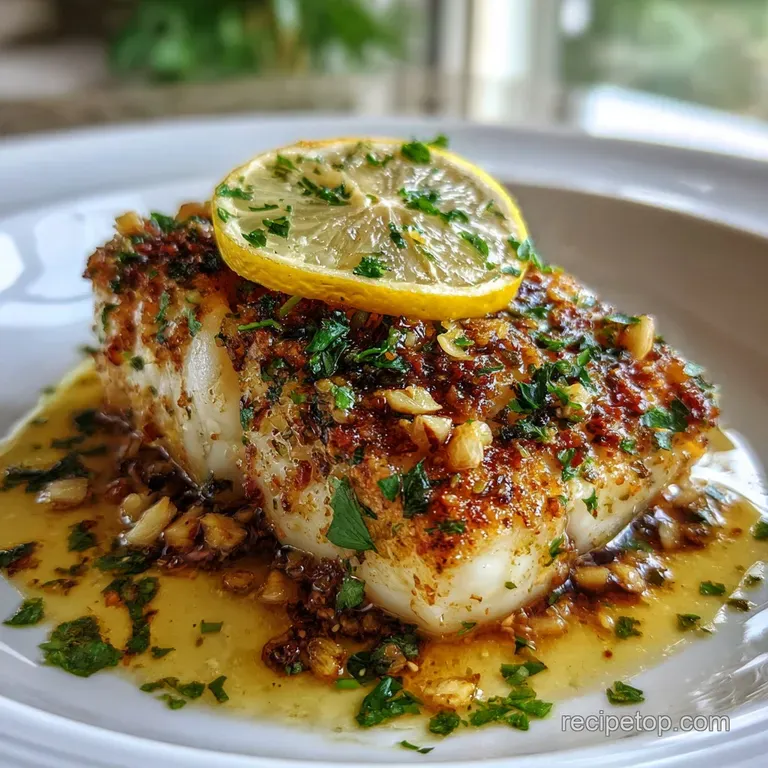
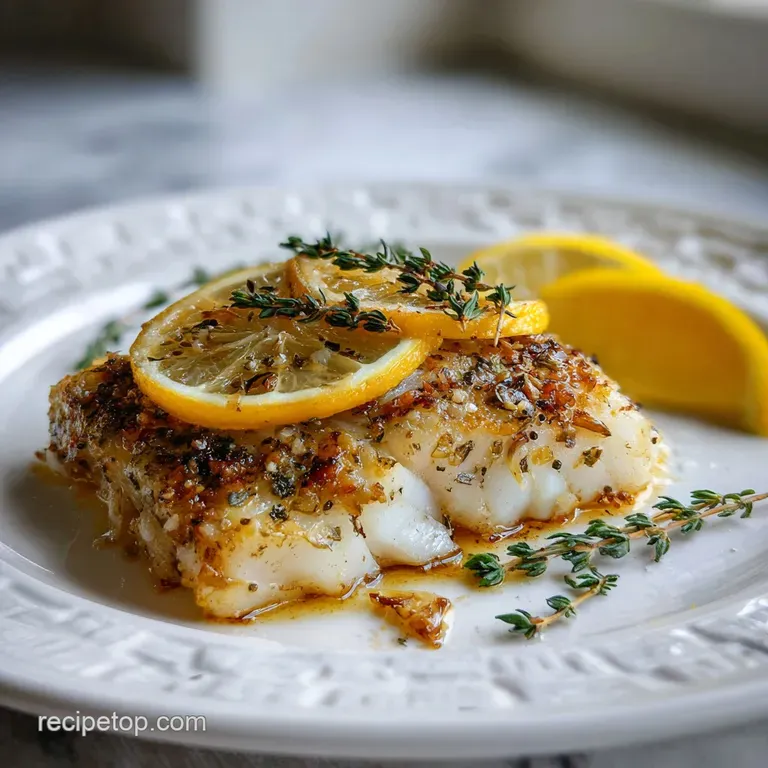
Baked Cod with Lemon and Garlic: Zesty Finish
- Time: Active 10 minutes, Passive 15 minutes, Total 25 minutes
- Flavor/Texture Hook: Flaky, buttery fillets with a zesty citrus sizzle
- Perfect for: Busy weeknight dinners or a healthy family meal
- Master the Perfect Quick Baked Cod with Lemon and Garlic
- The Physics of the Flaky Finish
- Quick Performance Data for Your Meal
- Selecting the Right Components for Success
- Tools Required for a Seamless Dinner
- Stepping Through the Cooking Flow Process
- Solving Common Texture and Flavor Issues
- Adapting the Recipe for Your Pantry
- Proper Methods for Storing and Reheating
- Completing the Meal with Smart Pairings
- Recipe FAQs
- 📝 Recipe Card
Master the Perfect Quick Baked Cod with Lemon and Garlic
The second that tray hits the oven, the kitchen fills with that sharp, punchy aroma of garlic hitting warm olive oil. You know the one it makes everyone wander into the kitchen asking, "When are we eating?" This recipe delivers a simple, yet flavorful, baked cod with lemon and garlic dish perfect for a weeknight meal.
I used to be terrified of cooking white fish because I’d either undercook it into a translucent mess or over bake it until it had the texture of a pencil eraser.
Everything changed when I realized that cod doesn't need a complicated marinade; it just needs a high-quality fat barrier and a burst of acidity. I remember one Tuesday night I was so rushed I almost ordered pizza, but I had these fillets in the fridge.
I threw them in with a quick butter lemon garlic slurry, and it was better than anything I’d ever ordered out. The fish comes out opaque and easily separates into large, silky flakes that practically melt away.
We’ve all had those "soggy fish" disasters where the fillets sit in a pool of gray water. Trust me, we’re skipping that today. By focusing on surface moisture and the right oven temperature, you’ll get a result that feels fancy but takes less time than boiling a pot of pasta.
Let’s get into the mechanics of why this works so you can nail it every single time without breaking a sweat.
The Physics of the Flaky Finish
Albumin Control: High heat quickly coagulates the protein, but keeping the cook time under 15 minutes prevents the white "goop" (albumin) from pushing out too aggressively.
Emulsion Stability: Combining melted butter with olive oil creates a fat profile that clings to the fish rather than sliding off into the bottom of the pan.
Osmotic Balance: Salting the fish 10 minutes before baking draws out excess surface moisture, allowing the lemon garlic infusion to actually penetrate the protein fibers.
| Fillet Thickness | Internal Temp | Rest Time | Visual Cue |
|---|---|---|---|
| 1.5 cm | 63°C | 2 minutes | Opaque throughout, separates easily |
| 2.5 cm | 63°C | 3 minutes | Flakes with gentle fork pressure |
| 4 cm | 63°C | 5 minutes | Center is no longer translucent |
Checking the thickness of your cod is the biggest variable in your kitchen. If you have a thicker loin piece, you might need an extra 3 or 4 minutes, whereas thin tail pieces will be done before you've even finished setting the table.
I always aim for that 63°C (145°F) mark because carryover cooking will do the rest of the work while the fish rests on the counter.
Quick Performance Data for Your Meal
| Component | Science Role | Pro Secret |
|---|---|---|
| Fresh Cod | Lean Protein | Pat dry with paper towels to ensure the fat sticks to the surface. |
| Lemon Juice | Denaturation | Add half during cooking for flavor and half after for bright acidity. |
| Garlic | Aromatics | Mince finely to release allicin, then submerge in oil to prevent burning. |
| Smoked Paprika | Maillard Mimicry | Provides a deep color and "charred" flavor without needing a grill. |
The relationship between the lemon juice and the fish protein is fascinating. The acid actually starts "cooking" the fish through denaturation before the heat even hits it. This is why we don't marinate cod in lemon for hours it would turn into ceviche!
Instead, we use it as a finishing tool to cut through the richness of the unsalted butter.
When I first started making this, I used to just throw whole garlic cloves in the pan. Big mistake. The garlic never softened enough, and the fish was bland. By mincing those 4 cloves and whisking them directly into the 3 tbsp of extra virgin olive oil and 2 tbsp of melted butter, you create a liquid gold that coats every nook and cranny of the 1.5 lbs of fresh cod fillets.
Selecting the Right Components for Success
- 1.5 lbs fresh cod fillets: Look for bright white flesh that doesn't smell "fishy."
- 1 tsp kosher salt: Use a coarse salt (like Diamond Crystal) for better coverage control.
- 0.5 tsp freshly cracked black pepper: Freshly ground offers a much better punch than the pre ground dusty stuff.
- 0.5 tsp smoked paprika: This adds that gorgeous sunset hue to the top of the fillets.
- 3 tbsp extra virgin olive oil: A fruity oil works best here to complement the lemon.
- 2 tbsp unsalted butter, melted: Why this? Butter adds a velvety mouthfeel that olive oil alone cannot achieve.
- 4 cloves garlic, minced: Why this? This provides the foundational savory backbone for the entire dish.
- 1 large lemon, zested and juiced: Don't skip the zest; that's where the aromatic oils live.
- 1 tsp dried oregano: Adds a Mediterranean herbiness that balances the citrus.
- 2 tbsp fresh parsley, chopped: The final burst of green freshness for the plate.
| Original Ingredient | Substitute | Why It Works |
|---|---|---|
| Cod Fillets | Tilapia or Halibut | Similar lean profiles. Note: Tilapia cooks faster; Halibut is firmer. |
| Smoked Paprika | Chili Powder | Adds heat and color. Note: Changes flavor profile to be more Southwestern. |
| Unsalted Butter | Ghee | High smoke point and rich flavor. Note: Nuttier taste, dairy-free friendly. |
If you find yourself out of cod, don't panic. You can easily pivot this into a Lemon Herb Baked recipe using tilapia or even haddock. The key is maintaining that lemon and garlic balance regardless of which white fish is currently in your fridge.
Tools Required for a Seamless Dinner
You don't need a professional kitchen for this. A simple 9x13 inch baking dish or a large rimmed baking sheet lined with parchment paper is your best friend here. If you use a glass dish, keep in mind it holds heat longer than metal, so you might want to pull the fish out a minute earlier.
I also highly recommend a microplane for that lemon zest it makes the job so much easier than using a box grater.
A small whisk and a glass bowl for your infusion are helpful, but honestly, a fork and a mug work just as well if you're trying to save on washing up. The most important "tool" is actually your hands use them to gently press the 1 tsp of kosher salt and 0.5 tsp of smoked paprika into the fish so it doesn't just wash away when you pour the butter over it.
Chef's Tip: Freeze your butter for 10 minutes before melting it. This might sound counterintuitive, but it helps the milk solids stay slightly more stable when you whisk it into the oil, creating a thicker emulsion.
Stepping Through the Cooking Flow Process
- Preheat the oven to 200°C (400°F). Note: High heat is essential for a quick cook that keeps the moisture inside.
- Dry the 1.5 lbs of cod fillets thoroughly using paper towels until the surface is matte and tacky.
- Season both sides of the fish with 1 tsp kosher salt, 0.5 tsp pepper, and 0.5 tsp smoked paprika.
- Whisk the 3 tbsp olive oil, 2 tbsp melted butter, 4 minced garlic cloves, 1 tsp dried oregano, and half the lemon juice in a small bowl.
- Arrange the fish in a single layer in your baking dish without the fillets touching.
- Drizzle the garlic butter mixture evenly over the top of each fillet.
- Bake for 12 to 15 minutes until the fish is opaque and the edges sizzle.
- Zest the lemon directly over the hot fish the moment it comes out of the oven.
- Garnish with 2 tbsp fresh parsley and the remaining lemon juice to brighten the flavors.
- Rest the fish for 3 minutes until the juices settle back into the flakes.
While the fish is in the oven, you have about 15 minutes of "dead time." This is the perfect window to boil some water for a Lemon Garlic Spaghetti recipe or to toss a quick green salad. The workflow here is all about synchronization so everything hits the table hot at the same time.
Solving Common Texture and Flavor Issues
Why Your Fish is Sitting in Water
If you see a lot of liquid in the bottom of the pan, it’s usually because the fish was frozen and not thawed/dried properly. Cod has a high water content, and if it's not patted bone dry, it will steam rather than bake. This ruins that beautiful buttery crust we're looking for.
Why Your Garlic Tastes Bitter
Garlic burns quickly at 200°C. If your garlic bits are turning dark brown or black, they were likely too exposed. Ensure they are fully submerged in the oil and butter mixture before they go into the oven. The fat acts as a heat shield, poaching the garlic while the fish cooks.
| Problem | Root Cause | Solution |
|---|---|---|
| Rubberiness | Overcooking | Pull the fish at 60°C; let carryover heat finish it to 63°C. |
| Lack of Flavor | Under salting | Salt the fish before adding the fat; it needs to hit the protein directly. |
| Mushy Texture | Low Oven Temp | Ensure oven is fully preheated to 200°C before the tray goes in. |
- • Pat the fish completely dry before seasoning (prevents steaming)
- • Don't skip the lemon zest; the juice adds acid, but the zest adds the actual "lemon" flavor
- • Space the fillets at least 2 cm apart to allow for proper air circulation
- • Use fresh garlic rather than the jarred stuff for a cleaner, sharper taste
- • Always check the thickest part of the fillet with a fork or thermometer
Adapting the Recipe for Your Pantry
The Panko Crunch (Texture Boost)
If you're craving something with a bit of a "shatter" factor, mix 30g of Panko breadcrumbs with a little extra olive oil and sprinkle it over the butter mixture before baking. It creates a crispy lid that protects the delicate fish underneath. This is a huge hit with kids who might be skeptical of "plain" fish.
The Mediterranean Upgrade
Throw in a handful of halved cherry tomatoes and some Kalamata olives around the fish before it goes into the oven. The tomatoes will burst and create a natural sauce that mingles with the lemon and garlic. It's a one pan wonder that feels like a trip to the coast of Greece. If you're into those vibes, this pairs beautifully with a 5 Minute Greek recipe for chicken on another night of the week.
| Stovetop (Pan Sear) | Oven (Baked) |
|---|---|
| Time:8 minutes | Time:15 minutes |
| Texture: Crispy skin, firm | Texture: Velvety, uniform flakiness |
| Effort: High (needs flipping) | Effort: Low (set and forget) |
1. High Heat vs Low Heat
You might think cooking fish "low and slow" is safer, but for a lean fish like cod, it often results in a dry, mealy texture. The 200°C heat is a "Gentle Heat Physics" trick it cooks the exterior fast enough to create a seal while the interior remains succulent.
2. Acid Placement Timing
Adding acid before and after cooking serves two different purposes. The juice before helps the seasoning stick and begins the protein breakdown, while the fresh juice after provides a bright, citrusy high note that balances the heavy butter.
Proper Methods for Storing and Reheating
Let's be honest: fish is always best the moment it leaves the oven. However, if you have leftovers, you can store them in an airtight container in the fridge for up to 2 days. I don't recommend freezing cooked cod, as the delicate cell structure breaks down and it becomes incredibly mushy once thawed.
To reheat, avoid the microwave at all costs it will turn your beautiful fish into rubber. Instead, place it in a small pan with a splash of water or extra butter, cover it with a lid, and warm it over low heat for 3 to 4 minutes.
This gently steams it back to life without toughening the proteins.
Zero Waste Tip: If you have leftover lemon garlic butter in the pan, don't wash it away! Scrape it into a small jar. It’s basically "liquid gold" that you can use the next day to sauté some shrimp or toss with roasted vegetables.
You can also flake the leftover cod into a bowl, mix it with a little mayo and celery, and make a world class fish salad sandwich for lunch.
Completing the Meal with Smart Pairings
Since this cod is so light and zesty, you want sides that won't overshadow it. A pile of roasted asparagus or some steamed green beans with a touch of sea salt works perfectly. If you want something more substantial, a bed of fluffy quinoa or even a side of buttered orzo will soak up all that extra garlic sauce.
For a drink, a crisp Sauvignon Blanc or a light Pinot Grigio is the classic choice. The acidity in the wine mimics the lemon in the dish, creating a very harmonious experience. If you're going alcohol free, a sparkling water with a heavy squeeze of fresh lime and a sprig of mint is incredibly refreshing against the buttery garlic.
Myths to Forget:"Fish must be white hot to be safe": Actually, if it's piping hot and tough, you've overcooked it. 63°C is the sweet spot where it's safe but still silky. "Frozen fish is inferior": Not true!
Most "fresh" fish at the counter was previously frozen anyway. "Flash frozen" cod is often higher quality because it was frozen on the boat minutes after being caught. Just make sure to thaw it in the fridge overnight and pat it dry!
Right then, you're ready to tackle this. It's a 25 minute journey from your fridge to the table, and I promise it'll become a staple in your house just like it did in mine. Happy cooking!

Recipe FAQs
What is the ideal final internal temperature for baked cod?
63°C (145°F). This temperature ensures the protein is fully cooked and safe while minimizing moisture loss. Let the fish rest for 2-3 minutes post oven, as carryover heat will finish the cook.
How do I prevent the garlic from burning in the high heat oven?
Submerge the minced garlic completely in the oil and butter mixture. The surrounding fat acts as a heat buffer, effectively poaching the garlic slowly rather than scorching it directly on the fish surface.
Is it true that I must use fresh cod for this recipe to work well?
No, frozen cod is often a perfectly viable alternative. The critical step is ensuring the fish is fully thawed in the refrigerator overnight and then patted completely dry before seasoning.
How can I add a crispy texture to the top of my baked cod fillets?
Sprinkle Panko breadcrumbs mixed with a drizzle of olive oil over the butter topping before baking. This creates a light, crunchy crust that contrasts nicely with the flaky interior. This technique of creating a surface barrier is similar to achieving a crisp crust in our Simple Roasted Sweet recipe.
What should I serve with this baked cod?
Serve it with a simple, bright starch or green vegetable. Quinoa or steamed green beans are excellent choices to complement the richness of the garlic butter. For a pasta pairing that utilizes similar bright flavors, check out the Lemon Butter Pasta recipe for inspiration.
Why is my baked cod releasing a lot of white liquid (albumin)?
This is usually caused by cooking the fish too slowly or at too low a temperature initially. High heat quickly sets the proteins, trapping the moisture inside; rapid cooking minimizes the aggressive pushing out of the white albumin.
How do I reheat leftover baked cod without drying it out?
Reheat gently on the stovetop covered over low heat with a splash of liquid. Avoid the microwave completely, as it will make the fish tough; instead, use a covered skillet for 3-4 minutes to gently steam the leftovers back to tenderness.
Baked Cod Lemon Garlic

Ingredients:
Instructions:
Nutrition Facts:
| Calories | 288 calories |
|---|---|
| Protein | 30.3 g |
| Fat | 17.1 g |
| Carbs | 2.3 g |
| Fiber | 0.4 g |
| Sugar | 0.5 g |
| Sodium | 588 mg |
