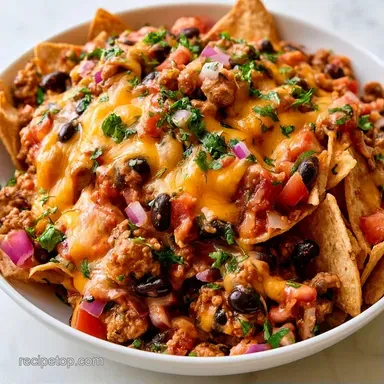
Bad Brads Campfire Nachos in 20 Minutes
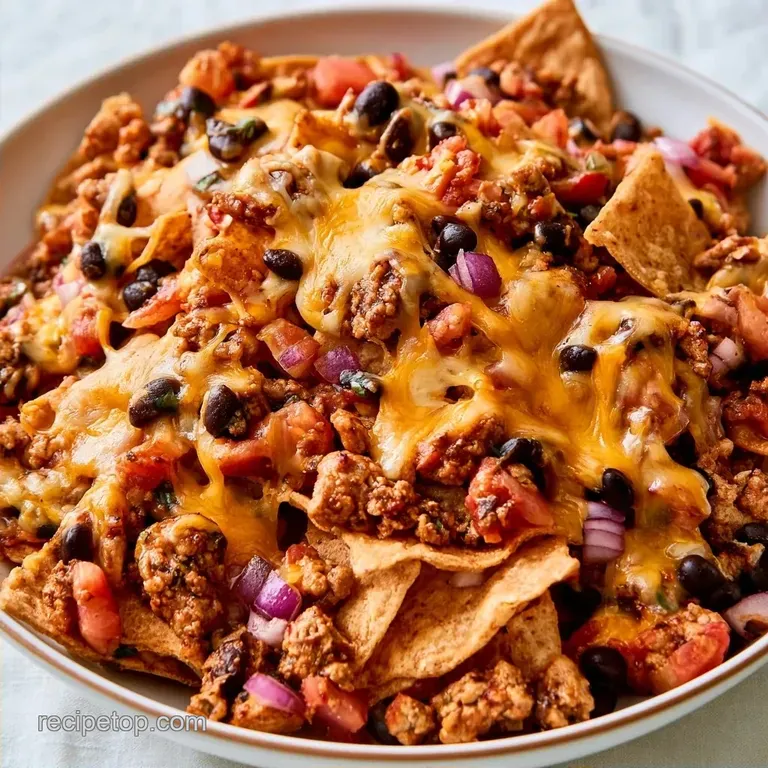
- Time: 10 min prep + 10 min on heat
- The Appeal: Crispy corn chips paired with gooey, melted cheddar
- Perfect for: Simple group meals while camping
The scent of cedar smoke and the chill of mountain air always whet my appetite. There is something about gathering around a crackling fire that enhances even the simplest dishes. I remember one outing where we used a flimsy foil pan for nachos, and it was a complete disaster.
The bottom layer turned to charcoal while the cheese on top never even melted.
That’s why I transitioned to using cast iron. The real trick is the lean ground turkey; it doesn't release as much grease, which keeps the chips from getting soggy. This ensures the meal feels substantial without leaving you feeling sluggish and ready for a nap immediately after.
You can look forward to a savory, hearty dish that requires minimal effort at the campsite. This Bad Brads Campfire Nachos Recipe prioritizes easy cleanup and bold flavor. It's the kind of meal that allows you to truly experience the outdoors instead of spending your evening tethered to a stove.
Bad Brads Campfire Nachos Recipe
First, let's cover the essentials. This meal is designed for four people and utilizes a few clever shortcuts to keep things moving.
| Feature | Detail |
|---|---|
| Prep Time | 10 minutes |
| Cook Time | 10 minutes |
| Total Time | 20 minutes |
| Yield | 4 servings |
Fresh vs. Shortcut Comparison
| Component | Freshly Prepped | Shortcut (Recommended) |
|---|---|---|
| Turkey | Browned on-site (messy) | Seasoned and browned beforehand |
| Cheese | Block cheese, manually grated | Pre-shredded reduced fat |
| Veggies | Chopped on a log | Pre-diced in containers |
What You'll Need
I've found that using pre seasoned turkey saves a massive amount of time and cleanup. Trust me on this, scrubbing a greasy pan in the woods is not fun.
| Ingredient | Role | If You Don't Have It |
|---|---|---|
| Whole grain corn chips | Crunchy base | Tortilla strips (thicker) |
| Lean ground turkey | Savory protein | Ground beef or plant based crumbles |
| Black beans | Hearty texture | Pinto beans or kidney beans |
| Reduced fat sharp cheddar | Gooey binder | Pepper jack or Monterey Jack |
| Roma tomatoes | Fresh acidity | Canned diced tomatoes (drained) |
| Red onion | Sharp bite | White onion or shallots |
| Pickled jalapeños | Tangy heat | Fresh sliced jalapeños |
| Fresh cilantro | Herbaceous finish | Fresh parsley |
Full Shopping List
- 10 oz (283g) baked whole grain corn tortilla chipsWhy this? Holds up better under heavy toppings.
- 1 lb (453g) lean ground turkey, pre browned and seasonedWhy this? Cuts cook time and reduces grease.
- 1 can (15 oz / 425g) black beans, rinsed and drainedWhy this? Adds fiber and a meaty texture.
- 2 cups (225g) reduced fat sharp cheddar cheese, shreddedWhy this? Melts quickly without excess oil.
- 1 cup (150g) diced Roma tomatoes
- ½ cup (50g) diced red onion
- 2 tbsp (30g) sliced pickled jalapeños
- ¼ cup (15g) chopped fresh cilantro
Essential Cooking Tools
You don't need a full kitchen to pull this off. A few basic tools make the process reliable and fast.
- 12 inch Cast Iron Skillet: This is non negotiable. It acts as a heat sink, which prevents the chips from burning.
- Heat Resistant Gloves: The skillet handle gets scorching hot over coals.
- Metal Spatula: Good for moving the pan or checking the bottom.
- Dutch Oven (Optional): If you have one, using the lid helps trap heat and melt the cheese faster.
Easy Steps to Follow
Time to put it all together. The aim is to create layers so that every chip is loaded with protein and cheese.
- Lay the base. Arrange half of the corn chips in an even layer at the bottom of the cast iron skillet. Note: Avoid packing them too tightly so the heat can circulate.
- First filling layer. Spread half of the black beans and the seasoned ground turkey over the chips.
- Add cheese. Sprinkle a generous handful of reduced fat cheddar over the turkey and beans.
- Repeat the layers. Add the remaining chips, then top them with the rest of the turkey and beans.
- Final cheese cover. Spread the remaining cheddar across the top. Note: Ensure the cheese reaches the edges to bind the nachos together.
- Set over heat. Place the skillet on a bed of hot coals. Avoid direct high flames, which will burn the chips quickly.
- Top with heat. If using a Dutch oven, place several hot coals on the lid to create an oven like effect.
- Cook for 8-10 minutes. Wait until the cheese is bubbling and has developed a mahogany color around the edges.
- Cool slightly. Carefully remove the skillet from the heat using gloves.
- Add fresh toppings. Immediately scatter the red onions, diced tomatoes, and jalapeños over the melted cheese.
- Garnish. Finish with a sprinkle of fresh cilantro.
Why This Recipe Works
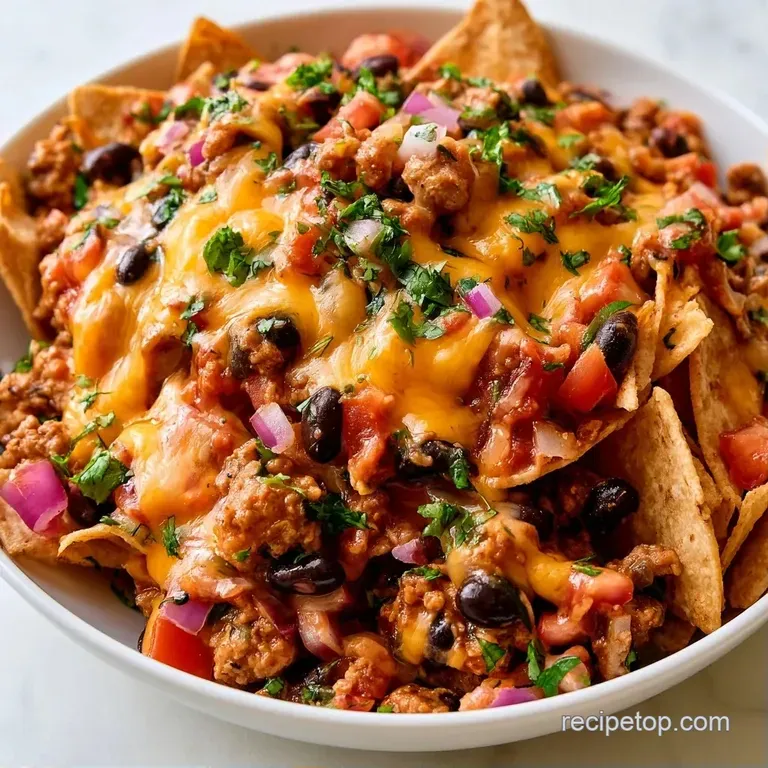
The heavy cast iron skillet spreads heat across the bottom, which stops the chips from scorching before the cheese melts. This creates a steady temperature that bubbles the cheddar evenly.
- Thermal Mass: The thick metal of the pan absorbs heat and releases it slowly, preventing "hot spots" that you'd get with thin aluminum.
- Strategic Layering: By putting cheese in the middle, you create a structural bond that stops the toppings from sliding off when you scoop.
- Moisture Control: Using pre browned turkey and rinsed beans prevents excess liquid from steaming the chips, keeping them crisp.
Chef's Tip: If your coals are running low, move the skillet to the center of the fire pit for 2 minutes to get that final bubble on the cheese.
Fixing Common Cooking Issues
Cooking over a fire is unpredictable. Here is how to handle the most common hiccups.
Bottom Chips Burning
If you smell acrid smoke or see blackened chips on the side, your coals are too hot. Lift the skillet away from the heat for 60 seconds or move it to the outer edge of the fire pit where the heat is more moderate.
Cheese Not Melting
This usually happens when the air is too cold or you lack top down heat. Cover the skillet with a lid or a piece of heavy duty foil for 3 minutes. This traps the steam and forces the cheese to melt.
Sogginess in the Middle
Too many wet toppings or unrinsed beans can make the center mushy. Always drain your beans thoroughly. If you're using a very juicy meat, pat it dry with a paper towel before layering it onto the chips.
For more ideas on hearty outdoor meals, you might like my Chicken Enchilada which shares similar bold flavors.
Saving and Reheating Tips
Nachos are best eaten immediately, but leftovers happen.
Storage Store any remaining nachos in a sealed bowl in the cooler for up to 48 hours. Because of the fresh tomatoes and onions, they won't stay crisp for long.
The Crunch Restore Reheat Avoid the microwave, as it turns the chips into rubber. Instead, put them back in a skillet over medium heat on a stove for 3-5 minutes. This crisps the bottoms back up and remelts the cheese.
Zero Waste If you have leftover diced onions and tomatoes, mix them with a bit of lime juice and salt to make a quick pico de gallo for breakfast tacos the next morning.
Customizing Your Nachos
The Bad Brads Campfire Nachos Recipe is a great base, but you can tweak it to fit your mood.
Decision Shortcut
- For more heat: Add diced habaneros to the cheese layer.
- For more protein: Double the black beans or add pinto beans.
- For a lighter base: Use baked corn chips and low sodium beans.
The Vegan Campfire
Swap the turkey for seasoned soy crumbles and use a dairy-free cheddar. Keep the beans and fresh veggies the same for a punchy, plant based version.
The Protein Powerhouse
Add grilled strips of chicken or sliced steak on top of the turkey layer. This makes the dish heavy enough to be a full dinner for active hikers.
The Fiesta Twist
Stir in a tablespoon of canned diced green chiles into the turkey before layering. It adds a mild, tangy depth that pairs great with the sharp cheddar.
Best Ways to Serve
Because this is a one-pot meal, the skillet doubles as your serving platter. Simply set it on a flat rock or a heat safe trivet in the middle of the camp table.
The Creamy Balance To cut through the richness of the turkey and cheese, you need something zesty. Serve these with sour cream or Greek yogurt; the coolness helps temper the heat from the jalapeños.
The Fresh Pairing I suggest serving this dish with sliced avocado or a simple cabbage slaw. The slaw offers a refreshing, watery snap that echoes the crunch of the chips.
If you're cooking for a large group and want another easy option, my BBQ Chicken Pizza is a great alternative.
Final Checkpoints for Success
- Time: 8-10 minutes of heat until the edges turn mahogany.
- Temp: Ensure the turkey reaches an internal temperature of 165°F (74°C).
- Weight: Use exactly 225g of cheese for perfect coverage.
Whether you're in the wilderness or your own backyard, these nachos are a great way to gather the group. It's a satisfying and simple meal to cap off a day of camping or hiking. Just keep an eye on the coals and you're all set.
Recipe FAQs
How to assemble these campfire nachos?
Layer half the corn chips, seasoned ground turkey, black beans, and cheddar in a cast iron skillet, then repeat the layers.
Tip: Use pre-browned turkey to prevent the chips from getting soggy.
Which campfire setup works best for cooking?
Place your skillet over a bed of hot coals instead of active flames.
Tip: Use a Dutch oven lid with coals on top to create an oven like environment.
Is it true that I should put the skillet directly in the flames?
False. Direct high flames will scorch the bottom chips before the cheese bubbles.
Tip: Aim for mahogany colored edges on the cheese to know when they are done.
Can I use different toppings for more variety?
To keep the flavors balanced, use the diced tomatoes, red onion, and pickled jalapeños.
Tip: If you appreciate this acidic balance, you'll find a similar flavor profile in our garlic pickle spears.
Bad Brads Campfire Nachos