Traditional Irish Pasties: Flaky and Savory

- Time: Active 40 minutes, Passive 50 minutes, Total 90 minutes
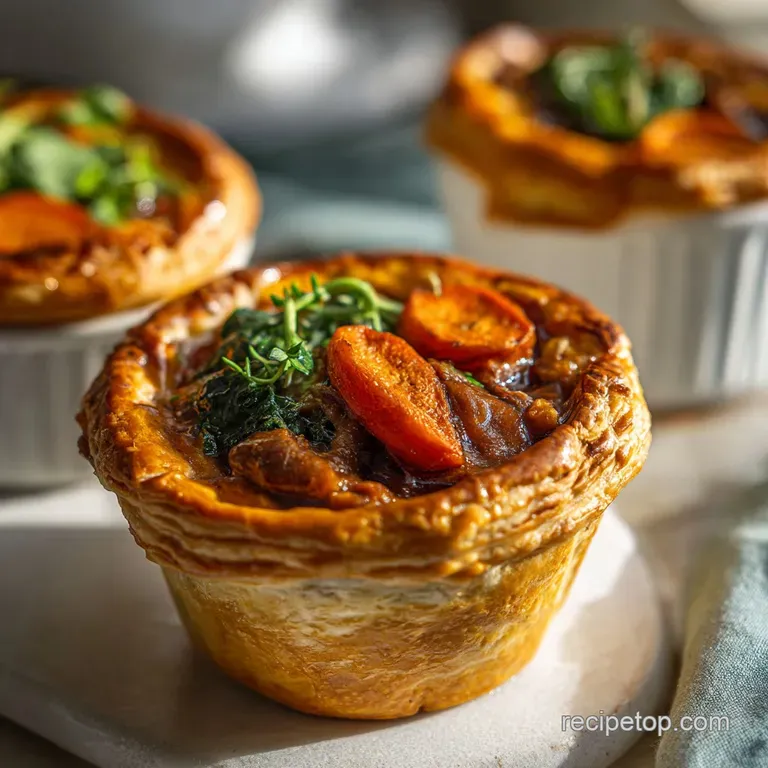
- Flavor/Texture Hook: Flaky, buttery crust with a savory, peppery beef and root vegetable center
- Perfect for: budget-friendly family dinners, portable work lunches, or weekend meal prep
- Why This Irish Pasties Delicious Savory Pastries Recipe Stays Shatteringly Flaky
- The Vital Numbers for Achieving Gold Standard Results Every Time
- Selecting Smart Budget Friendly Ingredients for Deep Savory Filling
- Simple Kitchen Tools for Hand Pie Success
- Step by Step Guide to a Golden Brown Crust
- Fixing Common Pastry Flaws and Texture Issues
- Simple Ingredient Swaps to Suit Your Pantry
- Busting Pastry Myths Once and For All
- Freshness Tips and Smart Leftover Storage Methods
- Traditional Sides That Make the Meal Complete
- Recipe FAQs
- 📝 Recipe Card
Why This Irish Pasties Delicious Savory Pastries Recipe Stays Shatteringly Flaky
Have you ever wondered why some hand pies feel like a heavy, leaden brick while others seem to practically explode into delicate shards the moment your teeth hit the crust? The secret isn't some expensive specialty flour or a professional bakery oven.
It actually comes down to a bit of humble kitchen physics involving the temperature of your fat and the way we handle the dough. This irish pasties delicious savory pastries recipe relies on creating tiny "pockets" of steam that do all the heavy lifting for us while the tray is in the oven.
When I first started making these, I used to just rub the butter in with my fingers until it looked like breadcrumbs. Big mistake. The heat from my hands melted the butter into the flour, creating a tough, cookie like texture instead of those gorgeous layers. Now, I swear by the grater method.
By using frozen butter and grating it directly into the flour, we keep those fat pieces distinct. As the pastry bakes at 400°F (200°C), that frozen butter hits the heat and instantly evaporates, leaving behind a little air gap.
Thousands of those gaps translate to a crust that is incredibly light but still strong enough to house a hearty meat filling.
But what about the filling? Most people make the mistake of pre cooking their meat and vegetables. If you do that, you end up with a dry, crumbly interior. In this version, we put everything in raw.
The beef chuck, potatoes, and carrots release their natural juices as they cook, and because they're trapped inside the dough, they have nowhere to go. They mingle with the salt and thyme to create a natural sauce that coats every bite.
It is a completely different experience than a standard pot pie, and honestly, it’s much easier on the cook since there’s no stovetop simmering required before the baking starts.
- Steam Expansion: Frozen butter strands melt rapidly in a hot oven, releasing water vapor that pushes the dough layers apart before the structure sets.
- Gluten Inhibition: Adding apple cider vinegar slightly lowers the pH of the dough, which limits how much the flour's proteins can bond, ensuring the crust stays tender rather than rubbery.
- Starch Gelatinization: The juices from the raw beef combine with the starch released by the diced Yukon Gold potatoes to form a thick, savory "gravy" inside the pastry.
- Cold Lamination: Folding the dough over itself three times creates physical layers of fat and flour that turn into a flaky, multi layered texture once baked.
Comparing Cooking Methods for Hand Pies
| Method | Time | Texture | Best For |
|---|---|---|---|
| Oven (Standard) | 50 minutes | Deeply browned, flaky layers, even cook | Traditional texture and easy cleanup |
| Stovetop (Pan Fry) | 15 minutes | Super crispy exterior, dense interior | Using pre cooked leftovers only |
| Air Fryer | 25 minutes | Very crunchy, fast browning | Small batches or quick reheating |
Whether you choose the traditional oven route or a quicker alternative, the goal is always to keep that filling moist while the outside turns into a golden brown shell. The oven is truly the gold standard here because it allows the internal temperature of the beef to rise slowly, which tenderizes the chuck without burning the delicate dough.
The Vital Numbers for Achieving Gold Standard Results Every Time
Getting the timing right is the difference between a soggy mess and a professional looking pastry. This recipe is designed to be efficient, but you cannot rush the chilling phase. If that dough is even slightly warm when it goes into the oven, the butter will leak out onto your baking sheet, leaving you with a greasy puddle and a flat crust.
I have had many "butter floods" in my kitchen before I realized that thirty minutes in the fridge is a non negotiable requirement, not a suggestion.
The size of your dice also matters more than you might think. We are looking for 1/4 inch cubes for both the beef and the potatoes. Why so specific? If the pieces are too big, the dough will be perfectly cooked while the beef is still chewy and the potatoes are hard. If they are too small, they turn into a mushy paste.
At a quarter inch, everything reaches that "melt in-your mouth" stage at exactly the 50 minute mark. It is a bit of prep work, but it pays off when every single bite is perfectly balanced.
| Component | Science Role | Pro Secret |
|---|---|---|
| Unsalted European Butter | Provides the fat for lamination | Freeze for 2 hours before grating to prevent melting |
| Apple Cider Vinegar | Breaks down gluten strands | Keep it ice cold along with your water for a crispier finish |
| Yukon Gold Potatoes | Releases starch to thicken filling | Don't rinse them after dicing; you want that surface starch |
| Beef Chuck | Provides fat and protein structure | Hand dice instead of using ground meat for better "chew" |
The reason we use European butter specifically is due to the higher fat content and lower water percentage compared to standard table butter. This means less steam is released too early, allowing the dough to hold its shape better while still providing that rich, buttery flavor we all crave in a savory pastries recipe.
If you only have regular butter, it will still work, but you might notice a slightly less "shattering" effect.
Selecting Smart Budget Friendly Ingredients for Deep Savory Filling
When we talk about an irish pasties delicious savory pastries recipe, we aren't looking for expensive cuts of meat like ribeye or filet. In fact, those would actually perform worse here because they lack the connective tissue that makes a pastry filling rich.
Beef chuck is the hero because it's affordable and full of flavor. As it bakes for 50 minutes, the collagen in the chuck breaks down, turning what could be a tough piece of meat into something incredibly tender. It’s the ultimate budget hack that actually results in a better final product.
The vegetables are equally humble. Carrots, onions, and potatoes are kitchen staples for a reason they provide bulk, sweetness, and earthy notes without breaking the bank. I always go for yellow onions because they have a higher sugar content than white onions, which helps them caramelize slightly inside the pastry.
If you're looking to save even more, you can often find "seconds" or "ugly" carrots at the market; once they are diced and tucked inside a crust, no one will ever know the difference.
- 500g All purpose flour: The base of our pastry structure.
- Substitute: Pastry flour for an even more tender, crumbly result.
- Why this? AP flour has the perfect protein balance for a sturdy but flaky hand pie.
- 250g Unsalted European butter: The fat source for our layers.
- Substitute: high-quality lard (same amount) for a more traditional, savory "snap."
- Why this? Grated frozen butter creates the signature air pockets that make it flaky.
- 2 tsp Sea salt: To season both the dough and the filling.
- Substitute: Kosher salt (use 3 tsp as it is less dense than sea salt).
- 1 tbsp Apple cider vinegar: To tenderize the dough.
- Substitute: White vinegar or lemon juice.
- 120ml Ice cold water: To bind the dough without melting the fat.
- 400g Beef chuck: The hearty protein center.
- Substitute: Lean ground beef if you are in a rush, though the texture will be softer.
- Why this? Hand dicing beef chuck ensures a juicy interior that doesn't get dry.
- 250g Yukon Gold potatoes: Provides starch and creaminess.
- Substitute: Russet potatoes (will be fluffier and less waxy).
- 150g Carrots: Adds a touch of natural sweetness.
- 1 small yellow onion: For a sharp, savory base.
- 1 tbsp Fresh thyme leaves: The primary aromatic.
- Substitute: 1 tsp dried thyme or fresh rosemary.
- 1 tsp Cracked black pepper: For a subtle, warming heat.
- 1 large egg + 1 tbsp water: For the egg wash that creates the golden shine.
I've found that using apple cider vinegar instead of plain white vinegar adds a very subtle fruitiness that complements the beef beautifully. It's a small tweak, but it’s those little layers of flavor that make people ask for the recipe. If you're looking for more savory inspiration, you might enjoy the flavor profile of an Irish Shepherd's Pie which uses similar root vegetables and hearty meats.
Simple Kitchen Tools for Hand Pie Success
You don't need a stand mixer or a fancy pasta roller to make these. In fact, the less machinery you use, the better the pastry usually turns out. A large mixing bowl and a sturdy box grater are your best friends here.
I prefer a box grater over a food processor because it gives me much longer, distinct strands of butter. The food processor tends to chop the butter too fine, which leads to a more uniform, sandy texture rather than those long, flaky sheets of dough.
A good rolling pin is essential, but honestly, in a pinch, I have used a wine bottle. The key is to keep everything cold. If you find your rolling pin is sticking to the dough, pop the pin in the freezer for ten minutes. It sounds crazy, but it works.
You’ll also need a sharp knife for dicing the beef and vegetables. Since we are doing a precision 1/4 inch dice, a dull knife will make the task feel like a chore and will likely bruise the onions rather than cleanly slicing them.
- Large mixing bowl: Give yourself plenty of room to toss the flour and butter without squishing the fat strands.
- Box grater: For that crucial "grated frozen butter" technique.
- Rolling pin: To get those 8 inch circles nice and even.
- Baking sheet + Parchment paper: To prevent sticking and ensure the bottoms of the pasties brown evenly.
- Pastry brush: For a smooth, even application of the egg wash.
- Small sharp knife: Essential for the fine dicing required for the filling.
One tip I learned the hard way: don't skip the parchment paper. Because the filling is raw when it goes in, it produces a fair amount of steam. If a tiny hole develops in your pastry, that juice will leak out and caramelize on the pan. Without parchment, you’ll be scrubbing that pan for an hour.
With it, the pastry just lifts right off, and the pan stays clean.
step-by-step Guide to a Golden Brown Crust
- Grate the butter. Toss 250g of grated frozen butter into 500g of all purpose flour mixed with 1 tsp of sea salt. Note: Work quickly so the heat from your hands doesn't soften the butter.
- Form the dough. Slowly drizzle in 1 tbsp apple cider vinegar and 120ml ice cold water, tossing with a fork until a shaggy, clumpy dough forms. Stop mixing as soon as it holds together when squeezed.
- Create the layers. Turn the dough onto a floured surface, fold it over itself three times like a letter, wrap in plastic, and chill for 30 minutes. Note: This creates the "lamination" that results in flakiness.
- Prep the filling. Combine 400g diced beef, 250g diced potatoes, 150g carrots, minced onion, thyme, 1 tsp salt, and pepper in a bowl. Let it sit for 10 minutes to draw out excess moisture.
- Drain and preheat. Drain any liquid from the meat mixture and preheat your oven to 400°F (200°C).
- Roll the rounds. Divide the chilled dough into 6 portions and roll each into an 8 inch circle on a floured surface. Keep the unused dough in the fridge while you work.
- Fill the pastry. Place a mound of filling on one half of each circle, leaving a 1 inch border. Don't overstuff, or the seams will burst in the oven.
- Seal and crimp. Fold the dough over, press the edges firmly, and use a fork or your thumb to create a tight seal.
- Apply the wash. Whisk the egg and 1 tbsp water, then brush generously over each pasty. Cut a small slit in the top to vent steam.
- Bake to finish. Bake on a parchment lined sheet for 45-50 minutes until the crust is a deep mahogany brown and you can hear the filling sizzling inside.
When you pull these out of the oven, the smell will be incredible buttery, herbaceous, and deeply savory. Resist the urge to bite in immediately! The filling is effectively a small pocket of steam and hot gravy. Give them at least ten minutes to rest.
This allows the juices to thicken slightly and the crust to firm up, so you don't lose all that delicious filling on your plate.
Fixing Common Pastry Flaws and Texture Issues
Even the most experienced home cooks run into trouble with pastry sometimes. The most common issue I see is the "soggy bottom." This happens when the moisture from the filling soaks into the bottom layer of dough before it has a chance to crisp up.
To prevent this, make sure you really drain that filling after it sits with the salt. That ten minute rest for the meat and veg is vital because the salt draws out the excess water that would otherwise turn your crust into a sponge.
Another thing to watch for is the "blowout." This is when the side of your pastry splits open, and all the juices leak out. This usually happens if the seal isn't tight enough or if you forgot to cut a vent in the top. That little slit acts as a pressure release valve.
Without it, the steam builds up until the weakest part of the pastry gives way. If it does happen, don't panic! It will still taste fantastic, it just might not be as pretty.
Why Your Pastry Might Be Struggling
| Problem | Root Cause | Solution |
|---|---|---|
| Tough, hard crust | Overworking the dough | Mix until just shaggy; don't knead it like bread |
| Butter leaking out | Dough was too warm | Chill the dough for a full 30 mins before rolling |
| Filling is crunchy | Vegetables diced too large | Keep the dice to a strict 1/4 inch for even cooking |
Common Mistakes Checklist
- ✓ Pat the beef dry with a paper towel before dicing to remove excess surface moisture.
- ✓ Use ice cold water only even room temperature water can start melting the butter strands.
- ✓ Don't skip the egg wash as it provides the protein barrier that creates that professional shine.
- ✓ Check your oven temp with an internal thermometer; if it's too low, the pastry will be greasy.
- ✓ Wait for the mahogany color before pulling them out; golden yellow isn't enough for a fully cooked interior.
If you find that your crust is consistently crumbly and won't hold together when you try to fold it, you likely need just a teaspoon more water. Every brand of flour has a slightly different hydration level, so use your intuition. It should feel like damp sand that just barely clings together. If you're looking for more tips on dough consistency, checking out other pastries recipe guides can help you get a feel for different hydration levels, even in savory contexts.
Simple Ingredient Swaps to Suit Your Pantry
One of the best things about this savory pastries recipe is how adaptable it is. If you don't have beef chuck, you can easily use pork shoulder or even lamb. The key is just to make sure you have a bit of fat in the meat. If you use something too lean, like chicken breast, the interior will be quite dry.
If you do go the poultry route, I highly recommend adding a small pat of butter inside each pasty before sealing it to provide that necessary moisture.
For my vegetarian friends, you can swap the beef for a mix of hardy mushrooms like Cremini or Portobello. Just be sure to sauté the mushrooms briefly first to cook off their high water content, otherwise, they will definitely give you a soggy crust. You can also play around with the cheeses.
A sharp white cheddar tucked inside the filling adds a wonderful tang that cuts through the richness of the butter.
- Scaling Down (Makes 2-3): You can easily halve the recipe. For the egg wash, just whisk a whole egg and use what you need, or use a splash of milk instead. Bake for the same amount of time, but keep an eye on them at the 40 minute mark.
- Scaling Up (Makes 12+): Double the ingredients exactly, but work in two batches for the dough. Overcrowding a large bowl makes it harder to distribute the butter evenly. Use two baking sheets and swap their positions halfway through baking to ensure even browning.
- The "Cheater" Version: If you're truly short on time, you can use store-bought puff pastry. It won't have the same "sturdy" bite as the traditional dough, but it will still be delicious. Reduce the bake time to 25-30 minutes and pre cook the filling slightly.
When scaling up, remember that spices don't always need to be doubled exactly. For a double batch, I usually go with 1.5x the pepper and thyme, then taste the filling to see if it needs that extra punch. Over seasoning is much harder to fix than under seasoning!
Busting Pastry Myths Once and For All
There is a huge misconception that you need a "magic touch" or cold hands to make good pastry. While it’s true that heat is the enemy, you don't need to be a professional baker to get this right.
I have seen people try to use marble slabs and specialized equipment when a simple chilled bowl and a fast pace are all that’s required. The "magic" is really just about keeping the fat in its solid state until it hits the oven.
Another myth is that you need to use expensive steak for the filling. People often think that "good meat equals a good pie." In reality, a high end tenderloin would be wasted here. It lacks the fat and connective tissue that makes the "gravy" inside the pasty so flavorful.
The slow cook environment inside the dough is designed for "tough" cuts. Trust the process and stick with the budget friendly chuck; it is actually the superior choice for this specific application.
Finally, don't believe anyone who tells you that the dough needs to be perfectly smooth. If your dough looks a little rough and has visible streaks of butter, you are doing it exactly right. A smooth, elastic dough is a sign of too much gluten development, which will lead to a tough, chewy crust.
We want "shaggy" and "rustic" those are the words that lead to the most delicious savory pastries recipe.
Freshness Tips and Smart Leftover Storage Methods
These pasties are surprisingly resilient. They actually make for incredible leftovers because the flavors in the filling continue to meld as they sit. If you find yourself with extras, let them cool completely on a wire rack before moving them to the fridge.
If you put them in a container while they are still warm, the residual steam will trap moisture against the crust, making it soft and sad.
For zero waste, I love using the potato and carrot peels. You can toss them with a bit of oil and salt and roast them alongside the pasties for a crispy "cook's snack." Also, any leftover meat and veg that didn't fit into the dough can be sautéed the next morning and topped with a fried egg.
It makes a fantastic hash that ensures nothing goes to waste.
- Fridge: Keep in an airtight container for up to 4 days.
- Freezer: These freeze beautifully! Wrap individual unbaked pasties in plastic wrap and then foil. Bake directly from frozen at 375°F (190°C) for about 60-70 minutes.
- Reheating: Avoid the microwave if you can; it will make the pastry rubbery. Instead, pop them back in a 350°F (180°C) oven or toaster oven for 10-15 minutes until the crust crisps back up.
If you are planning a party and want something different alongside these, a Buffalo Chicken Dip is a fun, spicy contrast to the earthy, herbal notes of the Irish pasties. It keeps the "handheld" theme going while offering a completely different flavor profile for your guests.
Traditional Sides That Make the Meal Complete
While an Irish pasty is technically a full meal in a pocket, I always like to serve it with something bright to cut through the richness of the pastry. A simple side of pickled red cabbage or a sharp green salad with a lemon vinaigrette works wonders.
The acidity helps refresh your palate between those heavy, buttery bites.
In many parts of Ireland and the UK, it is traditional to serve these with a side of "mushy peas" or a generous dollop of brown sauce (like HP Sauce). If you've never had brown sauce, it’s a tangy, slightly spicy condiment that is practically made for beef and pastry.
If you can't find it, a good quality Worcestershire sauce or even a spicy grainy mustard is a fantastic substitute.
If you are looking for a more "sit down" dinner feel, a side of roasted root vegetables using any leftover carrots and potatoes adds a nice textural contrast. But honestly, most days, I just grab one in a napkin and head out the door.
That was the original intent of the miners who carried these into the pits, and there is something deeply satisfying about a meal that requires nothing more than your own two hands.

Recipe FAQs
What is the best pastry for pasties?
A rough puff style pastry made with grated frozen butter is best. Using 250g of grated frozen butter incorporated into 500g of flour ensures distinct, buttery layers that stay crisp throughout the 45-50 minute bake.
What are Donovan's Irish pasties?
They are a specific style of hearty, hand held savory turnover. These feature a traditional filling of beef chuck, potatoes, carrots, and onions, all encased in a hand crimped pastry shell.
What is an Irish pasty?
It is a portable, seasoned meal encased in pastry. Historically a laborer's lunch, the modern version relies on a combination of beef, vegetables, and thyme to deliver moisture and flavor inside a mahogany brown crust.
What's in a pasty in Northern Ireland?
Expect a savory mixture of beef chuck, diced potatoes, carrots, and onions. The filling is seasoned with fresh thyme, sea salt, and cracked black pepper before being sealed into the dough.
How to ensure the pastry remains crisp?
Fold the dough three times to create internal layers and keep the water ice-cold during mixing. This technique prevents the butter from melting prematurely. If you enjoy mastering this type of laminated dough texture, you can apply similar handling principles when working with more delicate crusts.
Is it true I should bake them at 350°F for a longer time?
No, this is a common misconception. You must preheat your oven to 400°F (200°C) to ensure the pastry sets quickly and the interior beef and potato mixture reaches the correct temperature within the 45-50 minute window.
How to prevent the pasty from leaking during baking?
Drain any excess liquid from the beef and vegetable mixture after it sits for 10 minutes. Leaving excess moisture inside the filling will create steam that can force the crimped edges to burst open in the oven.
Traditional Irish Hand Pies

Ingredients:
Instructions:
Nutrition Facts:
| Calories | 828 kcal |
|---|---|
| Protein | 23.8 g |
| Fat | 48.2 g |
| Carbs | 74.1 g |
| Fiber | 3.8 g |
| Sugar | 2.1 g |
| Sodium | 778 mg |
