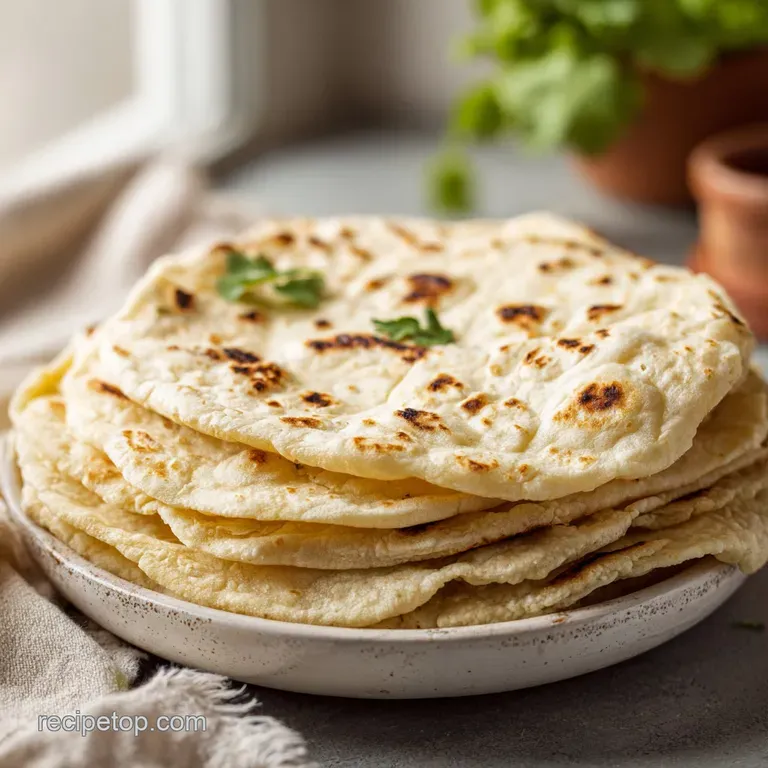
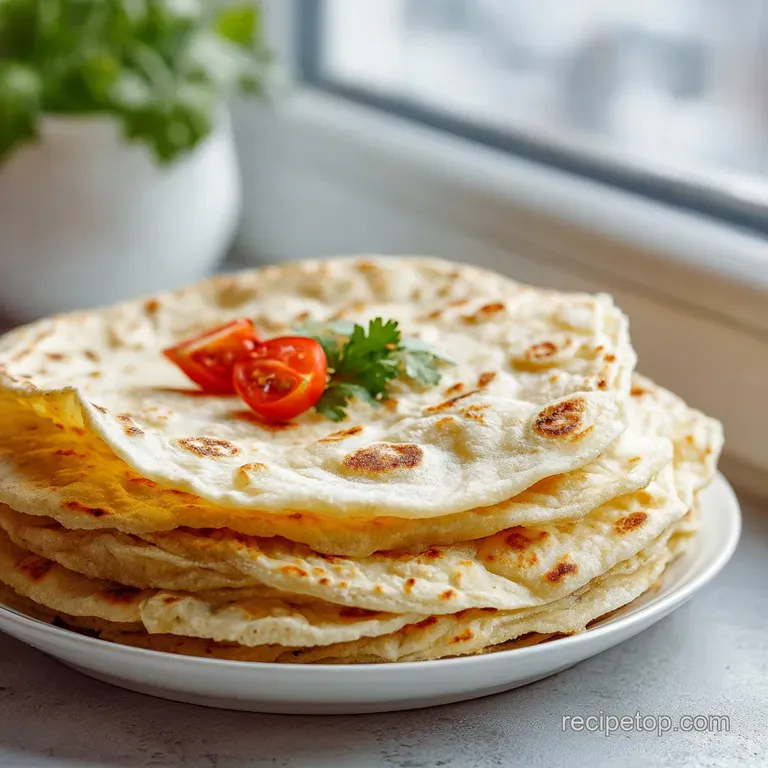
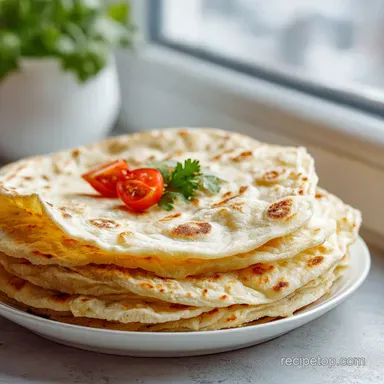
Gluten Free Tortillas Recipe: Silky and Bendable
- Time: Active 10 minutes, Passive 15 minutes, Total 25 minutes
- Flavor/Texture Hook: Silky, bendable, and slightly toasted
- Perfect for: Quick weeknight tacos or meal prep wraps
- The Physics Behind Creating a Pliable and Soft Dough
- Analyzing the Key Components for a Perfect Tortilla Texture
- Essential Tools Required for Rolling Out Thin Tortilla Rounds
- The Step by Step Searing Process for Golden Brown Results
- Solving Common Problems and Avoiding Cracked Tortilla Rounds
- Customizing Your Dough with Flavorful Additions and Flour Swaps
- Keeping Your Finished Tortillas Soft and Fresh for Days
- Perfect Pairings and Serving Suggestions for Your Mexican Feast
- Recipe FAQs
- 📝 Recipe Card
I remember the first time I tried a store-bought gluten-free tortilla. It was like eating a dusty, dry shingle. It literally shattered the moment I tried to fold it over some carnitas. I was so frustrated because taco night is sacred in our house, and I refused to believe we were destined for a life of crumbly wraps.
After months of trial and error, I realized the secret wasn't in some fancy flour, but in the temperature of the water. When that first batch came off the skillet, soft enough to roll into a cylinder without a single crack, I knew I’d cracked the code.
There’s nothing like the smell of toasting flour and that gentle hiss when the dough hits the hot cast iron.
Trust me, once you feel how velvety this dough is in your hands, you’ll never go back to those overpriced, cardboard like versions from the grocery store. We’re aiming for a wrap that can hold a heavy scoop of salsa without weeping or breaking.
It’s simple, fast, and honestly, a bit of a kitchen miracle.
The Physics Behind Creating a Pliable and Soft Dough
The Physics of the Pliable Puff: Boiling water gelatinizes the starches in the gluten-free flour blend, creating a "fake" structure. This temporary elasticity allows the dough to be rolled paper thin without snapping or crumbling.
- Starch Gelatinization: Heat breaks down starch granules, allowing them to absorb water and swell into a flexible gel.
- Lipid Interference: Fat coats the flour particles, preventing them from clumping and ensuring a silky mouthfeel.
- Hydrocolloid Activation: Xanthan gum reacts to the moisture and heat, providing the "stretch" usually found in wheat.
- Steam Expansion: Trapped moisture turns into steam during searing, creating those beautiful air pockets and bubbles.
| Method | Time | Texture | Best For |
|---|---|---|---|
| Cast Iron Skillet | 2 minutes | Toasty, charred spots | Authentic street tacos |
| Non stick Pan | 2 minutes | Soft, uniform color | Large burrito wraps |
| Electric Griddle | 5 minutes | Consistent heat | Cooking for a crowd |
Using a heavy cast iron skillet is my personal favorite because it holds onto heat so well. You want that immediate sizzle the moment the dough touches the surface to lock in the moisture and start the puffing process.
Analyzing the Key Components for a Perfect Tortilla Texture
When we talk about this gluten-free tortillas recipe, the choice of fat makes a massive difference. I usually reach for refined coconut oil because it has a neutral flavor and stays solid at room temperature, which helps the dough's stability.
However, if you want that old school flavor, lard is a fantastic alternative that provides a distinct richness.
| Ingredient | Science Role | Pro Secret |
|---|---|---|
| GF Flour Blend (280g) | Structural Base | Use a blend with xanthan gum for "stretch" |
| Refined Coconut Oil (3 tbsp) | Tenderizer | Rub into flour until it feels like fine sand |
| Boiling Water (3/4 cup) | Starch Gelatinizer | Must be rolling boil to activate the starches |
| Chickpea Flour (1 tbsp) | Protein & Color | Adds a golden hue and better browning |
The Dry Base Mix
Mixing your dry ingredients thoroughly is the first step to success. If the xanthan gum or salt isn't evenly distributed, you'll end up with some tortillas that are brittle and others that are gummy. I like to use a whisk to aerate the flour before adding the fat.
The Hydration and Fat
Don't be afraid of the boiling water. It might feel counterintuitive to use such high heat, but it’s the only way to get that silky, workable texture. The fat should be "cut" into the flour before the water hits it, ensuring every grain is protected from over hydration.
Essential Tools Required for Rolling Out Thin Tortilla Rounds
You don't need a professional kitchen to make these, but a few simple tools make the job much easier. A heavy rolling pin is essential for getting that even thickness. I’ve tried using a wine bottle in a pinch, but the weight of a real pin helps you glide over the dough without sticking.
Chef Tip: Freeze your coconut oil for 10 minutes before measuring. This makes it easier to "cut" into the flour, resulting in tiny pockets of fat that create a flakier texture once they hit the heat.
Parchment paper is another non negotiable for me. gluten-free dough can be notoriously tacky. Rolling the dough between two sheets of parchment prevents it from sticking to the counter or the pin, and it allows you to peel the tortilla off cleanly before it goes into the pan.
The step-by-step Searing Process for Golden Brown Results
- Whisk the 2 cups of GF flour, 1 tsp baking powder, 1/2 tsp salt, and optional 1 tbsp chickpea flour in a large bowl. Note: Whisking aerates the flour for a lighter crumb.
- Add the 3 tbsp of refined coconut oil. Note: Work the fat in with your fingers until the mix looks like crumbs.
- Pour in the 3/4 cup of boiling water carefully. Note: Use a wooden spoon to mix at first so you don't burn your hands.
- Knead the dough until it is smooth, velvety, and no longer sticks to the bowl.
- Divide the dough into 8 equal portions and roll them into balls.
- Rest the dough balls for 10 minutes under a damp cloth. until the xanthan gum is fully hydrated.
- Press a ball between two sheets of parchment paper and roll until it is about 6 inches wide and translucent.
- Heat a skillet over medium high heat. until a drop of water sizzles and vanishes.
- Cook the tortilla for 1 minute until bubbles form and the bottom has golden spots.
- Flip and cook for 30 seconds until the tortilla puffs slightly.
If you find yourself craving other flatbreads, this technique is actually quite similar to the one I use in my Vegan gluten-free recipe, which also relies on heat to manage the starch structure.
Solving Common Problems and Avoiding Cracked Tortilla Rounds
The most common issue people have with this gluten-free tortillas recipe is the dough drying out. If your kitchen is particularly dry, or if you take too long to roll them out, the edges can start to fray. Keep those dough balls covered with a damp towel; it’s a total game changer for keeping them pliable.
Why Your Tortillas Shatter
If your tortillas are brittle after cooking, you likely didn't use truly boiling water. The water needs to be at a full rolling boil (212°F) to properly gelatinize the flour. If the water is just "hot," the starches won't swell, and the dough will behave like wet sand rather than playdough.
2 Signs Your Heat is Too High
If the tortilla chars instantly without puffing, your pan is too hot. You'll also notice a lot of smoke. A properly heated pan should cause the dough to "hiss" gently, but it shouldn't smell like it's burning within the first ten seconds.
| Problem | Root Cause | Solution |
|---|---|---|
| Dough is too sticky | Too much water or cool water | Add 1 tbsp flour or let it rest longer |
| Tortilla is stiff | Overcooked or heat too low | Cook shorter at higher heat |
| Edges are cracking | Dough is too dry | Add 1 tsp warm water to the dough |
The resting period is also vital. While we aren't waiting for yeast to rise, we are waiting for the moisture to distribute evenly. A rushed tortilla is a grumpy tortilla.
Common Mistakes Checklist: ✓ Never use lukewarm water; it must be boiling to activate the starch. ✓ Don't skip the 10 minute rest; it prevents the dough from being "snappy." ✓ Avoid over flouring the board; use parchment paper to prevent sticking instead.
✓ Keep finished tortillas in a sealed container or cloth to trap the steam. ✓ Ensure the pan is fully preheated for at least 3 minutes before starting.
Customizing Your Dough with Flavorful Additions and Flour Swaps
You can easily adapt this tortillas recipe to fit different flavor profiles. I love adding a teaspoon of garlic powder or some finely chopped cilantro directly into the dry mix. It gives the wraps a professional look and a boost of flavor that complements spicy fillings.
The Chickpea Flour Protein Boost
Adding that single tablespoon of chickpea flour isn't just for nutrition. Chickpea flour browns beautifully and adds a subtle nutty depth that masks any "beany" aftertaste some GF blends might have. It makes the final product look much more like a traditional corn tortilla while keeping the flexibility of a flour wrap.
The Vegan Buttery Swap
While I love coconut oil, you can use a high-quality vegan butter stick. Just be aware that butter contains water, so you might need to slightly reduce the boiling water by about a teaspoon to keep the dough from getting too tacky.
| Original Ingredient | Substitute | Why It Works |
|---|---|---|
| Coconut Oil (3 tbsp) | Lard (3 tbsp) | Provides a traditional savory flavor and extreme tenderness |
| Sea Salt (1/2 tsp) | Garlic Salt (1/2 tsp) | Adds a savory kick. Note: Adjust other seasonings accordingly |
| Chickpea Flour (1 tbsp) | Almond Flour (1 tbsp) | Adds healthy fats. Note: Tortilla may be slightly more fragile |
For a lighter meal, these wraps are fantastic alongside a healthy mediterranean chickpea recipe, providing a soft, neutral base for those bright, zesty flavors.
Keeping Your Finished Tortillas Soft and Fresh for Days
Storage is where most gluten-free breads fail. Because there is no gluten to hold moisture, they can turn into rocks overnight if you aren't careful. The trick is to use their own steam to keep them soft.
As soon as a tortilla comes off the pan, stack it on a plate and cover it with a heavy kitchen towel or put it inside a tortilla warmer.
- Fridge: Store in an airtight bag for up to 4 days.
- Freezer: Place parchment paper between each tortilla and freeze for up to 3 months.
- Zero Waste: If they do get a bit dry, cut them into triangles and fry them in a little oil to make crispy GF chips.
When reheating, avoid the microwave if possible, as it can make GF flour chewy. A quick 15 second flash on a hot dry skillet will revive that "just cooked" flexibility and bring back the toasted aroma.
Perfect Pairings and Serving Suggestions for Your Mexican Feast
These tortillas are incredibly versatile. Beyond the standard taco, I’ve used them as a base for quick personal pizzas or even dusted them with cinnamon sugar for a sweet snack.
Because they are so sturdy, they can handle heavy fillings like shredded beef or chunky vegetable medleys without falling apart mid bite.
Scaling the Recipe
If you are cooking for a larger family, doubling this recipe is straightforward. However, when you double the ingredients, only increase the salt and baking powder by 1.5 times to avoid an overly metallic or salty taste.
Work in batches to ensure your pan stays at a consistent temperature; if you cook too many at once, the pan temperature will drop, and you'll lose that characteristic puff.
Debunking Kitchen Myths
One common myth is that you need a heavy duty tortilla press for success. While a press is nice, I've found that rolling by hand with parchment paper actually gives you more control over the thinness, which is crucial for gluten-free dough. Another myth is that you can't make these without xanthan gum.
While you can try, they will be much more like crackers than soft wraps. The gum is what gives us that "chew" we all crave.
Right then, you're all set! Grab your skillet, get that water boiling, and enjoy the best taco night you've had in years. Trust me, once you master the "boiling water trick," you'll be the hero of the kitchen.

Recipe FAQs
What is the secret to soft gluten-free tortillas?
Using truly boiling water. The high heat gelatinizes the starches in the GF flour, creating an immediate, flexible structure that mimics gluten’s elasticity.
How do you keep gluten-free tortillas from falling apart?
Ensure the dough rests for 10 minutes after mixing. This rest allows the moisture to fully hydrate the gums and starches, preventing brittle edges when rolling and cooking.
Can I use gluten-free flour for tortillas?
Yes, but the blend is critical. Look for a blend that already contains xanthan gum, as this provides the necessary binding and stretch that is missing from wheat flour.
How to make tortillas with 4 ingredients?
Combine GF flour blend, salt, fat, and boiling water. Omit any optional additions like chickpea flour, but you must use a blend that already includes the stabilizer (xanthan gum) for structural integrity.
Why do my gluten-free tortillas turn out brittle after cooking?
Your pan heat was likely too low or you cooked them too long. You need a very hot skillet so the moisture turns instantly to steam, puffing the tortilla; slow cooking dries them out immediately.
Is it true I must use a special press to roll the dough evenly?
No, this is a common misconception. Rolling between two sheets of parchment paper allows you to control the thinness manually and peel the dough easily, which is better than a press for this delicate GF dough.
What is the best way to serve these tortillas for best texture?
Stack them immediately on a plate and cover them with a thick towel. Trapping the steam keeps them soft and pliable, similar to how the steam sets the structure in the [Garlic and Butter recipe] doughs.
gluten-free Tortillas Recipe
Ingredients:
Instructions:
Nutrition Facts:
| Calories | 173 kcal |
|---|---|
| Protein | 2.9 g |
| Fat | 5.8 g |
| Carbs | 26.4 g |
| Fiber | 2.2 g |
| Sugar | 0.4 g |
| Sodium | 195 mg |
