Garlic and Butter Flatbread Recipe
- Time: Active 10 mins, Passive 0 mins, Total 20 mins
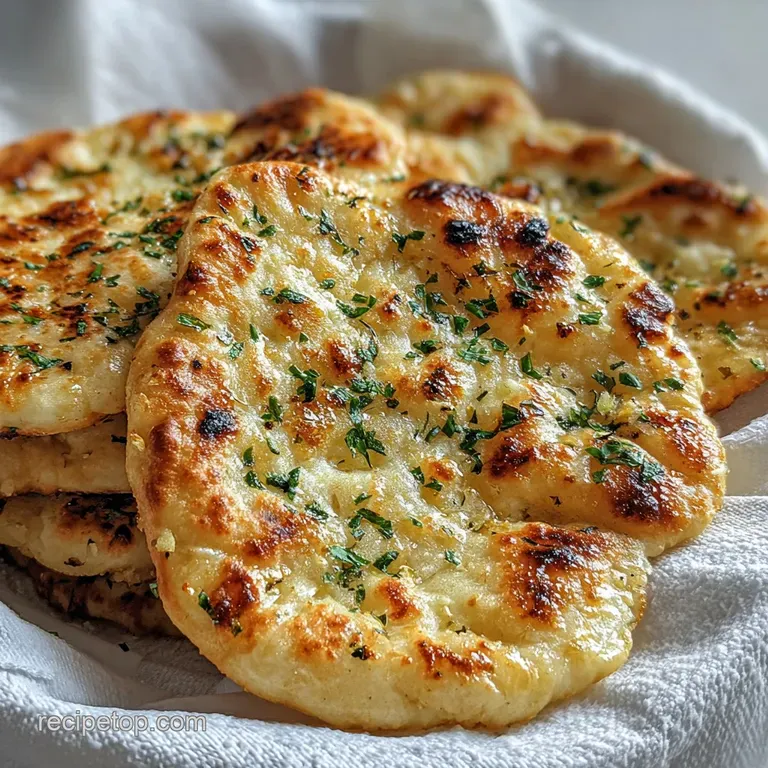
- Flavor/Texture Hook: Pillowy, charred edges with a velvety garlic finish
- Perfect for: Stress free weeknight dinners or a last minute side for soup
- Create the best garlic and butter flatbread recipe for fast weeknight meals
- Understanding the essential specs for this butter flatbread recipe
- Gathering affordable staples for your shopping list breakdown
- Necessary kitchen tools for a smooth flatbread making experience
- Mastering the key steps for soft garlic butter flatbread
- Fixing common issues when your flatbread doesn't go as planned
- Creative ways to mix up your homemade flatbread flavors
- Keeping it fresh with smart storage and reheating methods
- Simple presentation tips to make your flatbread look professional
- Kitchen Myths Debunked
- Recipe FAQs
- 📝 Recipe Card
Create the best garlic and butter flatbread recipe for fast weeknight meals
I remember the first time I tried to make "real" bread. It involved a thermometer, a draft free corner of the kitchen, and four hours of my life that I never got back only for the loaf to come out as hard as a brick. It was a disaster.
I almost gave up on home baking entirely until I stumbled across the magic of yogurt based dough. The first time that dough hit the hot pan and started to sizzle, I knew I’d found a winner.
The aroma of fresh garlic hitting warm butter is basically a love language in my house. There is something so satisfying about watching a flat piece of dough transform into a bubbly, charred masterpiece in under three minutes.
We usually make these when I’ve forgotten to buy bread for dinner, and honestly, we’ve started preferring them over the store-bought stuff anyway. It's the ultimate kitchen win: low effort, high reward, and it makes the whole house smell like a high end bistro.
This specific method is all about efficiency and reliability. We aren't looking for complex artisanal techniques here; we want bread on the table while the main course is still hot.
Whether you're serving this alongside a hearty stew or using it to scoop up dip at a party, it’s a solid, dependable recipe that works every single time. Let's get into the details so you can stop stressing about yeast and start eating.
Understanding the essential specs for this butter flatbread recipe
The secret to this recipe isn't hidden in a fancy technique it's in the way the ingredients interact under high heat. Unlike traditional breads that rely on biological leavening (yeast), we are using a fast acting chemical reaction that happens the moment the heat hits the pan.
The Chemistry of the Yogurt Rise: The lactic acid in the Greek yogurt reacts instantly with the baking powder, creating tiny carbon dioxide bubbles that expand the moment they hit the heat. This bypasses the hours of yeast fermentation while still delivering a soft, pliable crumb.
- Steam Expansion: The high moisture content in the yogurt turns to steam inside the dough, pushing the layers apart to create those signature airy pockets.
- Acidic Tenderization: Lactic acid breaks down the gluten proteins just enough to ensure the bread stays soft and velvety rather than becoming tough and bready.
- Maillard Magic: The proteins and natural sugars in the yogurt accelerate the browning process, giving you those beautiful dark "leopard spots" without overcooking the interior.
- Fat Buffer: The fat from the butter and yogurt coats the flour particles, preventing a rubbery texture and ensuring a tender "shatter" when you bite into the edges.
| Method | Total Time | Texture | Best For |
|---|---|---|---|
| This Quick Version | 20 minutes | Soft and chewy | Weeknight dinners |
| Traditional Yeast | 3 hours | Airy and crusty | Weekend projects |
| Sourdough Flatbread | 12+ hours | Tangy and complex | Advanced bakers |
Choosing the right method depends on your schedule, but for most of us, the 20 minute version provides about 90% of the satisfaction for 10% of the work. It’s a trade off I’m happy to make every single Tuesday night. This pairs so well with a warm bowl of our Crack Corn Casserole recipe if you want a cozy, carb heavy feast.
Gathering affordable staples for your shopping list breakdown
This recipe is built on pantry staples. I’ve found that you don't need the most expensive organic flour to get a great result; the Greek yogurt does most of the heavy lifting when it comes to flavor and texture.
| Component | Science Role | Pro Secret |
|---|---|---|
| All Purpose Flour | Provides the structural framework via gluten. | Weigh it! Scooping with a cup can pack too much flour, leading to dry bread. |
| Greek Yogurt | Acts as the acid for the rise and provides fat for tenderness. | Use full fat for the softest results. low-fat works but is slightly more "bready." |
| Baking Powder | The primary leavening agent. | Ensure it's fresh; if it’s over six months old, the bread won't puff. |
| Unsalted Butter | Adds richness and carries the garlic flavor. | Melt it slowly to avoid burning the milk solids before the garlic infuses. |
The beauty of this list is that you likely have everything in your kitchen right now. If you're out of one thing, don't worry most of these have a budget friendly swap that still gets the job done.
- 250g all purpose flour: Why this? Provides the perfect protein balance for a soft yet chewy flatbread structure. (Swap: 1:1 gluten-free flour blend will be slightly denser).
- 245g plain Greek yogurt: Why this? The acidity reacts with baking powder for an instant, yeast free rise. (Swap: Sour cream adds a richer, tangier flavor).
- 10g baking powder: Why this? Essential for creating air pockets without needing hours of proofing time. (Swap: 1/2 tsp baking soda + 1/2 tsp extra acid but results vary).
- 5g fine sea salt: Why this? Enhances the natural flavors of the flour and yogurt. (Swap: Table salt use slightly less as it's saltier by volume).
- 56g unsalted butter: Why this? Creates a luxurious finish and prevents the garlic from burning. (Swap: Olive oil healthier but lacks that classic dairy richness).
- 3 cloves fresh garlic: Why this? Delivers an intense, aromatic punch that defines the dish. (Swap: 1 tsp garlic powder convenient but less vibrant).
- 1 tbsp fresh parsley: Why this? Adds a pop of color and a fresh, herbal finish to the fat. (Swap: Dried parsley use 1/3 of the amount).
- 1 pinch flaky sea salt: Why this? Adds a crunchy texture and hits the palate first for flavor. (Swap: Kosher salt).
Necessary kitchen tools for a smooth flatbread making experience
You don't need a stand mixer or a pizza oven for this. In fact, I prefer doing this by hand because it’s faster to clean up. A solid heavy bottomed pan is your best friend here.
- Cast Iron Skillet: This is the gold standard for heat retention. It gives those dark, crispy spots that a thin non stick pan just can't manage. If you're looking for a protein to go with this, my Baked Cod with recipe is a winner and can be made while the pan heats up.
- Digital Scale: I’m a stickler for this. 250g of flour is 250g every time on a scale, but in a measuring cup, it can vary by 20% depending on how you scoop.
- Rolling Pin: If you don't have one, a smooth wine bottle works in a pinch. You want the dough thin about 3mm to ensure it cooks through before the outside burns.
- Pastry Brush: For slathering that garlic butter on at the end. If you don't have one, just use the back of a spoon.
Chef's Note: To prevent the dough from sticking to your rolling pin without using too much extra flour, try rolling the dough between two sheets of parchment paper. It keeps things tidy and ensures you don't accidentally dry out the dough with "flour overload."
Mastering the key steps for soft garlic butter flatbread
Getting the dough right is about feel. It should be soft and slightly tacky, but it shouldn't stick to your hands like glue. If it does, a tiny sprinkle of flour will fix it.
- Whisk the dry ingredients. Combine 250g flour, 10g baking powder, and 5g sea salt in a large bowl. Note: Distributing the baking powder evenly prevents "bitter spots."
- Incorporate the yogurt. Add 245g Greek yogurt to the bowl and stir with a fork until a shaggy dough forms.
- Knead briefly. Turn the dough onto a lightly floured surface and knead for 1-2 minutes until smooth and elastic.
- Divide and portion. Cut the dough into 6 equal pieces (roughly 85g each) and roll them into balls.
- Roll it thin. Use a rolling pin to flatten each ball into a circle about 15-18cm wide. Note: Thinner dough equals more bubbles.
- Prep the garlic butter. Melt 56g butter with 3 cloves of minced garlic in a small saucepan over low heat until fragrant and bubbling.
- Heat the pan. Set your skillet over medium high heat for 3 full minutes until a drop of water sizzles and evaporates instantly.
- Cook the first side. Place a dough circle in the dry pan and cook for 1-2 minutes until the surface bubbles and the bottom is charred.
- Flip and finish. Flip the flatbread and cook for another 60 seconds until cooked through and puffy.
- Glaze and serve. Remove from heat and immediately brush with the garlic butter, then sprinkle with parsley and flaky salt.
Fixing common issues when your flatbread doesn't go as planned
Even with a simple recipe, things can go sideways if the heat is off or the yogurt is too watery. Don't panic; most bread issues are easily reversible.
The Dough is Too Sticky to Roll
This usually happens if your yogurt has a higher water content (common with low-fat versions) or if it's a humid day. If the dough is clinging to your fingers and refusing to form a ball, you simply need more structure.
| Problem | Root Cause | Solution |
|---|---|---|
| Sticky Dough | High moisture in yogurt or humidity | Add flour 1 tablespoon at a time until workable |
| Tough Bread | Over kneading or too much flour | Knead only until smooth; keep dough slightly tacky |
| No Bubbles | Pan isn't hot enough | Increase heat and wait for the "water dance" test |
One mistake I once made was adding way too much flour at the start. It resulted in a flatbread that tasted more like a cracker than a soft wrap. Trust the process and keep the flour additions minimal.
Why Your Flatbread is Tough or Rubbery
If your bread feels like a workout for your jaw, you've likely overdeveloped the gluten. Remember, this isn't a sourdough loaf that needs 20 minutes of kneading. You only want to knead it enough to get it smooth.
Common Mistakes Checklist:
- ✓ Stop kneading the moment the dough looks smooth (prevents tough gluten)
- ✓ Use a dry pan - don't add oil to the skillet (prevents frying/greasiness)
- ✓ Keep a clean towel over the cooked flatbreads (traps steam to keep them soft)
- ✓ Mince garlic very fine or use a press (prevents bitter, crunchy raw chunks)
- ✓ Preheat the pan for a full 3-5 minutes before starting
Creative ways to mix up your homemade flatbread flavors
Once you have the base down, you can pivot this recipe to fit almost any cuisine. It’s a versatile canvas that costs pennies to customize.
- The Air Fryer Hack: If you don't want to stand over a stove, you can air fry these at 200°C for about 3-4 minutes per side. They come out a bit crispier, almost like a pita chip, but it's totally hands off.
- The "Everything" Twist: Before rolling, press a tablespoon of "everything bagel" seasoning into the dough. It adds a massive crunch and savory depth that goes great with cream cheese.
- Vegan Substitution: You can use a thick coconut based yogurt and vegan butter. Just make sure the yogurt isn't sweetened, or you'll end up with a very strange tasting dinner.
- Whole Grain Fiber Boost: Swap 50g of the white flour for whole wheat flour. It adds a nutty flavor, though you might need an extra teaspoon of yogurt to compensate for the higher absorption.
Choosing Your Best Cooking Path
| Goal | Adjustment | Outcome |
|---|---|---|
| Extra Soft | Use Sour Cream instead of Yogurt | Richer, more tender crumb |
| Crispy/Crunchy | Roll thinner and add 1 tsp oil to pan | Fried, taco shell texture |
| Lower Calorie | Brush with olive oil instead of butter | Lighter feel, less dairy flavor |
Keeping it fresh with smart storage and reheating methods
These are definitely best eaten within minutes of leaving the pan, but they do keep surprisingly well if you handle them right. The key is preventing them from drying out and turning into cardboard.
- Fridge
- Store in an airtight bag for up to 3 days. I like to put a piece of parchment paper between them to prevent sticking.
- Freezer
- These freeze beautifully! Wrap individual flatbreads in plastic wrap, then place them in a freezer bag for up to 2 months.
- Zero Waste Tip
- If you have leftover garlic butter, don't toss it. Toss it with some steamed broccoli or use it to sauté mushrooms the next night. You can also use any leftover dough scraps to make "mini bites" for kids just fry them like little donuts and toss in cinnamon sugar.
Reheating for Success: Never use the microwave if you can help it; it makes the bread chewy in a bad way. Instead, pop them back into a dry, hot skillet for 30 seconds per side. If they've dried out a bit, sprinkle a few drops of water on them before heating the steam will revive the interior.
Simple presentation tips to make your flatbread look professional
You’ve put in the work (even if it was only 20 minutes), so make it look like it. The way you serve these can turn a simple side into the star of the table.
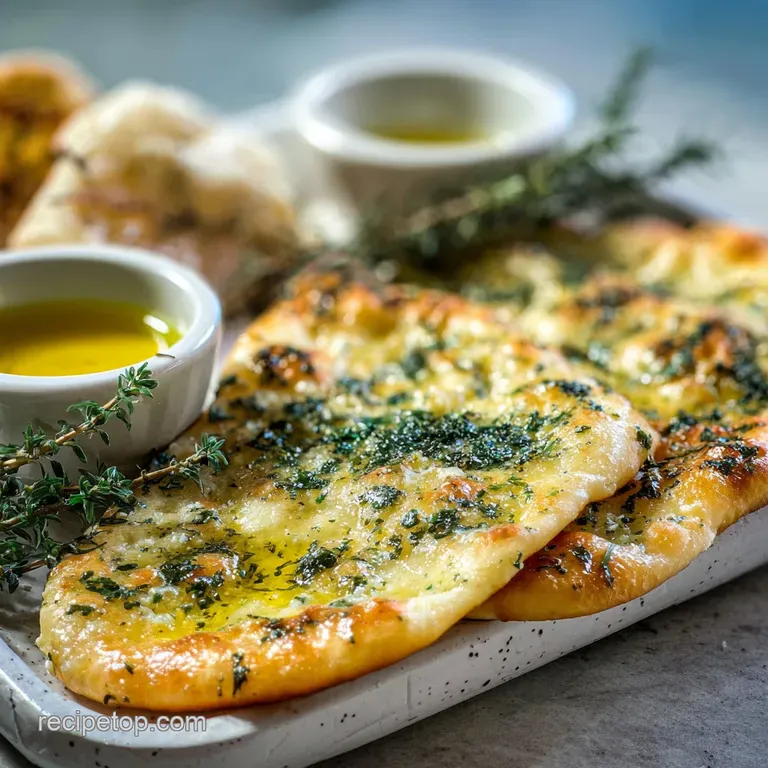
The "Stack Effect" is my favorite way to serve these. Pile them high on a wooden board and let the garlic butter drip down the sides of the stack. It keeps the bottom ones warm and looks incredibly rustic.
Garnish with a final sprinkle of fresh parsley and a heavy hand of that flaky sea salt right before guests sit down. The salt crystals catching the light makes them look much more expensive than they actually are.
For a Mediterranean vibe, serve them alongside a bowl of hummus drizzled with olive oil and a few olives. If you're feeling fancy, you can even cut them into triangles using a pizza cutter. It’s a small touch, but it makes them much easier for dipping.
Honestly, just having a warm stack of bread in the center of the table changes the whole mood of a meal it’s communal, comforting, and smells like heaven.
Kitchen Myths Debunked
Myth: You must let the dough rest for at least an hour. Actually, with yogurt based dough, resting is optional. While a 10 minute rest can make the dough slightly easier to roll by relaxing the gluten, the chemical leavening starts working immediately.
If you're in a rush, you can go from mixing to frying in five minutes flat.
Myth: You need a high protein bread flour for flatbread. In this case, all purpose flour is actually superior. We aren't looking for the massive structural strength required for a tall loaf of bread. AP flour keeps the flatbread tender and easy to tear, which is exactly what you want for dipping.
Myth: Searing at high heat will burn the inside while leaving the outside raw. Because we roll these so thin (3-5mm), the heat penetrates to the center almost instantly. The high heat is necessary to create the steam pressure that causes the bread to puff up.
If you cook them on low heat, they will just dry out and become tough.

Recipe FAQs
Can I substitute regular yogurt for Greek yogurt in this recipe?
No, stick with Greek yogurt or sour cream. Regular yogurt often contains too much whey, which leads to a wetter, stickier dough that is difficult to handle and results in a tougher flatbread.
How to know when my cast iron skillet is hot enough before cooking the dough?
Test by dropping a bead of water onto the surface. The water should instantly sizzle violently and evaporate completely within one second; if it just sits there, the pan is too cold.
How to achieve the softest texture if my flatbread came out slightly chewy?
Stop kneading the dough sooner next time. Overworking the flour develops too much gluten, resulting in toughness. If you enjoyed mastering the sensory doneness cues here for high heat cooking, apply that same gentle touch to our Lemon Garlic Spaghetti recipe for perfect texture control.
Is it true that I must use fresh garlic for the butter topping?
No, but fresh is highly recommended for flavor. Garlic powder works as a backup if needed, but you must use significantly less (about 1/3 the volume) to prevent a harsh, bitter taste.
How long can I safely prepare the dough in advance?
Yes, you can chill the dough for up to 24 hours. Wrap the entire ball of dough tightly in plastic wrap and refrigerate; allow it to sit at room temperature for 30 minutes before rolling to make it easier to handle.
How to tell if my baking powder is still active for a good puff?
Test a teaspoon of baking powder in hot water. If it fizzes vigorously and immediately, it is active; if it barely bubbles, replace it, as old powder results in flat, dense bread.
What can I serve with these flatbreads besides soup?
Yes, they are excellent for dipping and scooping. They pair wonderfully with creamy dips or hearty cheese bakes. For a complete party spread, try using them to scoop our famous Buffalo Chicken Dip recipe.
Garlic Butter Flatbread Recipe

Ingredients:
Instructions:
Nutrition Facts:
| Calories | 261 calories |
|---|---|
| Protein | 8.1g |
| Fat | 10.0g |
| Carbs | 34.3g |
| Fiber | 1.3g |
| Sugar | 1.8g |
| Sodium | 512mg |
