Sesame Chicken: the Perfect Crunch Recipe
- Time: Active 20 minutes, Passive 15 minutes, Total 35 minutes
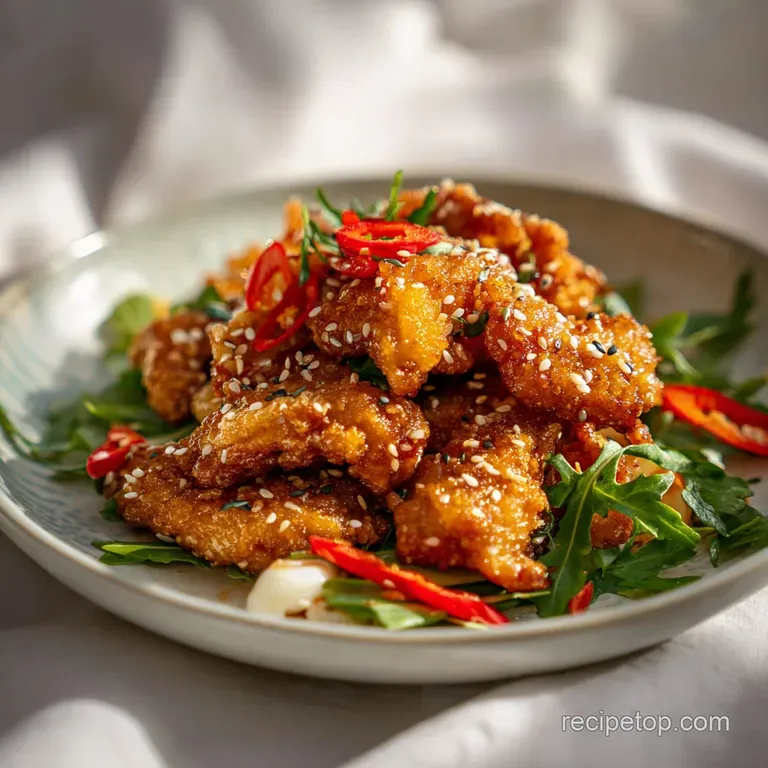
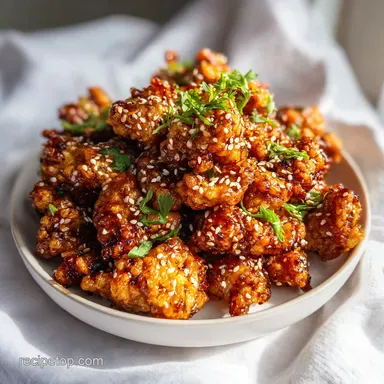
- Flavor/Texture Hook: Shaggy, ultra crispy crust with a velvety, honey garlic glaze
- Perfect for: Busy weeknights or a budget-friendly family "fakeaway" night
- Achieving The Sesame Chicken Perfect Crunch Recipe
- Essential Kitchen Statistics
- Choosing The Best Ingredients
- Picking The Right Equipment
- The Master Execution Guide
- Mastering The Final Texture
- Clever Variations and Tweaks
- Safe Storage Guidelines
- Mastering Scaling and Proportions
- Perfect Side Dish Pairings
- CRITICAL: Very High in Sodium
- Recipe FAQs
- 📝 Recipe Card
Achieving The Sesame Chicken Perfect Crunch Recipe
The air in a busy Chinese kitchen carries a specific, heavy perfume a mix of toasted seeds, sharp ginger, and the metallic tang of a seasoned wok. It's a scent that reminds me of the first time I sat at a Formica table in a small shop downtown, watching the steam rise off a plate of glossy, golden chicken.
That dish wasn't just food; it was a masterclass in textures. The way the sauce clung to the craggy edges without making them soggy was a revelation to me. I spent years trying to figure out how to get that specific "shatter" at home without a commercial deep fryer.
For many of us, sesame chicken is the ultimate comfort food, a bridge between traditional Cantonese techniques and the sweet, bold flavors of American Chinese cuisine. It’s a dish that demands balance.
You want the honey to be present but not cloying, the vinegar to provide a bright zing, and most importantly, you want the chicken to stay crispy until the very last bite. If you've ever ended up with a pile of rubbery meat sitting in a pool of watery syrup, you know how frustrating it can be.
We’re going to fix that today by focusing on the structure of the coating and the timing of the glaze.
We are going for a result that is efficient, family friendly, and uses ingredients you likely already have in the back of your cupboard. There’s no need for expensive, specialized oils or complicated gadgets.
This is about working smart with what we have to create something that feels like a weekend treat on a Tuesday night budget. Trust me, once you hear that first crunch, you’ll never look at a takeout menu the same way again.
Essential Kitchen Statistics
When we talk about the sesame chicken perfect crunch recipe, precision is our best friend. We aren't just tossing things into a pan; we are managing moisture and heat to create a specific structural outcome.
The chicken needs to hit that sweet spot where it’s cooked through but remains succulent, while the starch needs enough heat to fully dehydrate and crisp up.
How the Crust Stays Rigid
- Starch Hybridization: Using cornstarch alongside flour creates a more brittle, "shattery" crust than flour alone, which tends to be bread like.
- The Leavening Lift: Baking powder introduces tiny air bubbles into the coating, increasing the surface area for the sauce to cling to without weighing down the meat.
- Protein Protection: The egg white in the marinade creates a thin, alkaline barrier that keeps the chicken fibers from tightening and becoming tough during the over high heat fry.
- Glaze Reduction: Simmering the sauce until it reaches a "syrupy" state ensures it coats the chicken like a lacquer rather than soaking into the breading.
| Method | Time | Texture | Best For |
|---|---|---|---|
| Stovetop Fry | 15 minutes | Maximum shatter crisp | Authentic takeout results |
| Oven Bake | 25 minutes | Firm and crunchy | Lower oil consumption |
| Air Fryer | 18 minutes | Evenly browned | Hands off convenience |
If you’re looking for another 35 minute winner, my creamy orzo chicken recipe is a great one pan alternative that hits similar comfort levels with a different texture profile. It's all about finding those reliable weeknight staples that don't require you to spend hours over the stove.
Component Deep Dive
| Ingredient | Science Role | Pro Secret |
|---|---|---|
| Cornstarch | Moisture absorption | Use "shaggy" dredging for extra surface area. |
| Honey | Caramelization | Simmer until bubbles turn slow and thick for best adhesion. |
| Baking Powder | Aeration | Don't skip this; it prevents the coating from becoming a "brick." |
| Egg White | Binding | Whisk until frothy to ensure even distribution over the meat. |
Choosing The Best Ingredients
We are keeping things budget friendly here, but that doesn't mean we compromise on the "why." Every item in this list has a job to do. I’ve found that using chicken thighs is the single best move for a home cook.
They are more forgiving than breasts and stay juicy even if you accidentally leave them in the oil for an extra minute.
- 1.5 lbs chicken thighs, cut into 1 inch pieces: Thighs provide the fat needed for flavor and the durability to stand up to high heat.
- 1 tbsp soy sauce (for marinade): This seasons the meat from the inside out.
- 1 tbsp Shaoxing wine: This is the secret to that "restaurant" smell. If you don't have it, dry sherry is a perfect swap.
- 1 tsp toasted sesame oil: A little goes a long way for that nutty aroma.
- 1 egg white, lightly beaten: The glue for our starch layer.
- 1 cup cornstarch: The primary source of the "crunch."
- 1/2 cup all purpose flour: Provides the structural backbone so the cornstarch doesn't just flake off.
- 1 tsp baking powder: Creates a light, bubbly texture.
- 1/2 tsp sea salt & 1/2 tsp white pepper: White pepper provides a subtle heat without the black specks.
- 1/4 cup honey: The base of our sticky glaze.
- 3 tbsp soy sauce (for sauce): For that deep, umami saltiness.
- 2 tbsp rice vinegar: Adds the necessary acidity to cut through the sugar.
- 1 tbsp ketchup: It sounds weird, but it adds body, color, and a hit of tomato based acidity.
- 1 tsp sriracha: Just enough for a tiny kick, but you can add more if you’re brave.
- 2 cloves garlic, minced & 1 tsp fresh ginger, grated: The aromatic foundation.
| Original Ingredient | Substitute | Why It Works |
|---|---|---|
| Shaoxing Wine | Dry Sherry | Similar dry, fermented profile that cuts through fat. |
| Honey | Brown Sugar | Adds a deep molasses note, though less "floral" than honey. |
| Rice Vinegar | Apple Cider Vinegar | Similar acidity level, though slightly fruitier. |
Picking The Right Equipment
You don't need a high end wok to make this sesame chicken perfect crunch recipe work. In fact, for most home stovetops, a heavy bottomed skillet or a Dutch oven is actually better because they retain heat more effectively than thin walled woks.
When you drop cold chicken into the oil, you want that temperature to stay as steady as possible.
A spider strainer or a slotted spoon is essential for safely removing the chicken from the oil. You also want to have a wire cooling rack set over a baking sheet ready. If you put the fried chicken directly onto paper towels, the steam gets trapped underneath and turns your beautiful crispy crust into a soggy mess.
The wire rack allows air to circulate around the entire piece of chicken, keeping it dry and firm while you finish the sauce.
While this is a classic stir fry, sometimes we crave a wrap, like this Chipotle ranch chicken burrito which uses similar protein prep but takes it in a completely different flavor direction. Both rely on getting that chicken texture just right before moving to the final assembly.
The Master Execution Guide
- Marinate the chicken: Whisk the egg white, 1 tbsp soy sauce, and 1 tsp sesame oil in a medium bowl. Toss your chicken pieces in and let them sit for 10 minutes. Note: This "velveting" process protects the protein from the harsh heat.
- Mix the coating: In a large bowl or a zip top bag, whisk together the cornstarch, flour, baking powder, salt, and white pepper.
- Dredge the meat: Add the marinated chicken to the starch mixture. Press firmly so the coating sticks. Look for "shaggy" bits of starch hanging off the meat; those become the extra crunchy parts.
- Heat the oil: Fill a heavy pot with about 5 cm (2 inches) of neutral oil. Heat it to 175°C (350°F).
- First fry: Carefully drop the chicken in batches. Fry for 3 to 5 minutes until the coating is pale golden and firm to the touch.
- Drain the chicken: Remove with a slotted spoon and place on a wire rack. Don't crowd them!
- Build the glaze: In a wide skillet, whisk together the honey, 3 tbsp soy sauce, rice vinegar, ketchup, sriracha, garlic, and ginger.
- Thicken the sauce: Simmer over medium heat for about 2 to 3 minutes until the glaze looks thick and glossy.
- The final toss: Add the fried chicken to the bubbling sauce. Toss quickly for 30 seconds to coat every nook and cranny.
- Serve immediately: Garnish with sesame seeds and green onions. The sooner you eat it, the better the crunch will be.
Mastering The Final Texture

One of the biggest hurdles with this dish is maintaining that "shatter" once the sauce is applied. Sugar based glazes are hygroscopic, meaning they love to pull moisture out of the air and the chicken itself. If you let the chicken sit in the sauce too long, the crust will soften.
The goal is to lacquer the chicken, not drown it.
The Problem of Sogginess
If your chicken comes out soft, it’s usually one of two things: either your oil wasn't hot enough, or you put too much sauce on. If the oil is below 175°C, the starch absorbs the fat instead of crisping up. If you find your sauce is too thin, keep simmering it until it reduces further.
It should be the consistency of warm maple syrup before the chicken ever touches it.
| Problem | Root Cause | Solution |
|---|---|---|
| Coating falling off | Meat was too wet | Pat chicken dry before the initial marinade. |
| Tough, dry meat | Overcooked | Use a meat thermometer to pull chicken at 74°C. |
| Greasy texture | Oil temp dropped | Fry in smaller batches to keep the heat up. |
Common Mistakes Checklist
- ✓ Check oil temperature with a thermometer before every batch.
- ✓ Use a wire rack instead of paper towels for draining.
- ✓ Simmer the sauce until it's thick enough to coat a spoon.
- ✓ Don't skip the baking powder it's the key to the light texture.
- ✓ Toss the chicken in the sauce at the very last second before serving.
Clever Variations and Tweaks
This sesame chicken perfect crunch recipe is a great canvas for your own creativity. While the classic version is hard to beat, sometimes you want to mix it up based on what's in the pantry or your family's preferences.
Since this is a budget smart recipe, don't feel like you have to run to the store if you’re missing one specific aromatic.
For a spicy twist, you can double the sriracha or add a teaspoon of crushed red pepper flakes to the sauce. If you want something brighter, zest a whole orange into the glaze and swap half the rice vinegar for fresh orange juice. This turns it into a hybrid Orange Sesame chicken that kids absolutely love.
Decision Shortcut List
- If you want a thicker crust: Dip the chicken back into the egg wash after the first dredging, then dredge a second time in the starch.
- If you want it healthier: Lightly spray the dredged chicken with oil and air fry at 200°C for 15-18 minutes, shaking the basket halfway through.
- If you want it vegan: Use extra firm tofu that has been pressed for 30 minutes. Swap the honey for agave or maple syrup.
Safe Storage Guidelines
Leftover sesame chicken is a bit of a polarizing topic. Some people love the cold, slightly chewy texture the next day, while others demand that original crunch. Because of the honey and starch, the coating will naturally soften in the fridge.
To store it, let it cool completely before putting it in an airtight container. It will stay safe in the fridge for up to 3 days.
When it comes to reheating, avoid the microwave at all costs. The microwave will turn the chicken into a rubbery, soggy mess. Instead, use an oven or air fryer. Reheat at 180°C for about 5 to 7 minutes.
This will help re crisp the exterior and melt the glaze back into a glossy coating.
For a zero waste tip, don't toss the leftover sauce if you have any in the pan. You can toss it with some leftover cold noodles and a splash of hot water for a quick "sesame noodle" lunch the next day. Also, if you have ginger and garlic scraps, toss them into a freezer bag for making your own chicken stock later.
Mastering Scaling and Proportions
If you are cooking for a larger crowd, doubling this recipe is straightforward, but you need to be careful with the starch and oil. If you double the chicken to 3 lbs, don't just double the salt and pepper; start with 1.5 times the amount and taste your sauce. Spices can become overwhelming when scaled up linearly.
When frying in large batches, you must give the oil time to come back up to temperature between sets. If you rush it, the second batch will be greasy. Use a large Dutch oven to hold the finished chicken in a warm oven (around 90°C) while you finish the rest.
This keeps everything hot without further cooking the meat.
Kitchen Myths Debunked
One common misconception is that you need a lot of oil to get things crispy. You actually only need enough for the chicken to float. Another myth is that "velveting" is only for stir fry; as we see here, it's the secret to keeping fried chicken from drying out.
Finally,, many people think you have to use "sushi rice" vinegar. Any basic white vinegar will work in a pinch, though you might need a tiny pinch more sugar to balance the sharper bite.
Perfect Side Dish Pairings
The best thing to serve with this sesame chicken perfect crunch recipe is something that can soak up any extra glaze. A simple bowl of steamed jasmine rice is the gold standard.
For a low carb option, cauliflower rice works surprisingly well because it has a neutral flavor that doesn't compete with the honey and ginger.
To balance the richness of the fried chicken, I always serve a bright, green vegetable. Steamed broccoli is the classic choice the florets are like little sponges for the sauce.
Alternatively, a quick slaw made from shredded cabbage, carrots, and a splash of rice vinegar provides a refreshing crunch that cuts through the sweetness of the glaze. If you have some toasted sesame seeds and sliced scallions, don't be shy with the garnish; they add a final layer of texture and visual appeal that makes the dish look like it came straight from a restaurant kitchen.

CRITICAL: Very High in Sodium
1645 mg 1645 mg (72% 72%)
The American Heart Association recommends a daily sodium intake of no more than 2,300mg.
Tips to Reduce Sodium
-
Low-Sodium Soy Sauce-25%
Replace the total 4 tablespoons of soy sauce with a low-sodium version. This is the biggest contributor to the recipe's high sodium content.
-
Reduce Added Salt-20%
Omit the 1/2 teaspoon of sea salt entirely. You can always add a pinch more later if needed after tasting.
-
Low-Sodium Sriracha-10%
If available, use a low-sodium sriracha or opt for a smaller amount if regular sriracha is your only option, as it contributes to sodium.
-
Boost with Herbs & Spices
Enhance flavor by using more fresh ginger, garlic, and white pepper. Consider adding other fresh or dried herbs like cilantro or scallions for a flavor lift without sodium.
-
Low-Sodium Ketchup-5%
Look for a low-sodium ketchup or use a smaller amount to reduce the overall sodium in the sauce.
Recipe FAQs
Is it true I can use regular flour for the coating?
No, this is a common misconception. You must use the listed blend of cornstarch and flour to achieve the signature light, airy crunch; using only flour will result in a heavy, bready texture.
How to keep the chicken crispy after saucing?
Toss the fried chicken in the sauce at the very last second before serving. Letting the chicken sit in the glaze too long will inevitably soften the crispy coating, so serve it immediately for the best texture.
How to ensure the chicken reaches perfect doneness?
Fry the pieces for 3 5 minutes at 350°F until pale golden. If you enjoyed mastering this precise oil temperature control, you can apply the same principle to our Garlic Mongolian Beef to ensure your protein is seared perfectly without overcooking.
Why is my chicken coating falling off in the oil?
Press the coating firmly into the meat during the dredging process. Ensure you create shaggy edges with the cornstarch flour mixture, as this adhesion is crucial for keeping the breading intact during the flash fry.
How to tell if the sauce is ready for the chicken?
Simmer the sauce until it is thick enough to coat the back of a spoon. Testing the viscosity this way ensures the glaze clings to the chicken pieces rather than pooling at the bottom of your serving dish.
How to drain the chicken without losing crunch?
Place the fried chicken on a wire rack rather than on paper towels. Paper towels trap steam underneath the chicken, which quickly softens the crust; a wire rack allows for proper airflow on all sides.
Is baking powder necessary for the crust?
Yes, the baking powder is essential for the light, crispy texture. It reacts during the frying process to create small air pockets in the coating, which is the primary secret behind that professional grade crunch.
Crispy Sesame Chicken Recipe
Ingredients:
Instructions:
Nutrition Facts:
| Calories | 524 calories |
|---|---|
| Protein | 36.4g |
| Fat | 14.9g |
| Carbs | 57.5g |
| Fiber | 1.2g |
| Sugar | 19.8g |
| Sodium | 1645mg |
