
Imagine sitting down to a meal that feels like it’s straight from a high-end restaurant, yet you made it in your own kitchen. That’s the magic of a perfectly cooked Rib Eye Roast Beef Recipe .Whether you’re hosting a special occasion or simply craving a gourmet dinner, this recipe delivers tender, juicy results every time.
What makes this dish stand out is its simplicity. Even if you’re new to cooking, you’ll find the step-by-step guidance easy to follow. The key lies in locking in the natural juices and enhancing the flavor with the right seasoning. It’s a foolproof way to impress your family or guests.
From the essential equipment like a roasting pan to the precise cooking temperatures, every detail is covered. This recipe ensures your prime rib turns out perfectly every time, making it a go-to for any special meal.
Introduction to a Gourmet Rib Eye Roast Experience
There’s something magical about transforming a simple cut of meat into a gourmet masterpiece. The aroma of garlic and fresh herbs fills the air as the oven works its magic, turning raw ingredients into a dish that’s both elegant and deeply satisfying.
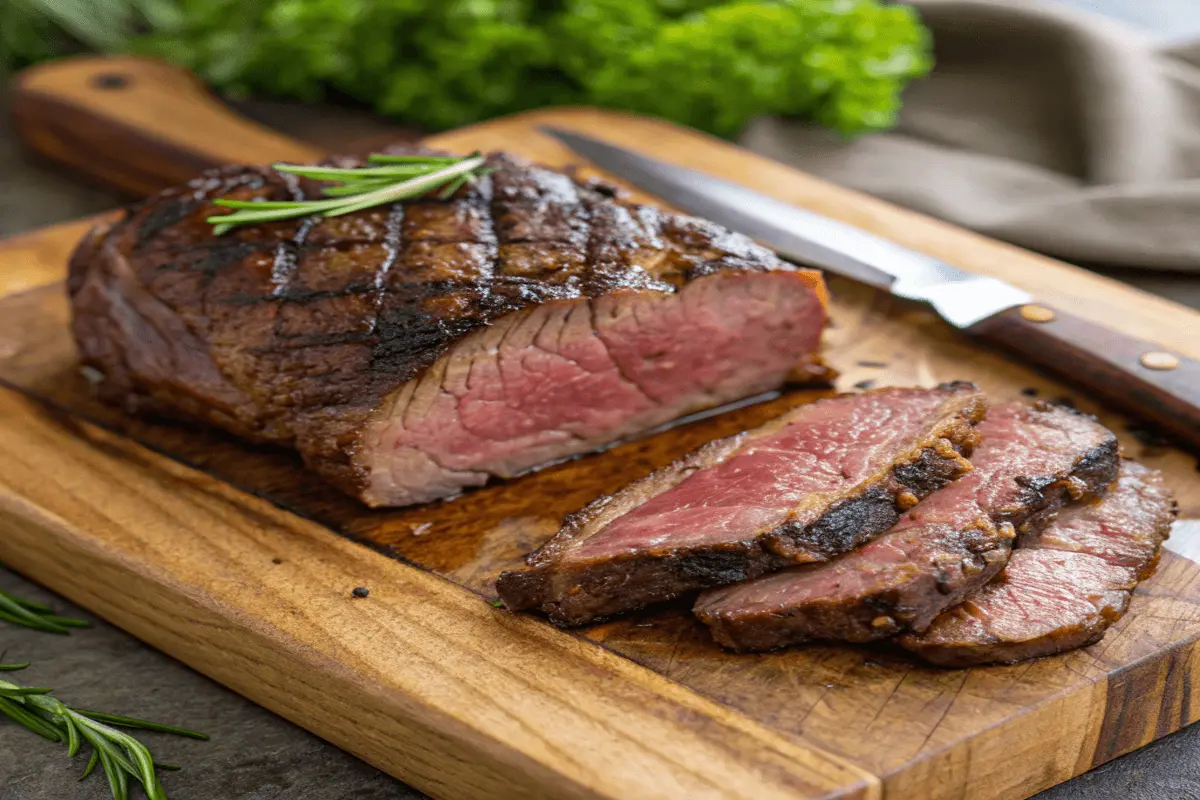
Picture this: a golden-brown roast, perfectly seasoned with butter and herbs, resting in your pan. The sizzle as it cooks is a symphony of flavor, promising a meal that’s as memorable as it is delicious. Whether it’s a holiday feast or a cozy family dinner, this dish brings people together.
Key to this experience is precision. Monitoring the internal temperature ensures your prime rib is cooked to perfection. A few extra minutes of patience can make all the difference, allowing the juices to redistribute for maximum tenderness.
One of the joys of cooking is the journey. From prepping the ingredients to resting the meat, every step is an opportunity to craft something extraordinary. So, roll up your sleeves, embrace the process, and get ready to create a meal that’s as rewarding to make as it is to eat.
Essential Ingredients and Cooking Tools
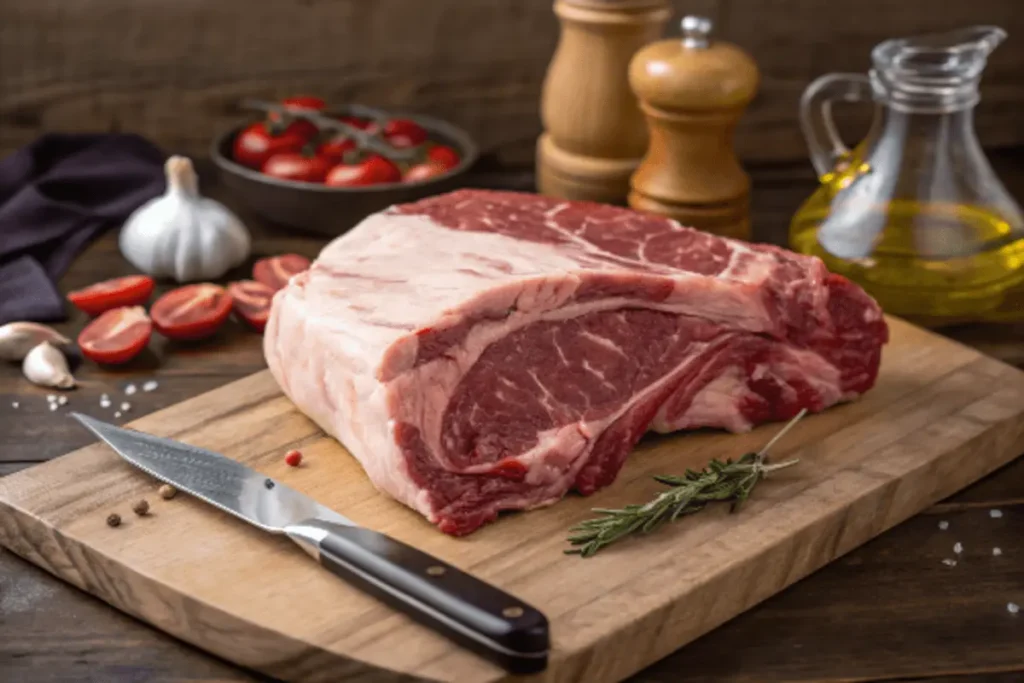
The secret to a perfect meal lies in the ingredients and tools you choose. Start with a high-quality rib roast from a trusted butcher. This ensures the meat is fresh and well-marbled, which is key to a juicy result.
Next, gather your seasonings. Kosher salt and freshly ground pepper are must-haves. They enhance the natural flavor of the meat. Add butter and fresh herbs like rosemary or thyme for an aromatic touch.
Your roasting pan is just as important. Choose a sturdy one that distributes heat evenly. Pair it with a reliable meat thermometer to monitor the internal temperature accurately. This prevents overcooking and ensures a tender finish.
Don’t forget the basics: a sharp knife, a durable cutting board, and a rack for even airflow. These tools make prepping and carving easier. Investing in quality equipment sets the foundation for a successful recipe.
Finally, consider the size of your roast. A 3-pound cut serves 6-8 people, while a 5-pound one can feed up to 8. Plan ahead to ensure you have enough for everyone. With the right ingredients and tools, you’re ready to create a meal that’s both flavorful and memorable.
Prepping Your Roast for Perfection
The foundation of a mouthwatering meal starts with proper preparation. Begin by letting your meat come to room temperature. This ensures even cooking and a tender result. Pat the surface dry with paper towels to remove excess moisture, which helps create a beautiful sear.
Next, prepare a mixture of melted butter, minced garlic, and your favorite herbs. Brush this generously over the entire surface of the meat. The butter adds richness, while the garlic infuses deep flavor.
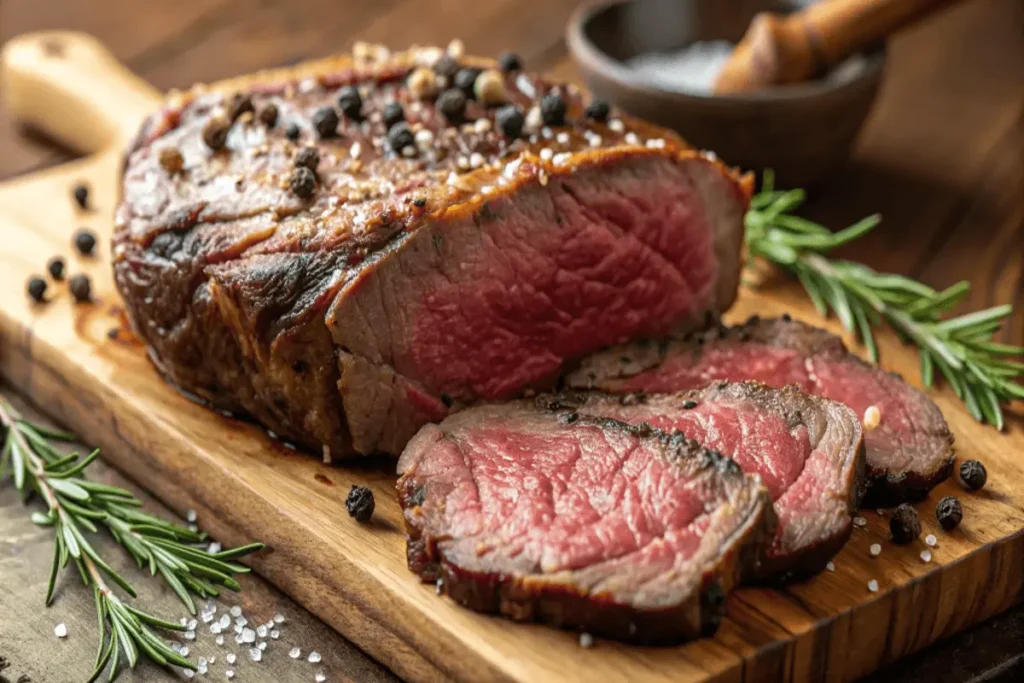
Season the meat generously with salt and freshly ground pepper. For an extra layer of flavor, add Italian seasonings or fresh rosemary. Make small cuts into the surface to allow the seasoning to penetrate deeply.
Place the meat on a rack in your roasting pan. This elevates the meat, allowing heat to circulate evenly. Preheat your oven to the recommended temperature before placing the meat inside. This step is crucial for achieving a perfectly cooked result.
Take your time with each step. Proper prep sets the stage for an exceptional dish. Once everything is ready, you’re one step closer to a flavorful and tender meal that will impress everyone at the table.
Mastering the rib eye roast beef recipe: Step-by-Step Cooking Instructions
Cooking a gourmet meal at home doesn’t have to be complicated—mastering the right techniques can make all the difference. Follow these steps to achieve a perfectly cooked dish that’s tender, juicy, and full of flavor.
Initial Sear to Lock in Juices
Start by preheating your oven to 450°F. This high heat is essential for creating a flavorful crust. Pat the meat dry with paper towels to ensure a good sear. Rub it generously with melted butter and minced garlic for added richness.
Place the roast in the oven for 20 minutes. This initial sear locks in the juices and creates a golden-brown exterior. Avoid opening the door during this time to maintain consistent heat.
Transitioning to Low-Heat Roasting
After the sear, reduce the oven temperature to 250°F. This lower heat allows the meat to cook evenly and retain its moisture. Use a meat thermometer to monitor the internal temperature accurately.
For a 3-pound roast, cook for about 1.5 hours. Adjust the time based on the weight—approximately 20 minutes per pound. Aim for an internal temperature of 125°F for medium-rare or 130°F for medium.
Remember, patience is key. Avoid frequent checks to keep the heat stable. This method ensures a tender and flavorful result every time.
Achieving Juicy, Tender Meat Through Resting
The final step to a perfect meal is often overlooked but makes all the difference. After removing your meat from the oven, let it rest. This simple step ensures the juices redistribute, resulting in a tender and flavorful dinner.
Resting allows the fibers in the meat to relax. Cutting into it too soon can cause the juices to escape, leaving you with a dry cut. For best results, cover the roast loosely with foil and let it rest for 15-30 minutes.
During this time, the internal temperature will rise slightly, ensuring even cooking. Use a thermometer to monitor the temperature. This step is crucial for achieving the perfect texture and flavor.
Place the meat on a cutting board or rack to allow airflow. Avoid placing it directly on a cold surface, as this can cool it too quickly. A few extra minutes of patience can transform your dinner into a memorable experience.
Here’s a quick guide to resting times based on size:
| Weight (Pounds) | Resting Time (Minutes) |
|---|---|
| 2-3 | 15-20 |
| 4-5 | 25-30 |
Resting also improves the presentation. When you finally carve the meat, it will hold its shape better, making it ideal for serving. Pair it with your favorite sauce or side dishes for a complete meal.
Remember, this step is just as important as cooking. A little extra time ensures every bite is juicy and full of flavor. Follow this tip, and your dinner will be a hit every time.
Carving Your Roast: Tips and Techniques
Carving your meal is an art that transforms a great dish into a memorable experience. The way you slice and serve your creation can elevate its flavor and presentation. With the right techniques, you’ll ensure every bite is tender and visually appealing.
Slicing Against the Grain
One of the most important steps is slicing against the grain. This technique ensures each piece is tender and easy to chew. Start by identifying the direction of the muscle fibers in your meat. Then, cut perpendicular to those fibers for the best results.
Use a sharp carving knife for clean, smooth cuts. A dull knife can tear the meat, making it less appealing. For consistent thickness, aim for slices about ¼ to ½ inch thick. This not only looks professional but also ensures even flavor distribution.
Presentation and Serving Suggestions
Presentation is key to making your meal stand out. Arrange the slices neatly on a platter, overlapping them slightly for a polished look. Use the rack as a serving aid to keep the meat elevated and visually appealing.
Pair each slice with complementary side dishes and sauces. Classic options like garlic butter or herb-infused sauces add an extra layer of flavor. For a festive touch, garnish with fresh herbs like rosemary or thyme.
Here are a few quick tips for perfect presentation:
- Carve after the resting period to retain juices.
- Use a sturdy cutting board to stabilize the meat.
- Keep your knife sharp for smooth, effortless cuts.
By following these tips, you’ll create a meal that’s as beautiful as it is delicious. For visual guidance, consider reviewing video tutorials to master the carving process.
Enhancing Flavor with Garlic, Butter, and Herbs
Unlock the full potential of your dish with the perfect blend of garlic, butter, and herbs. These ingredients work together to create a rich, aromatic experience that elevates your meal to gourmet status.
Garlic adds a robust, savory depth to your dish. When combined with melted butter, it creates a flavorful crust that locks in moisture. Fresh herbs like rosemary or thyme bring a touch of complexity, enhancing the natural taste of the meat.
To incorporate these ingredients, start by preparing a mixture of minced garlic, melted butter, and chopped herbs. Brush this generously over the surface of your meat before cooking. This step ensures every bite is packed with flavor.
Seasoning is equally important. Use salt and freshly ground pepper to enhance the natural flavors. For a balanced taste, apply these seasonings evenly across the surface. Avoid over-seasoning, as it can overpower the dish.
Here’s a quick guide to ingredient quantities for a 3-pound roast:
| Ingredient | Quantity |
|---|---|
| Garlic (cloves) | 4 |
| Butter (tablespoons) | 4 |
| Fresh Herbs (tablespoons) | 2 |
| Salt (teaspoons) | 1 |
| Pepper (teaspoons) | 1 |
For visual learners, video tutorials can help you master the seasoning process. These resources provide step-by-step guidance, ensuring you achieve the perfect balance of flavor.
Adjust the seasoning based on your preferences. If you enjoy a stronger garlic taste, add an extra clove. For a milder flavor, reduce the amount of herbs. Experimentation is key to finding your ideal combination.
Remember, the goal is to enhance, not overpower. The right balance of garlic, butter, and herbs can transform a simple dinner into a memorable, gourmet experience.
Side Dishes to Complement Your Roast
A great meal isn’t complete without the perfect sides to enhance its flavors. The right accompaniments can elevate your dinner, creating a balanced and satisfying experience. From hearty potatoes to fresh seasonal vegetables, these dishes add texture and depth to your plate.
Hearty Potatoes and Vegetables
Roasted potatoes are a classic choice that pairs beautifully with your main dish. Toss them in olive oil, garlic, and fresh herbs for a crispy, flavorful result. Seasonal vegetables like asparagus, Brussels sprouts, or butternut squash also make excellent additions. Roast them in the oven at 400°F for 20-30 minutes, depending on the vegetable.
For a healthier option, try grilled zucchini or green beans. These lighter sides balance the richness of the meat, creating a harmonious meal. Use the same roasting pan to save time and infuse the vegetables with the main dish’s flavors.
Classic Gravy and Horseradish Sauce Options
No roast is complete without a rich, savory gravy. Use the drippings from your cooking process to create a homemade version. Add a splash of broth and a tablespoon of butter for extra richness. For a tangy twist, serve horseradish sauce on the side. Its sharp flavor cuts through the richness, adding a delightful contrast.
These sauces are simple to prepare and can be made while your meat rests. Serve them in small bowls or drizzle directly over the dish for added flavor. Pairing these classic options with your dinner ensures every bite is memorable.
Experiment with different combinations to find your favorite. Whether you prefer hearty potatoes or fresh vegetables, the right sides can transform your meal into an unforgettable experience.
Using the Right Equipment: Roasting Pan and Meat Thermometer
The right tools can turn a good meal into a masterpiece. A sturdy roasting pan and a reliable thermometer are essential for achieving a perfectly cooked dish. These tools simplify the process and ensure consistent results every time.
A high-quality roasting pan distributes heat evenly, preventing hot spots that can lead to uneven cooking. Pair it with a rack to elevate the meat, allowing air to circulate for a crispy exterior. This setup is key to creating a golden-brown crust.
Monitoring the internal temperature is crucial for precision. A digital thermometer gives you real-time readings, ensuring your dish is cooked to the desired doneness. For medium-rare, aim for an internal temperature of 125°F to 130°F.
Preheating your oven is another critical step. A properly calibrated oven ensures consistent heat, which is vital for even cooking. Avoid opening the door frequently, as this can cause temperature fluctuations.
Here are a few tips to get the most out of your equipment:
- Choose a heavy-duty roasting pan for durability.
- Invest in a digital thermometer for accurate readings.
- Preheat your oven for at least 15 minutes before cooking.
If your thermometer readings seem off, check its calibration. A quick test in boiling water can confirm its accuracy. For visual guidance, follow video tutorials that demonstrate best practices.
Using the right tools not only simplifies the process but also elevates your meal to a professional level. With a sturdy roasting pan and a reliable thermometer, you’re well on your way to creating a dish that’s both tender and flavorful.
Troubleshooting Common Roast Challenges
Even the most experienced cooks can face challenges when preparing a perfect dish. Overcooking and dryness are two common issues that can turn a gourmet meal into a disappointing experience. With the right tips and techniques, you can avoid these pitfalls and ensure your dinner is tender and flavorful every time.
Avoiding Overcooking
Overcooking is a common mistake that can ruin the texture and flavor of your meat. To prevent this, use a reliable thermometer to monitor the internal temperature. For medium-rare, aim for 125°F to 130°F. Avoid opening the oven frequently, as this can cause temperature fluctuations and extend cooking time.
Another tip is to follow the minute per pound guideline. For example, a 3-pound roast typically takes about 1.5 hours at 250°F. Adjust the time based on the weight of your meat to ensure it cooks evenly without drying out.
Preventing a Dry Roast
Dryness often results from overcooking or improper resting. After removing your meat from the oven, let it rest for 15-30 minutes. This allows the juices to redistribute, ensuring a tender and juicy result. Tent the roast with foil to retain moisture during this step.
Brushing the meat with melted butter before cooking can also help lock in moisture. Adding garlic and fresh herbs enhances the flavor while keeping the meat succulent.
Here’s a quick guide to cooking times based on weight:
| Weight (Pounds) | Cooking Time (Minutes per Pound) |
|---|---|
| 2-3 | 20 |
| 4-5 | 25 |
By following these steps, you can overcome common challenges and create a dish that’s both tender and flavorful. For additional guidance, consider watching video tutorials that demonstrate these techniques in action.
Conclusion
Creating a gourmet meal at home is easier than you think. With the right ingredients, tools, and techniques, you can achieve a tender and flavorful result every time. From prepping to resting, each step plays a crucial role in ensuring success.
Proper seasoning, precise cooking temperatures, and quality equipment are key. Letting your meat rest ensures it stays juicy, while carving against the grain enhances tenderness. Pair your dish with complementary sides for a complete experience.
Don’t hesitate to experiment with flavors like garlic, butter, and fresh herbs. These simple additions can elevate your dinner to restaurant-quality. For extra guidance, check out helpful video tutorials.
Now that you have all the tips, it’s time to try this recipe yourself. Share your results and enjoy the satisfaction of creating a memorable meal at home!
FAQ
What’s the best way to prepare a rib eye roast for maximum flavor?
Start by seasoning generously with salt, pepper, and herbs. Sear it first to lock in juices, then roast at a low temperature for even cooking. Adding garlic and butter enhances the taste.
How long should I cook a rib eye roast per pound?
Cook for about 15 minutes per pound at 325°F. Use a meat thermometer to ensure the internal temperature reaches 135°F for medium-rare.
What side dishes pair well with a rib eye roast?
Hearty options like roasted potatoes, vegetables, or a classic gravy work perfectly. Horseradish sauce also adds a zesty touch.
How do I prevent my roast from drying out?
Avoid overcooking by monitoring the internal temperature. Let the meat rest for 15-20 minutes after roasting to retain its juices.
Can I use a bone-in rib eye roast for this recipe?
Yes, bone-in cuts add extra flavor and moisture. Just adjust the cooking time slightly to account for the bone.
What’s the best way to carve a rib eye roast?
Slice against the grain for tender pieces. Use a sharp carving knife and present it on a platter for an elegant touch.
Do I need a roasting pan and meat thermometer?
A roasting pan ensures even heat distribution, while a thermometer helps you achieve the perfect doneness. Both are essential tools.
How can I add a crispy crust to my roast?
Start with a high-temperature sear, then finish with low and slow roasting. This method creates a flavorful, crispy exterior.
What’s the ideal internal temperature for a rib eye roast?
Aim for 135°F for medium-rare. Let it rest until it reaches 145°F for the best texture and juiciness.
Can I prepare the roast ahead of time?
Yes, season it a day in advance to let the flavors penetrate. Bring it to room temperature before cooking for even results.