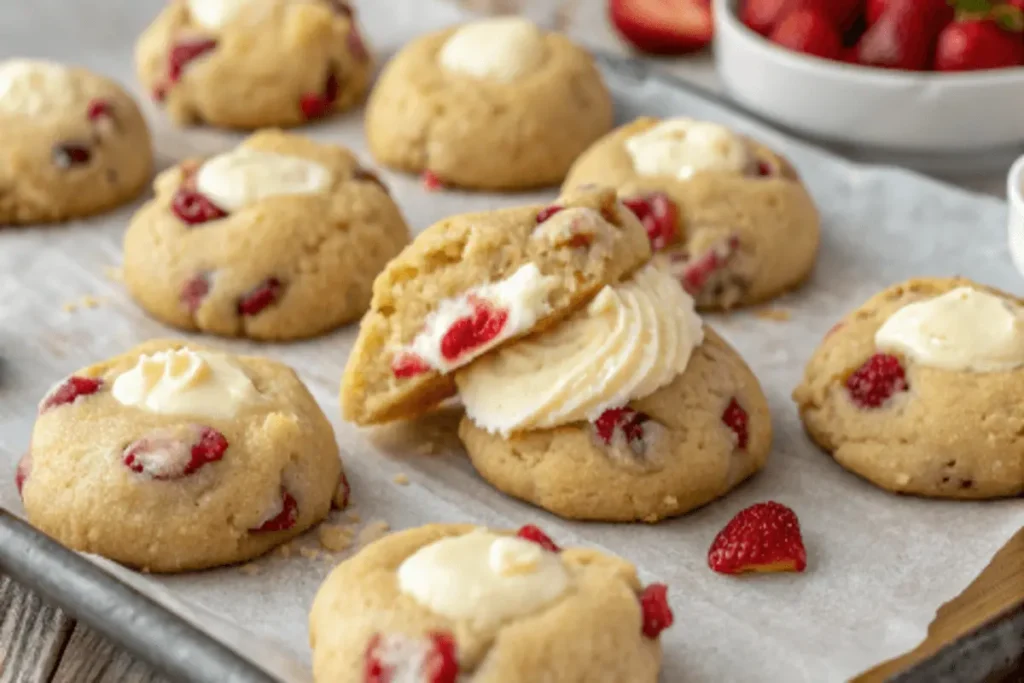
There’s something magical about combining two beloved desserts into one irresistible treat. For me, baking has always been a way to experiment and create something new. That’s how my signature strawberry cheesecake cookie recipe came to life—a perfect blend of soft, chewy sugar cookies, creamy filling, and a burst of fruity flavor.

This recipe is the result of countless hours in the kitchen, refining techniques and drawing inspiration from trusted sources. The name itself, strawberry cheesecake cookie, hints at the delightful combination of flavors you’ll experience in every bite. It’s a dessert that feels both familiar and exciting.
In this article, I’ll walk you through the ingredients, steps, and tips that make these cookies so special. Whether you’re a seasoned baker or just starting out, this recipe is designed to bring joy to your kitchen and smiles to those who taste it.
Introduction to Homemade Strawberry Cheesecake Cookies
Every baker has that one recipe that feels like a personal masterpiece—this is mine. My journey into baking started as a curious beginner, eager to learn and experiment. Over time, I’ve refined my skills, and this cookie recipe is the result of countless hours in the kitchen.

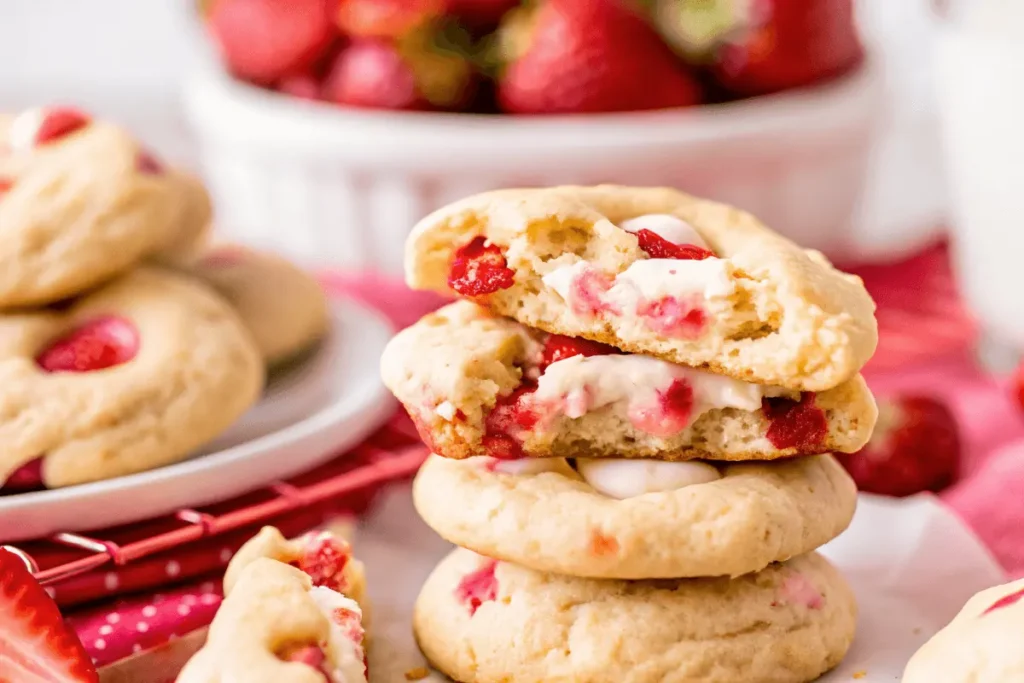
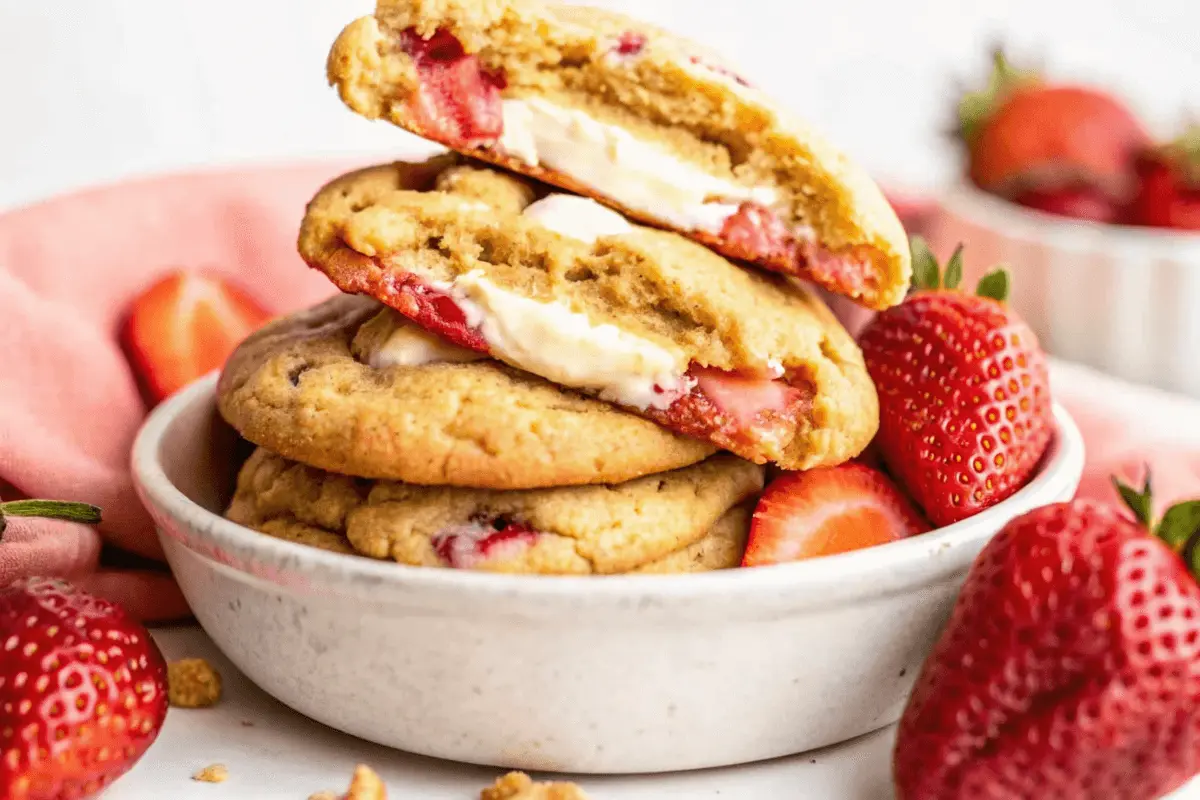
What makes these treats so special? It’s the perfect balance of flavors and textures. The dough is soft and chewy, while the creamy filling adds a delightful surprise. Each bite offers a burst of fruity goodness, making them irresistible.
A Personal Journey into Baking
When I first started baking, I was all about trial and error. I remember experimenting with different ingredients, like fresh strawberries and cream cheese, to create something unique. The process taught me the importance of patience and precision, especially when working with cookie dough.
One of my favorite memories is the first time I nailed the consistency of the dough. It was a game-changer, and it gave me the confidence to keep improving. Baking is more than just following a recipe—it’s about understanding the science behind it.
What Makes These Cookies So Special
These cookies stand out because of their hidden treasures. The creamy centers are a nod to classic cheesecake, while the jammy bursts add a fruity twist. It’s a combination that feels both familiar and exciting.
Consistency is key in this recipe. From the dough to the filling, every step is designed to ensure the perfect texture and flavor. Whether you’re a seasoned baker or just starting out, this recipe invites you to explore a blend of tradition and innovation.
Overview of the Recipe and Baking Process
Creating the perfect treat requires precision, patience, and a touch of creativity. This recipe is designed to guide you through every step, ensuring soft, chewy textures and impressive flavors. Let’s dive into the process.

The foundation of these treats lies in the sugar and baking techniques. Sugar not only sweetens but also helps achieve that light, airy texture. Baking at the right temperature ensures even cooking and prevents over-spreading.
One of the key ingredients is cream cheese. It’s carefully integrated into the filling to create a rich, creamy center. This step requires precise measurements and thorough mixing to avoid lumps and ensure smoothness.
Here’s a quick breakdown of the steps:
| Step | Details |
|---|---|
| Preheat Oven | Set to 375°F for optimal baking. |
| Mix Ingredients | Combine sugar, butter, and flour for the dough. |
| Prepare Filling | Blend cream cheese with sugar and vanilla. |
| Bake | 17-20 minutes, spacing dough balls 4 inches apart. |
| Cool | Allow to cool completely before serving. |
Chilling the dough and filling is crucial. It helps maintain shape and enhances flavor. After assembling, a final chill ensures the treats hold their form during baking.
By following these steps, you’ll create a dessert that’s both indulgent and satisfying. Whether you’re a seasoned baker or a beginner, this recipe is a delightful way to explore the art of baking.
Key Ingredients for Strawberry Cheesecake Cookies
The secret to unforgettable baked goods lies in the quality of the ingredients. For this recipe, every component plays a crucial role in creating the perfect balance of flavors and textures. Let’s explore the essentials that make these treats stand out.
Fresh Strawberries and Cream Cheese
Fresh strawberries are the star of this recipe. Their natural sweetness and vibrant color add a fruity burst to every bite. I recommend using ripe, juicy strawberries for the best results. If fresh ones aren’t available, high-quality frozen strawberries can work as a substitute.
Cream cheese is another key ingredient. It brings a rich, creamy texture to the filling, mimicking the classic cheesecake experience. Opt for full-fat cream cheese for a smoother consistency and richer flavor. Softening it to room temperature ensures it blends seamlessly with other ingredients.
The Role of Sugar, Butter, and Vanilla
Sugar isn’t just for sweetness—it also helps achieve the perfect texture. Granulated sugar gives the dough its structure, while brown sugar adds a hint of caramel flavor. I use a mix of both to create a balanced taste.
Butter is essential for richness and moisture. Unsalted butter allows you to control the saltiness, ensuring the flavors shine through. Creaming it with sugar creates a light, airy base for the dough.
Vanilla extract enhances the overall flavor profile. A teaspoon of pure vanilla adds warmth and depth, complementing the fruity and creamy elements. Always choose natural vanilla for the best results.
| Ingredient | Measurement | Substitution |
|---|---|---|
| Fresh Strawberries | 2/3 cup (chopped) | Frozen strawberries |
| Cream Cheese | 8 oz (1 cup) | Mascarpone cheese |
| Granulated Sugar | 2/3 cup | Coconut sugar |
| Unsalted Butter | 1/2 cup | Salted butter (reduce added salt) |
| Vanilla Extract | 1 teaspoon | Vanilla bean paste |
Measuring ingredients accurately is crucial. I prefer using a kitchen scale for precision, but measuring cups work well too. Fresh, high-quality ingredients ensure an authentic flavor that stands out. Whether you’re a seasoned baker or a beginner, these components will help you create something truly special.
Tools and Equipment Needed in My Kitchen
Baking success starts with the right equipment and a well-organized space. Having the proper tools not only makes the process easier but also ensures consistent results. Let’s dive into the essentials that every baker should have in their kitchen.
Must-Have Baking Tools and Measuring Tips
First, a good set of mixing bowls is a must. I prefer stainless steel or glass bowls because they’re durable and easy to clean. They’re perfect for combining ingredients without worrying about spills or messes.
An electric hand mixer is another game-changer. It saves time and effort, especially when creaming butter and sugar or whipping up fillings. If you’re serious about baking, investing in a stand mixer can take your skills to the next level.
Don’t forget parchment paper. It’s a lifesaver for preventing sticking and making cleanup a breeze. I always line my baking sheets with it to ensure my treats come out perfectly every time.
- Accurate Measurements: Use a kitchen scale for precision, especially with flour and sugar. Spoon and level flour to avoid dense results.
- Organization: Keep your kitchen tidy. A clutter-free workspace makes baking more enjoyable and efficient.
- Quality Tools: Invest in durable items like silicone spatulas and measuring cups. They last longer and perform better.
Using the right tools not only simplifies the process but also enhances the final texture and flavor of your baked goods. With these essentials, you’ll be well-equipped to tackle any recipe with confidence.
Step-by-Step Preparation Guide
Breaking down each step ensures a flawless and delicious result. This guide will walk you through preparing the filling, mixing the dough, and assembling the treats for the perfect texture and flavor.
Preparing the Cheesecake Filling and Strawberry Jam
Start by making the cheesecake filling. Beat cream cheese, powdered sugar, and vanilla until smooth. This creates a rich, creamy mixture that’s perfect for the center. Chill it in the freezer to firm up before use.
Next, prepare the jam. Simmer diced fruit with sugar until it thickens. This step adds a fruity burst to every bite. Let it cool before incorporating it into the dough.
Mixing the Cookie Dough Efficiently
For the dough, cream butter and sugar until light and fluffy. Add an egg and mix well. Gradually add flour to form a soft, pliable dough. Fold in the jam partially to create pockets of flavor.
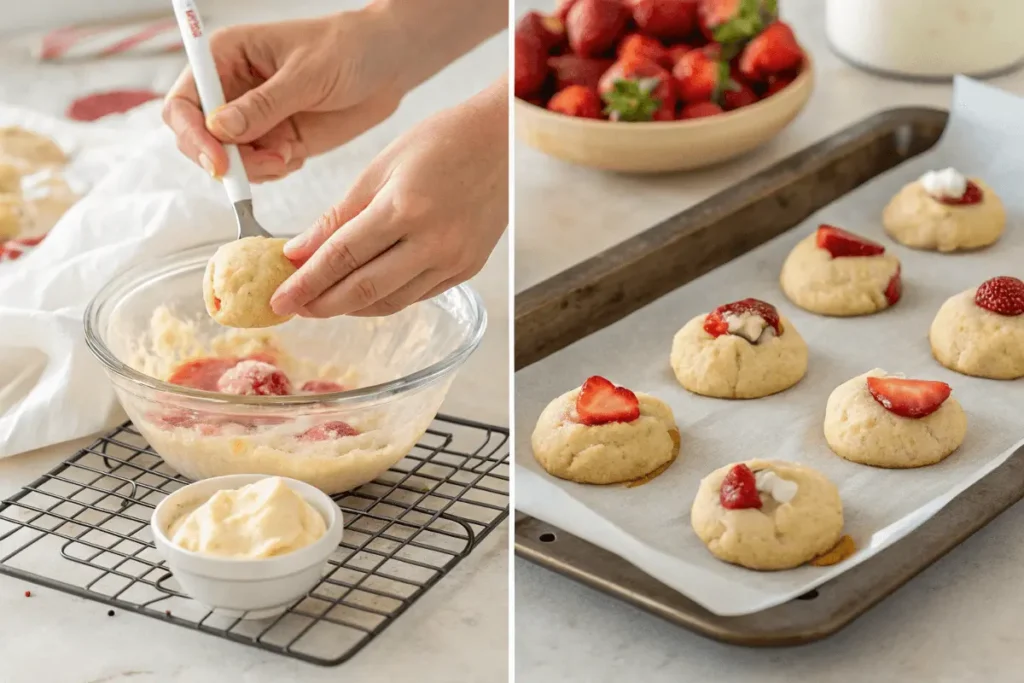
Once the dough is ready, scoop it into small portions. Flatten each ball and place a frozen filling piece in the center. Carefully enclose the filling to prevent leaks during baking.
Chill the assembled dough before baking. This step ensures the treats hold their shape and bake evenly. Follow these steps for a dessert that’s both indulgent and satisfying.
Crafting the Perfect Cookie Dough
Mastering the art of cookie dough is all about balance and technique. The right consistency ensures your baked goods hold their shape while remaining tender. Let’s dive into the steps that make this possible.
Techniques for a Soft and Chewy Texture
Start by creaming butter and sugar until light and fluffy. This step is crucial for creating a soft, airy texture. I always use room-temperature butter to ensure it blends smoothly.
When adding flour, mix just until combined. Overmixing can lead to a dense result, which is the opposite of what we want. A gentle hand ensures the dough stays tender and chewy.
Using a measured scoop is another game-changer. It ensures even portions, so every treat bakes uniformly. I recommend a 3-tablespoon scoop for the perfect size.
Shaping the dough can be tricky, but lightly flouring your fingers prevents sticking. This small tip makes the process smoother and less messy.
Finally, chilling the dough before baking is essential. It helps maintain shape and enhances flavor. Follow these steps, and you’ll achieve a texture that’s soft, chewy, and utterly satisfying.
Assembling the Cookies with a Creamy Center
The assembly process is where the magic truly happens, turning simple ingredients into a delightful treat. This step ensures every bite is filled with a creamy surprise, making it the highlight of the recipe. Let’s dive into the details to achieve the perfect result.
Incorporating the Frozen Cheesecake Discs
Start by flattening each dough ball to create a small well in the center. This space is where the frozen filling will go. Gently press the disc into the dough, ensuring it’s fully enclosed. If the dough feels too firm, let it sit at room temperature for a few minutes to soften slightly.
Carefully fold the edges of the dough over the filling, sealing it completely. Double-check that no filling is exposed to prevent leaks in the oven. This step requires patience but ensures a clean, professional finish.
Once assembled, place the dough balls on a baking sheet, spacing them about 4 inches apart. This allows enough room for them to spread evenly while baking. Chill the assembled dough for 30 minutes before placing it in the oven. This final chill helps the treats hold their shape and bake perfectly.
By following these steps, you’ll create a dessert that’s as beautiful as it is delicious. The creamy center will stay intact, offering a delightful contrast to the soft, chewy exterior. It’s a process that rewards precision and care, resulting in a treat that’s sure to impress.
Baking Tips and Tricks for Best Results
Perfecting baked goods requires attention to detail and a few insider tips. Whether you’re a beginner or a seasoned baker, these strategies will help you achieve consistent, delicious results every time.
Temperature, Timing, and Shaping Techniques
Start by preheating your oven to the right temperature. For this recipe, 375°F works best. This ensures even baking and prevents spreading. Always monitor the bake time closely—17 to 20 minutes is ideal for a golden-brown finish.
Shaping the dough is equally important. Use a measured scoop to create uniform portions. Flatten each ball slightly to ensure even baking. Chilling the dough for at least one hour before baking helps maintain its shape and enhances flavor.
Ensuring Even Baking and Consistent Results
Every oven behaves differently, so small adjustments may be needed. If your treats brown too quickly, reduce the temperature by 10°F. Check them periodically to avoid overcooking. A few extra minutes or hours of chill time can make a big difference in achieving the perfect texture.
Space the dough balls about 4 inches apart on the baking sheet. This allows enough room for them to spread evenly. By following these tips, you’ll create treats that are both beautiful and delicious, every day.
Caring for and Storing Your Cookies
Keeping your baked goods fresh and flavorful is just as important as the baking process itself. Proper storage ensures that every bite remains as delightful as the first. Here’s how to maintain their soft texture and creamy center for days—or even months.
Optimal Storage Methods and Freezing Tips
To keep your treats fresh, store them in airtight containers. This prevents moisture loss and keeps them soft. I recommend placing a piece of parchment paper between layers to avoid sticking.
For longer storage, freezing is a great option. You can freeze baked goods for up to three months. Wrap them individually in plastic wrap and place them in a freezer-safe bag. This method locks in flavor and texture.
If you prefer to freeze the dough, shape it into balls and freeze them on a baking sheet. Once solid, transfer them to a freezer bag. They can be stored for up to one month. When ready to bake, simply place them on a tray and bake as usual—no need to thaw.
Using ingredients like granulated sugar and baking powder ensures consistent results even after storage. These components help maintain the dough’s structure and texture, whether baked fresh or frozen.
When defrosting, let the treats sit at room temperature for about 30 minutes. This preserves the creamy center and ensures they taste just as good as the day they were baked. Proper storage methods are key to enjoying your creations for days—or even weeks—to come.
Creative Variations and Personal Twists
Exploring new flavors and ingredients can transform a classic recipe into something extraordinary. Over the years, I’ve experimented with countless variations to make this treat uniquely mine. Whether it’s adding a hint of almond extract or swapping out traditional components, small changes can lead to big surprises.
Adding Unique Flavors and Adjusting Ingredients
One of my favorite twists is enhancing the flavor profile with complementary extracts. A dash of vanilla or almond can add depth and warmth to the dough. For a fruity twist, try incorporating a splash of lemon or orange zest. These small adjustments can elevate the taste without overwhelming the original recipe.
Adjusting ingredient amounts is another way to personalize your bake. If you prefer a sweeter treat, increase the sugar slightly. For a richer texture, add an extra tablespoon of butter. These tweaks allow you to tailor the recipe to your preferences while maintaining its integrity.
Adapting the Recipe for Dietary Needs
Adapting this recipe for dietary needs is easier than you might think. For a gluten-free version, substitute the flour with a gluten-free blend. To make it dairy-free, use plant-based butter and cream cheese alternatives. These swaps ensure everyone can enjoy the treat, regardless of dietary restrictions.
Using parchment paper is a simple yet effective way to ensure consistent results. It prevents sticking and makes cleanup a breeze. Whether you’re baking for a crowd or just for yourself, these adaptations make the process smoother and more enjoyable.
I encourage you to experiment with different ingredients and flavors. The possibilities are endless, and each variation brings its own unique charm. By making small changes, you can create a dessert that’s truly your own.
Conclusion
Baking is a journey of discovery, and this recipe is a testament to that. From measuring the perfect amount of flour to incorporating fresh strawberry for a burst of flavor, every step matters. Taking the time to chill the dough and bake at the right temperature ensures a dessert that’s both soft and satisfying.
There’s always a unique way to make this recipe your own. Whether it’s adjusting the sweetness or experimenting with different fillings, I encourage you to get creative. Share your results and let me know how it turns out!
Thank you for joining me on this flavorful baking adventure. Remember, passion and precision are the keys to every great treat. Happy baking!
FAQ
Can I use frozen strawberries instead of fresh ones?
Yes, you can! Just make sure to thaw and drain them well to avoid excess moisture in the dough.
How do I ensure my cookies stay soft and chewy?
Avoid overbaking them. Pull them out of the oven when the edges are golden but the center is still slightly soft.
Can I make the dough ahead of time?
Absolutely! You can refrigerate the dough for up to 24 hours before baking. Just let it come to room temperature before shaping.
What’s the best way to store these cookies?
Keep them in an airtight container at room temperature for up to 3 days. For longer storage, freeze them in a sealed bag.
Can I substitute the cream cheese filling?
While cream cheese gives the best flavor, you can try mascarpone or a dairy-free alternative for a twist.
How do I prevent the filling from leaking out during baking?
Make sure the filling is chilled and the dough is wrapped tightly around it. This helps it hold its shape.
Can I add other fruits to this recipe?
Definitely! Blueberries, raspberries, or even a mix of fruits can work beautifully for a different flavor profile.
What’s the secret to getting the perfect cookie shape?
Use a cookie scoop for even portions and gently roll the dough into smooth balls before baking.
Can I make these cookies gluten-free?
Yes, just swap the all-purpose flour for a gluten-free blend. The texture will still be delicious!
How do I know when the cookies are done baking?
They’re ready when the edges are lightly golden and the center is set but still slightly soft to the touch.

