
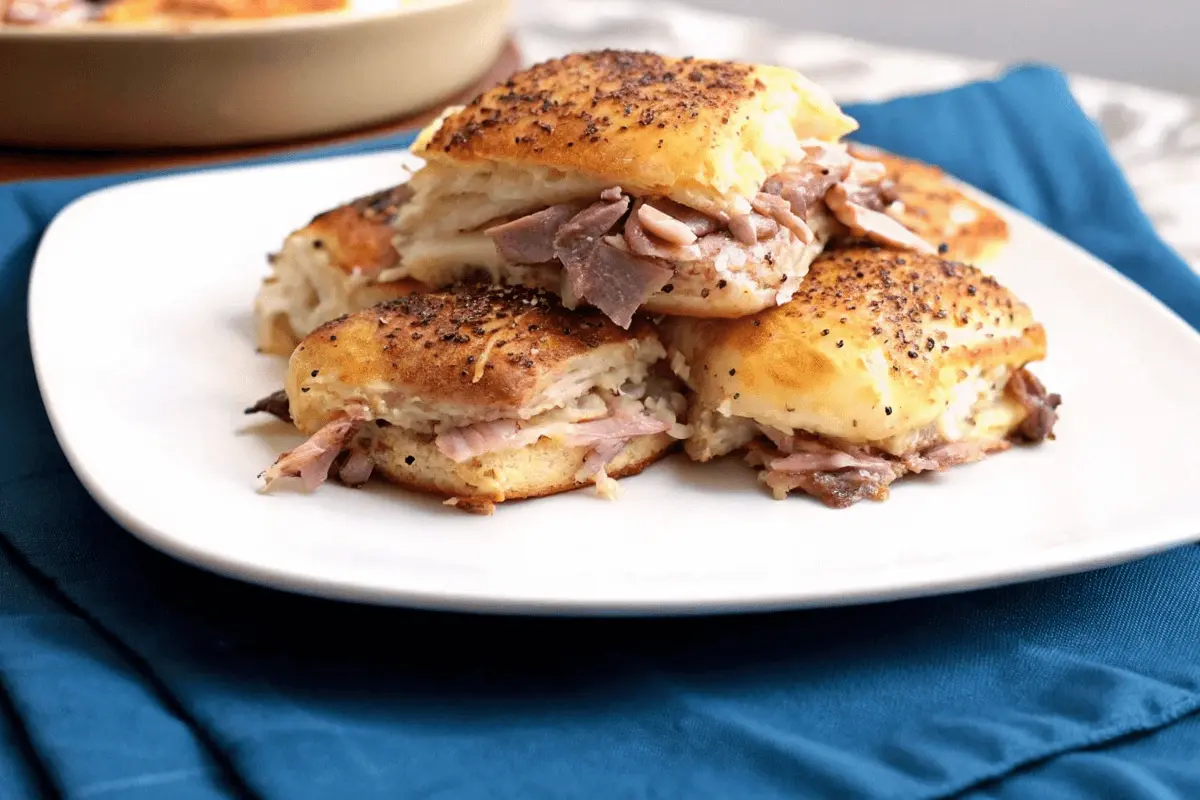
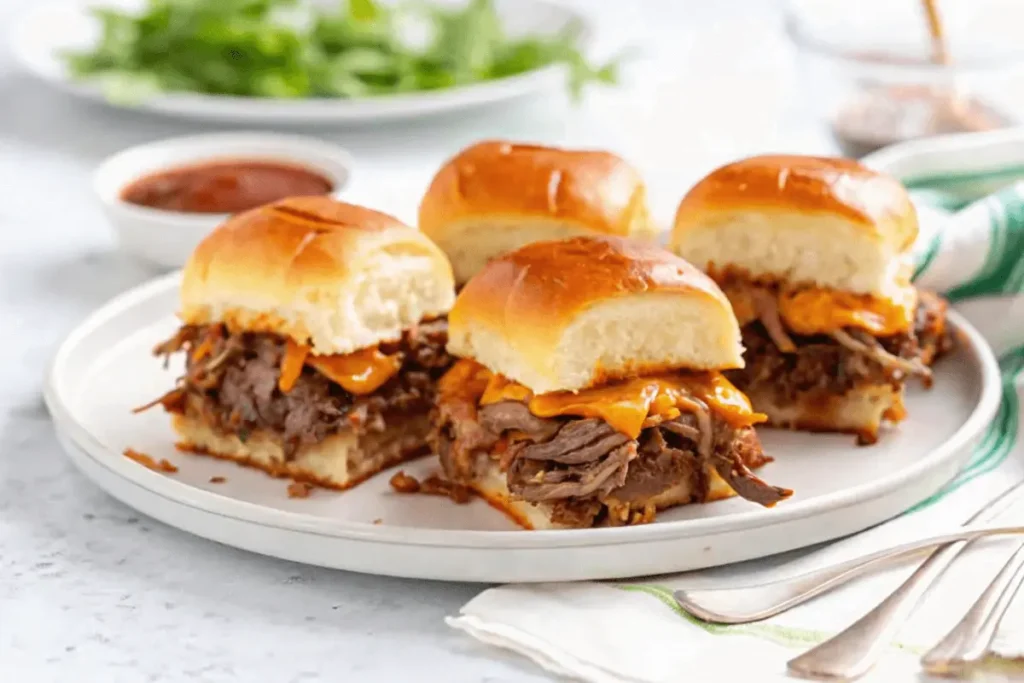
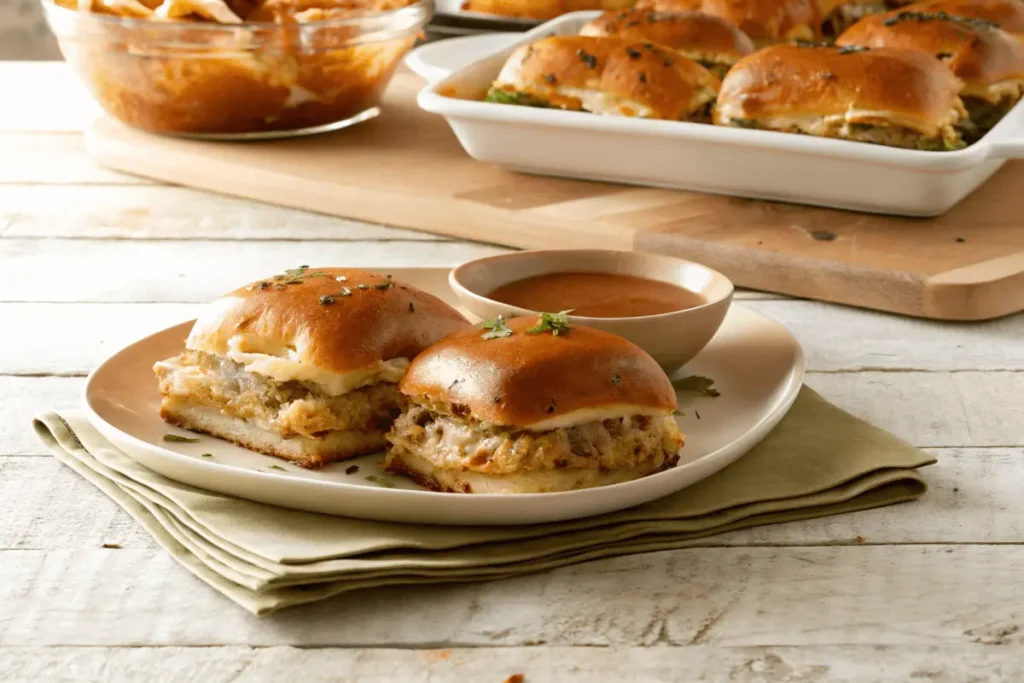
There’s something magical about bite-sized treats that bring people together. Whether it’s a family gathering, a game day party, or just a cozy night in, Homemade roast beef sliders always steal the show. Imagine tender slices of savory meat, melted cheese, and buttery rolls coming together in perfect harmony. It’s a flavor combination that’s hard to resist.
This recipe is not just about taste—it’s about creating memories. The simplicity of assembling these sliders makes them a go-to option for any occasion. With just a few minutes of prep, you can have a crowd-pleasing dish ready to serve. The rich history behind this dish adds a nostalgic touch, making it a favorite for generations.
In this guide, you’ll discover how to craft these delicious sliders step by step. From selecting the freshest ingredients to mastering the final assembly, every detail is covered. Get ready to impress your guests with a dish that’s as easy to make as it is to enjoy.
Introduction to Homemade roast beef sliders
Small, flavorful sandwiches are a timeless crowd-pleaser. Whether it’s a family dinner or a casual get-together, these mini bites always hit the spot. Their history dates back to the early 20th century, when they became a staple at diners and parties. Today, they’ve evolved into a versatile dish that’s perfect for any occasion.
Slider History and Inspiration
The concept of sliders originated in the 1920s, when small sandwiches were served as quick, affordable meals. Over time, they became a favorite at gatherings, thanks to their easy-to-eat size and endless flavor possibilities. My own love for sliders began at a potluck, where I discovered the magic of sweet Hawaiian rolls layered with tender meat and a zesty butter-mustard sauce. That experience inspired this recipe, which combines nostalgia with modern convenience.
Why You’ll Love This Recipe
This recipe stands out for its simplicity and balance of flavors. Here’s why it’s a must-try:
- Easy Assembly: Using pre-made rolls saves time without sacrificing taste.
- Flavorful Toppings: The butter-mustard sauce adds a tangy kick that complements the savory meat.
- Crowd-Pleasing: These sliders are perfect for sharing and always disappear fast.
With just a few minutes of prep, you can create a dish that’s both delicious and memorable. Whether you’re hosting a party or enjoying a cozy night in, these sliders are sure to impress.
Key Ingredients and Tools: Homemade roast beef sliders
The secret to perfect sliders lies in the quality of your ingredients and tools. Every component plays a crucial role in creating a dish that’s both flavorful and satisfying. From the meat to the rolls, each element must be carefully chosen to ensure the best results.
Ingredient Spotlight:Homemade roast beef sliders
Start with thinly sliced meat, which ensures tenderness and even distribution in every bite. Pair it with sharp provolone cheese for a rich, melty layer that complements the savory flavors. Don’t forget the sweet Hawaiian rolls, which add a soft, buttery base that ties everything together.
For a tangy kick, include Dijon mustard and a touch of horseradish. These ingredients add depth and balance to the dish. A sprinkle of onion powder and garlic flakes enhances the overall flavor profile, making each slider unforgettable.
Essential Kitchen Equipment
Having the right tools is just as important as the ingredients. A 9-by-13-inch baking dish is ideal for arranging the rolls and ensuring even baking. Use a sharp serrated knife to slice the rolls without crushing them, preserving their texture.
Preheat your oven to 325°F (163°C) to achieve the perfect melt and crisp. A reliable oven and a sturdy baking pan are key to bringing this dish to life. With these tools, you’ll be ready to create sliders that are as easy to make as they are to enjoy.
Mastering the Roast Beef Sliders Recipe
Creating the perfect sliders is all about precision and timing. Follow these steps to ensure your dish turns out flavorful and well-balanced. From preheating the oven to layering ingredients, every detail matters.
Step-by-Step Baking Process: Homemade roast beef sliders
Start by preheating your oven to 350°F (175°C). This ensures even baking and helps the cheese melt perfectly. Prepare a 9-by-13-inch baking dish by lightly greasing it to prevent sticking.
Carefully slice your rolls in half using a serrated knife. Spread a layer of horseradish mayo on the bottom half for a tangy kick. Layer thinly sliced meat and sharp provolone cheese evenly across the rolls.
For the butter-mustard mixture, combine melted butter, Dijon mustard, and a pinch of garlic powder. Brush this mixture generously over the top of the rolls. This step adds a rich, savory flavor to your dish.
Timing and Temperature Tips
Cover the dish loosely with foil and bake for 10 minutes. This helps the cheese melt without over-browning the rolls. Remove the foil and bake for another 10 minutes, or until the tops are golden and crisp.
Let the sliders cool for 5 minutes before serving. This allows the flavors to settle and makes them easier to handle. Serve warm for the best taste and texture.
By following these steps, you’ll create sliders that are perfectly baked and bursting with flavor. Whether for a party or a quick meal, this recipe is sure to impress.
Creative Toppings and Side Ideas
Elevate your slider game with creative toppings and sides that add a personal touch. Whether you’re hosting a party or enjoying a casual meal, these ideas will take your dish to the next level. From custom sauces to perfectly paired sides, there’s no limit to how you can make this meal your own.
Custom Sauce Variations
Experiment with your sauce to create unique flavor profiles. Start with a base of Dijon mustard and horseradish for a tangy kick. Add a teaspoon of brown sugar for a hint of sweetness or mix in extra horseradish for a bolder taste. You can also try swapping Dijon for whole-grain mustard for a rustic twist.
For a creamy option, blend mayo with garlic powder and a tablespoon of pickle relish. This combination adds richness and a subtle crunch. Don’t be afraid to adjust the ingredients to suit your preferences. The beauty of custom sauces is their versatility.
Suggested Side Dishes
Pair your sliders with sides that complement their flavors. A crisp garden salad with a light vinaigrette adds freshness to your meal. Roasted potatoes seasoned with rosemary and garlic make a hearty addition. For a tangy contrast, serve coleslaw or bread and butter pickles on the side.
If you’re looking for something quick, try a simple fruit salad or a bowl of seasoned fries. These options are easy to prepare and balance the savory flavors of your dish. The right side can turn a simple meal into a memorable feast.
| Topping Ideas | Sauce Variations | Side Dishes |
|---|---|---|
| Sweet onions | Horseradish mayo | Roasted potatoes |
| Crunchy pickles | Garlic butter sauce | Garden salad |
| Caramelized peppers | Brown sugar mustard | Coleslaw |
Don’t hesitate to mix and match these ideas to create a meal that reflects your taste. Share your favorite combinations with friends and family to inspire their culinary adventures. With a little creativity, every bite can be a new experience.
Tips for Perfecting Your Slider Assembly
Perfecting your slider assembly is easier than you think with these practical tips. Whether you’re a beginner or a seasoned cook, these hacks will help you create sliders that are both delicious and visually appealing. Let’s dive into the details to ensure your next batch is a success.
Avoiding Common Pitfalls
One of the most common mistakes is overloading your rolls. Too many ingredients can make the layers slide apart, creating a messy bite. Instead, aim for balance. Use about 1 pound of thinly sliced meat and 12 slices of cheese for a 12-count package of rolls.
Another pitfall is uneven baking. To avoid this, preheat your oven to 350°F and cover the dish with foil for the first 10 minutes. This ensures the cheese melts evenly without over-browning the rolls. Remove the foil for the last 10 minutes to achieve a golden, crisp top.
Quick Assembly Hacks
For efficient assembly, slice your rolls in a connected “slab” using a long serrated knife. This keeps the rolls intact and makes layering easier. Spread a thin layer of sauce on the bottom half, followed by meat and cheese. Brush the top with a butter sauce made with melted butter, garlic powder, and a teaspoon of mustard for added flavor.
If you’re preparing a large batch, assemble the sliders in a 9-by-13-inch baking dish. This keeps them organized and ensures even baking. For leftovers, wrap them tightly in foil and store in the fridge for up to 3 days. Reheat at 350°F for about 10 minutes, covered with foil, to retain moisture.
| Common Pitfalls | Quick Fixes |
|---|---|
| Overloading rolls | Use balanced layers |
| Uneven baking | Preheat oven, use foil |
| Messy assembly | Slice rolls in a slab |
Conclusion
These flavorful mini sandwiches are a perfect blend of simplicity and taste. With just a few ingredients like melty cheese and tangy sauce, you can create a dish that’s both easy and impressive. The oven does most of the work, leaving you with golden, buttery rolls that are hard to resist.
Don’t forget to experiment with toppings and dips to make it your own. Whether it’s a party or a quick dinner, this dish is sure to please. Store any leftovers in the fridge and reheat for a tasty meal later.
We’d love to hear how you’ve customized this recipe. Share your tweaks and enjoy the journey of creating something delicious!
FAQ
Can I use leftover meat for this dish?
Yes, leftover meat works perfectly. Just slice it thinly and layer it on the rolls for a quick and delicious meal.
What type of cheese pairs best with these sandwiches?
Provolone, cheddar, or Swiss cheese are excellent choices. They melt well and complement the flavors of the dish.
How do I store these if I have leftovers?
Store them in an airtight container in the fridge for up to 2 days. Reheat in the oven for the best texture.
Can I make these ahead of time?
Absolutely! Assemble them, cover with foil, and refrigerate. Bake them when you’re ready to serve.
What sides go well with this dish?
Pair them with a fresh salad, coleslaw, or crispy fries for a complete meal.
Can I use a different type of mustard?
Yes, you can substitute Dijon mustard with whole grain or honey mustard for a unique flavor twist.
How do I prevent the rolls from getting soggy?
Lightly toast the rolls before assembling and avoid overloading them with sauce.
Can I add other toppings to customize the dish?
Definitely! Try adding caramelized onions, pickles, or a dash of garlic powder for extra flavor.